

Outbound File Transfer Activity in SFMC
Learn how Outbound File Transfer Activity in SFMC securely exports large data via SFTP for automation, compliance, and scalable reporting workflows.
By Sharan Kumar Mariappan
Assistant Software Developer
Outbound File Transfer Activity In Salesforce
In the Salesforce marketing cloud, transferring the data is the most crucial part. On a day-to-day basis, the marketer analyzes the data or includes the data into the system for further engagement. Engagement of the customer is closely monitored by the marketer to nurture businesses. The file transfer activity helps analyze the data or including the data into the system. There are two types of file transfer activity. They are inbound and outbound. In this blog we will deeply discuss how to create an outbound file transfer activity in Salesforce marketing cloud.
How the Outbound File Transfer Activity Works?
1. Initially, we will exporting data from data extension in SFMC
2. The data extract activity exports data from Data extension and uploads the file to SFMC Safehouse in .CSV format.
3. Then extract the file transfer activity encrypts file (Optional) from SFMC Safehouse in the safehouse (encryption of the file is entirely optional, If you are dealing with more secured data encrypt the file) and the file has been moved to enhanced FTP.

4. We need to generate a report of subscribers who have opened our emails in the last six months (i.e., all engaged subscribers). The report should include Subscriber Keys, Job IDs, and Event Dates.
5. Since the data size exceeds 20 MB, it cannot be downloaded directly from a Data Extension. Additionally, due to privacy and data security policies, the data must not be downloaded or stored on a local desktop. However, management still requires access to the last six months of engagement data.
6. To address this, we can extract the required data from the Data Extension and securely deliver it to the client using an Outbound File Transfer Activity via SFTP. This approach ensures secure data handling while complying with privacy and data breach prevention guidelines.
How to create an Outbound File Transfer Activity?
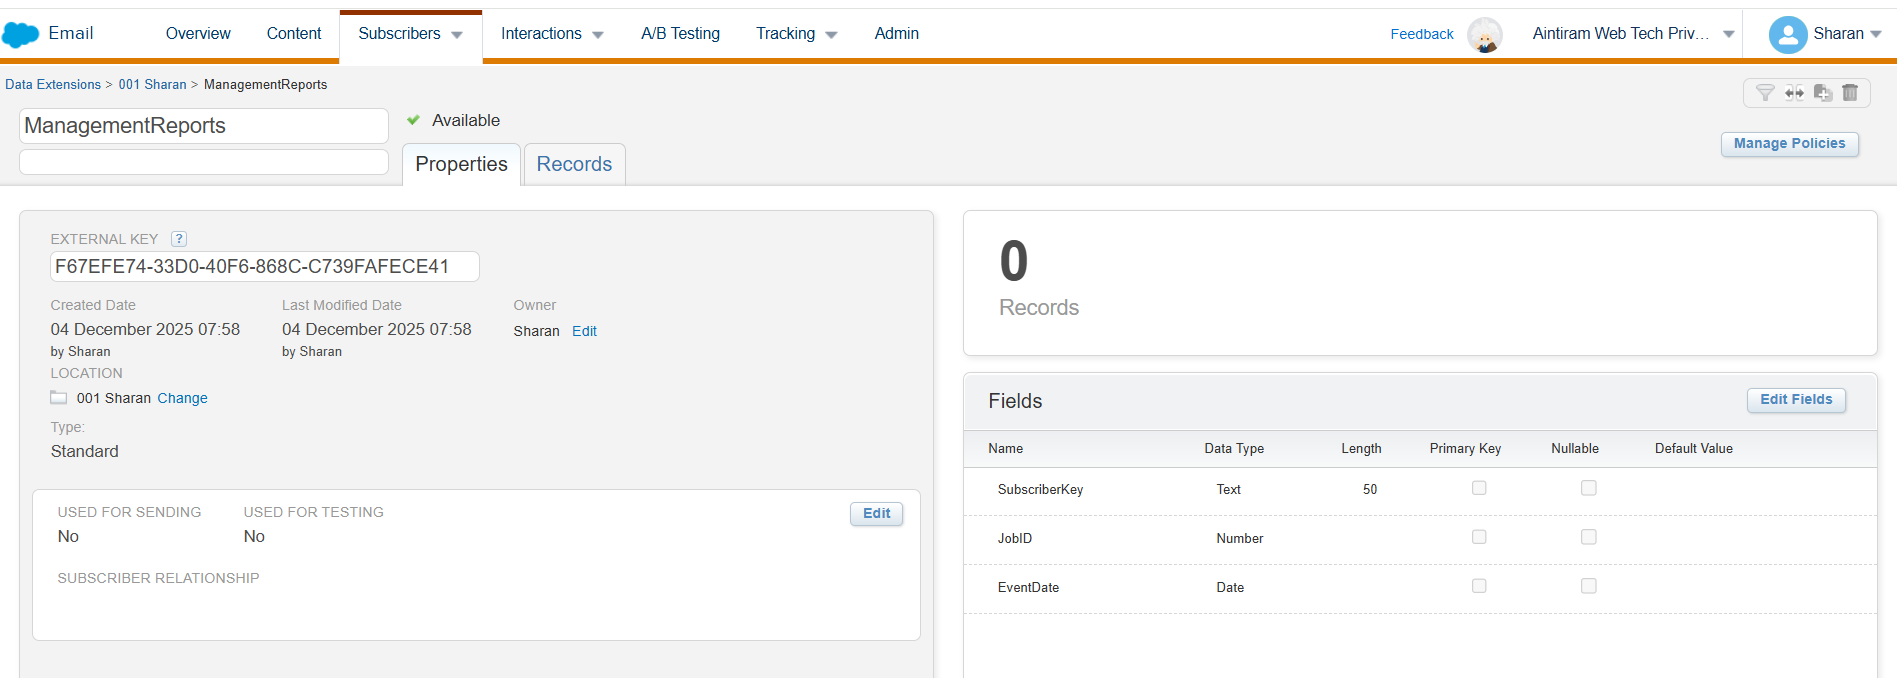
Step 1: Create a data extension
1. Your org should have the data extension should be created inside it. If you don't have it created inside the marketing cloud, Just create it following in the steps mentioned in this blog: Create A Data Extension in Marketing Cloud
Step 2: SQL Query Activity
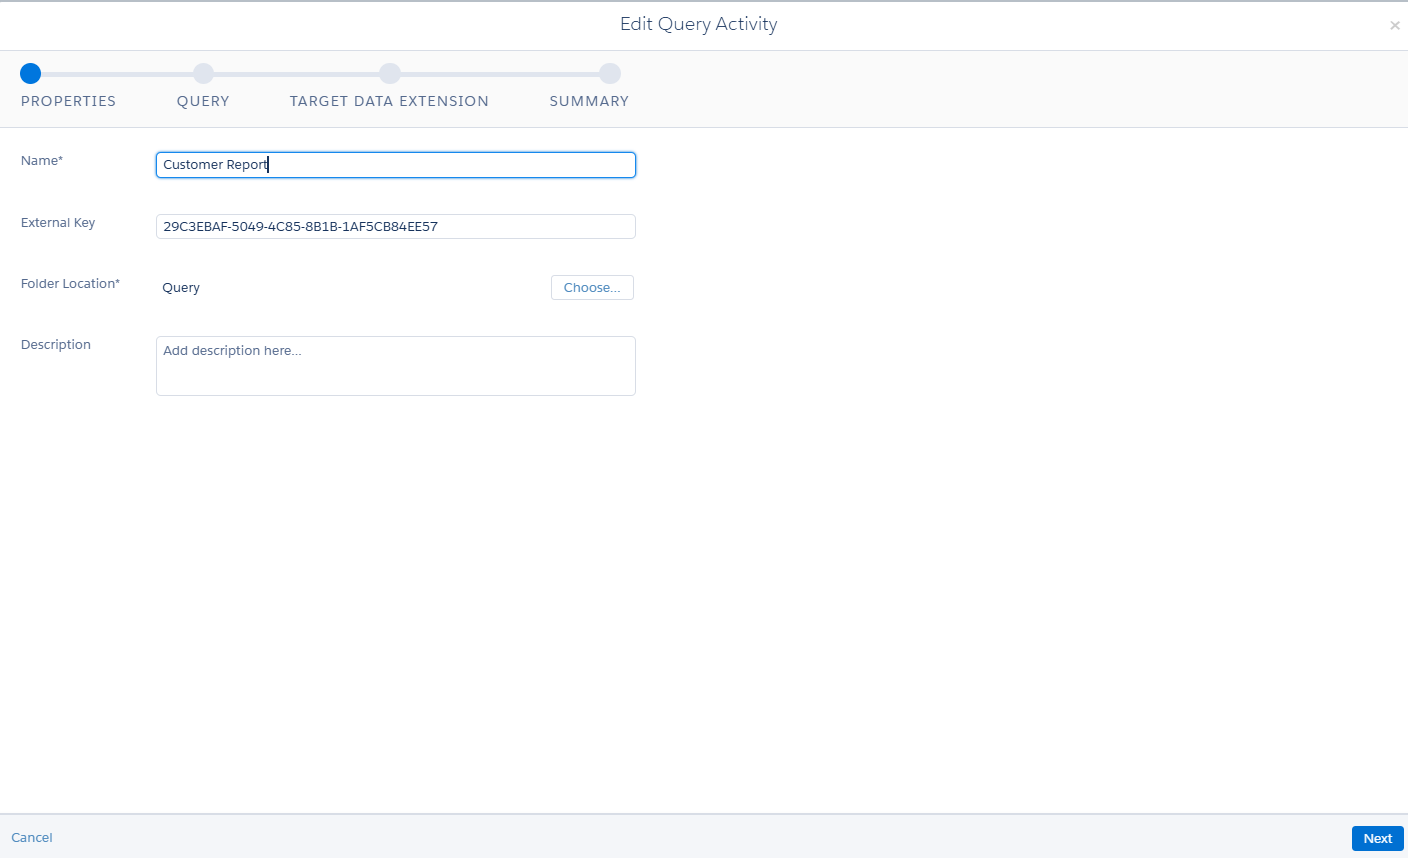
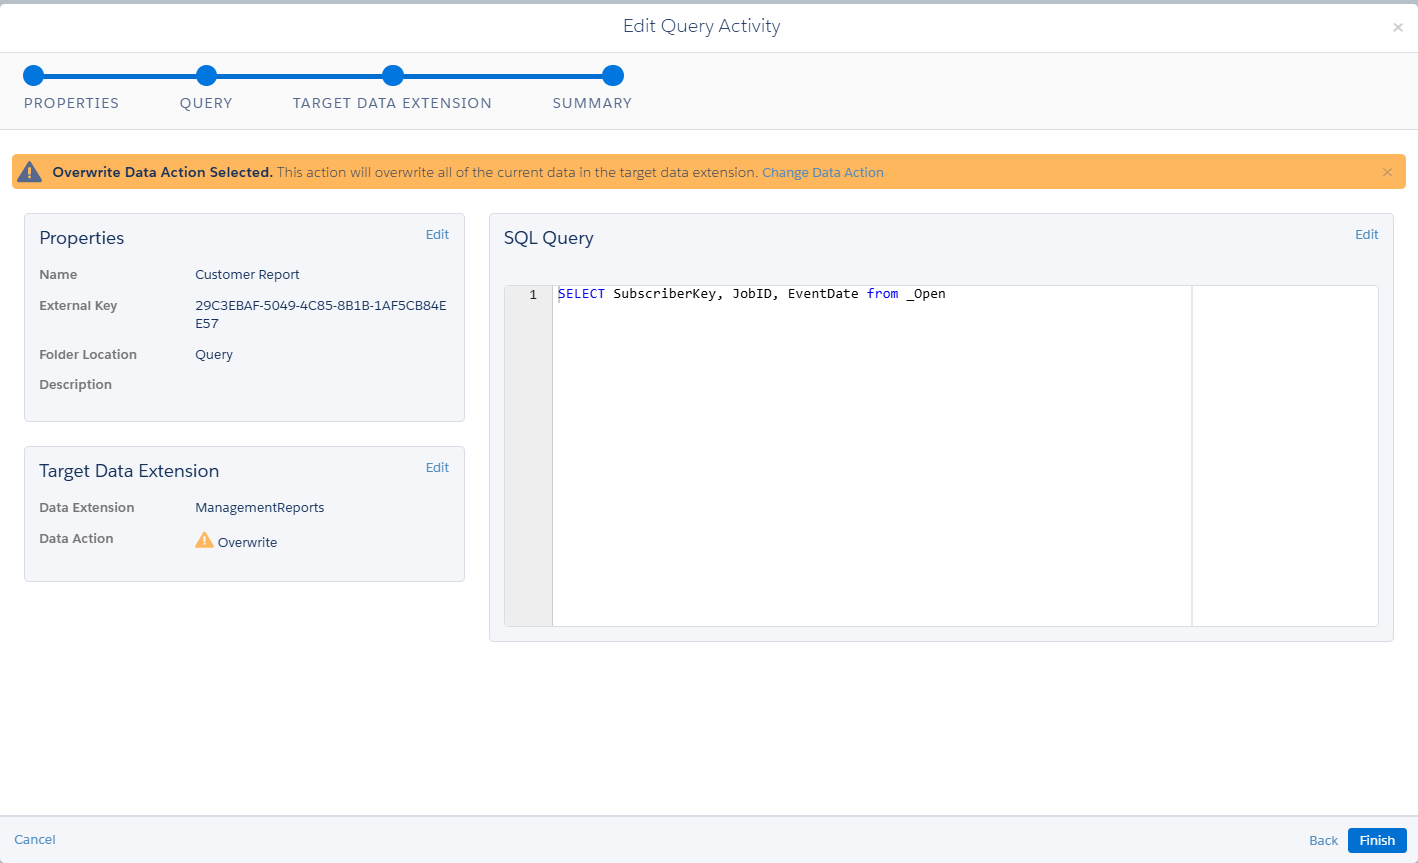
1. Create a SQL query activity to copy the data extension
2. Give the name to the SQL query activity.
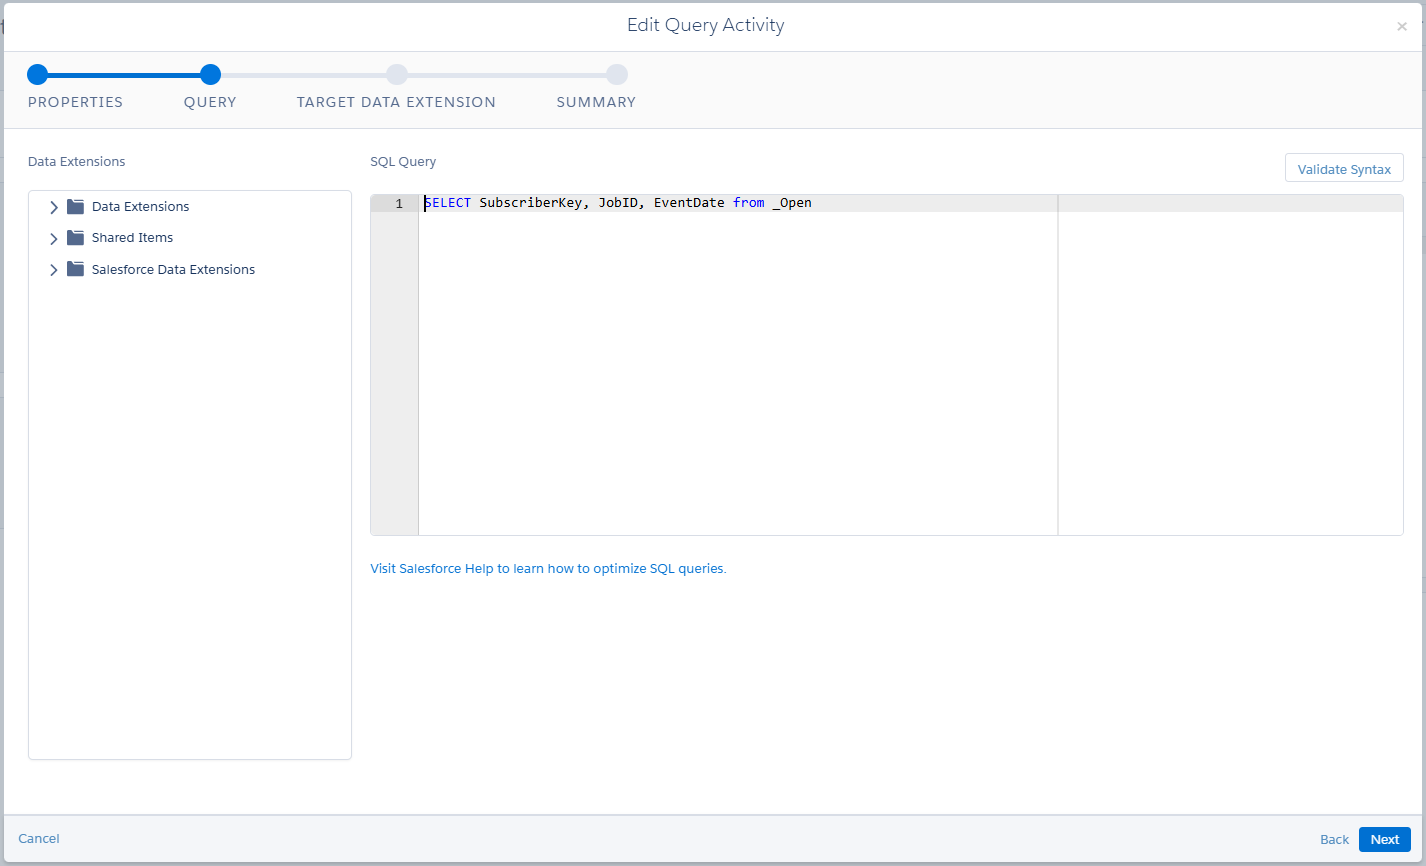
3. Add the query to select the subscriber key, Job ID and Event data from the _Open data view as shown below.
(Note: What is Data view? SFMC Data Views are hidden, system-generated tables in Salesforce Marketing Cloud that store valuable subscriber and campaign tracking data (sends, opens, clicks, bounces) from the past six months, accessible primarily through SQL queries in Automation Studio to build advanced segments, reports, and gain deep engagement insights, serving as a powerful backend for performance analysis and personalization.)
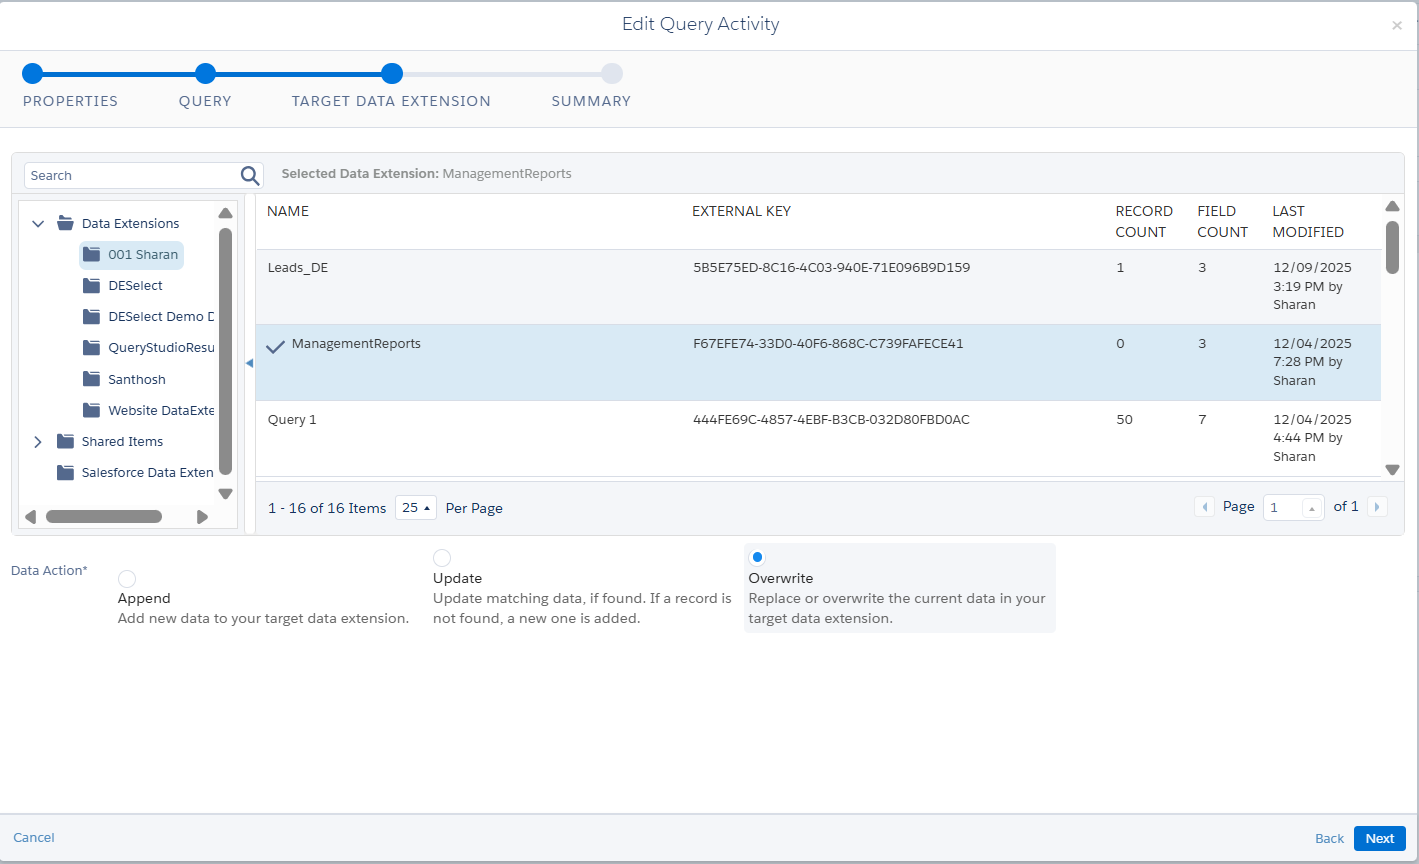
4. Choose the target data extension and choose the name of the data extension. Here, I have chosen the created data extension. Selected the overwrite radio button as shown below.
5. Review the summary and click on save.
Step 3: Data Extract Activity
- Navigate to activities and click on data extract activity as shown below.
- Give the name and File naming pattern as shown below. If you need any description, you can add it in the description section.
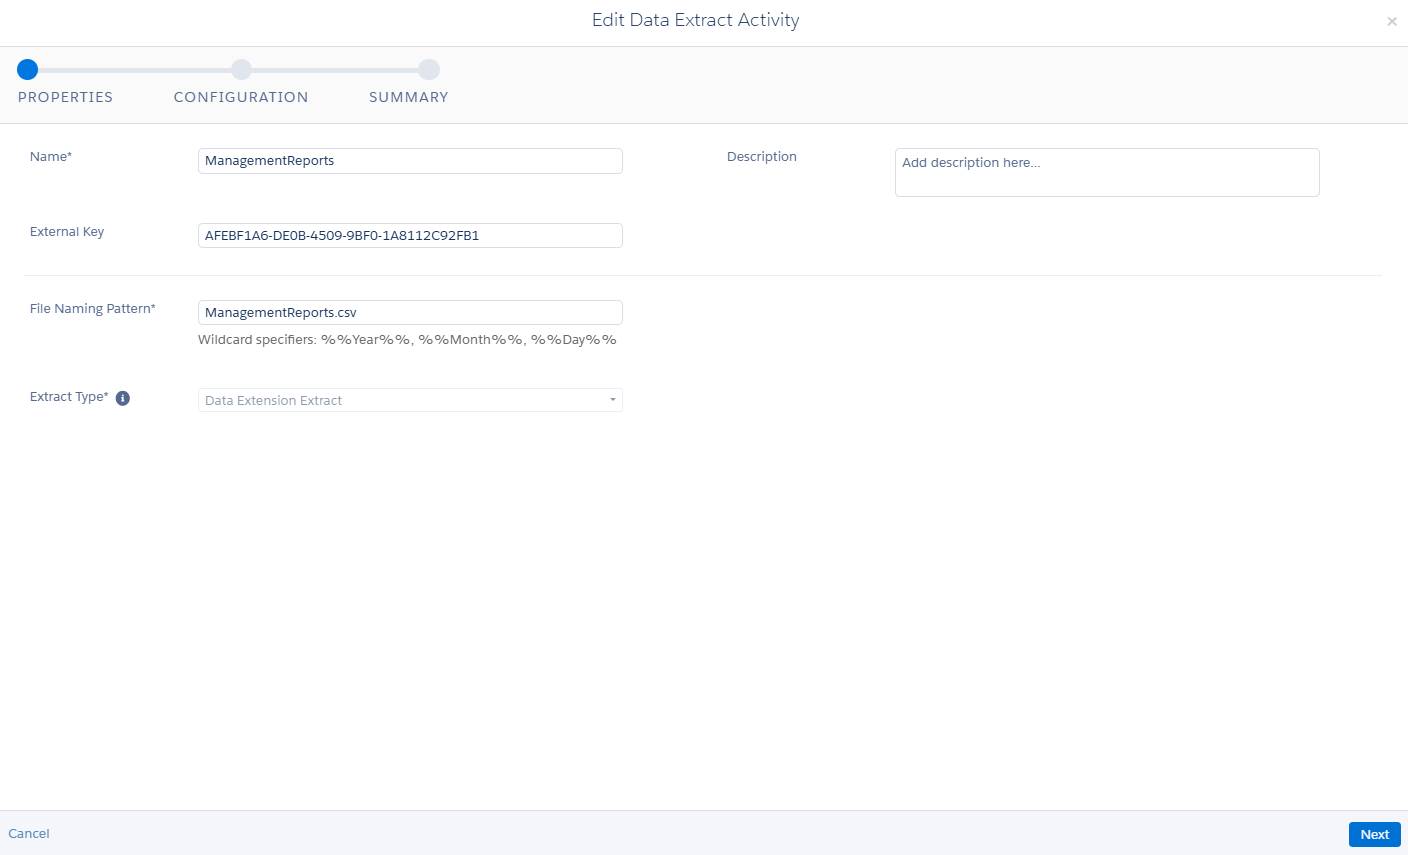
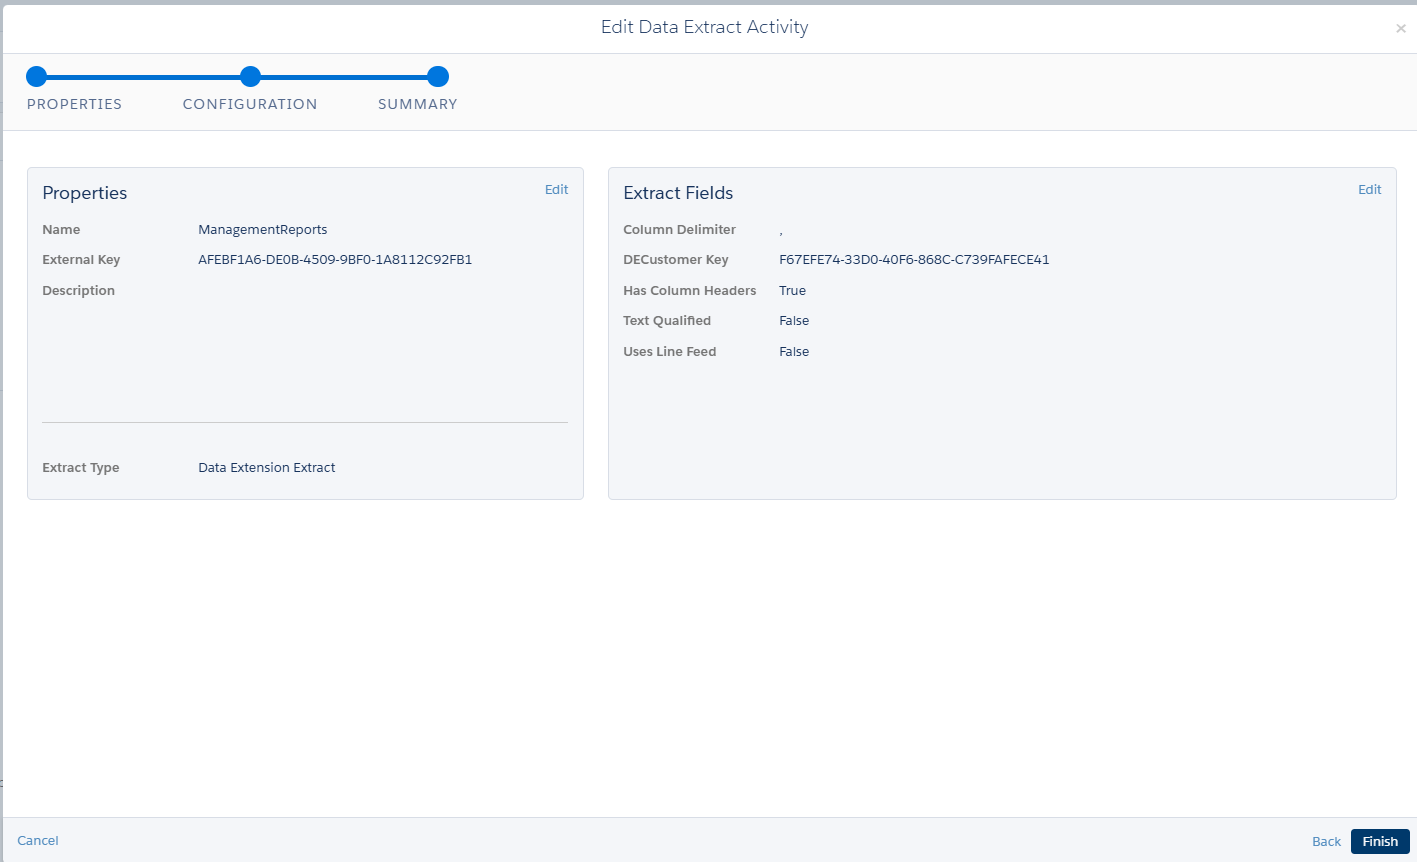
3. Next go to the configuration section add the data extension customer key here ( that is the key from the created data extension). Select the has column header checkbox.

4. Review the summary and click on finish.
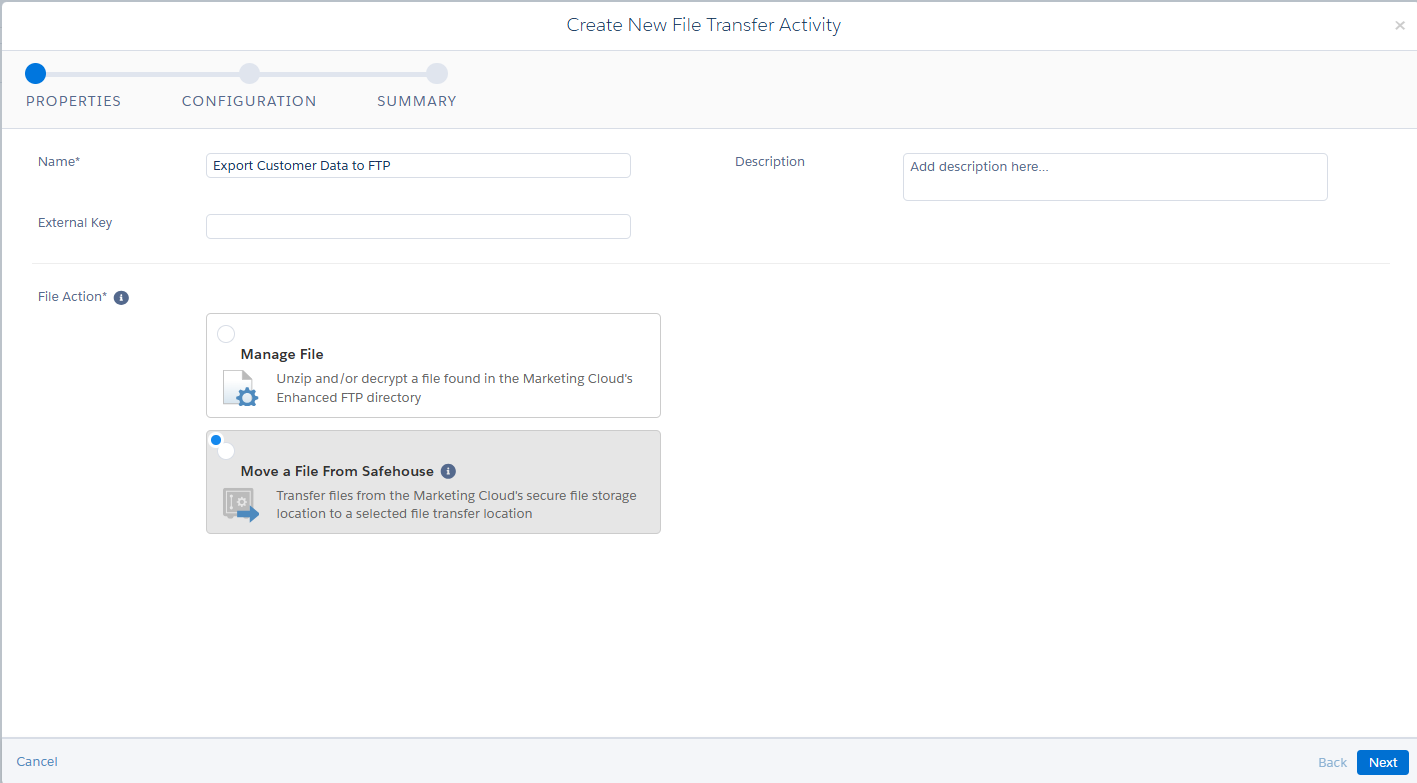
Step 4: File Transfer Activity Configuration
1. Navigate to Activities in the Automation Studio.
2. Click on the File transfer Activity
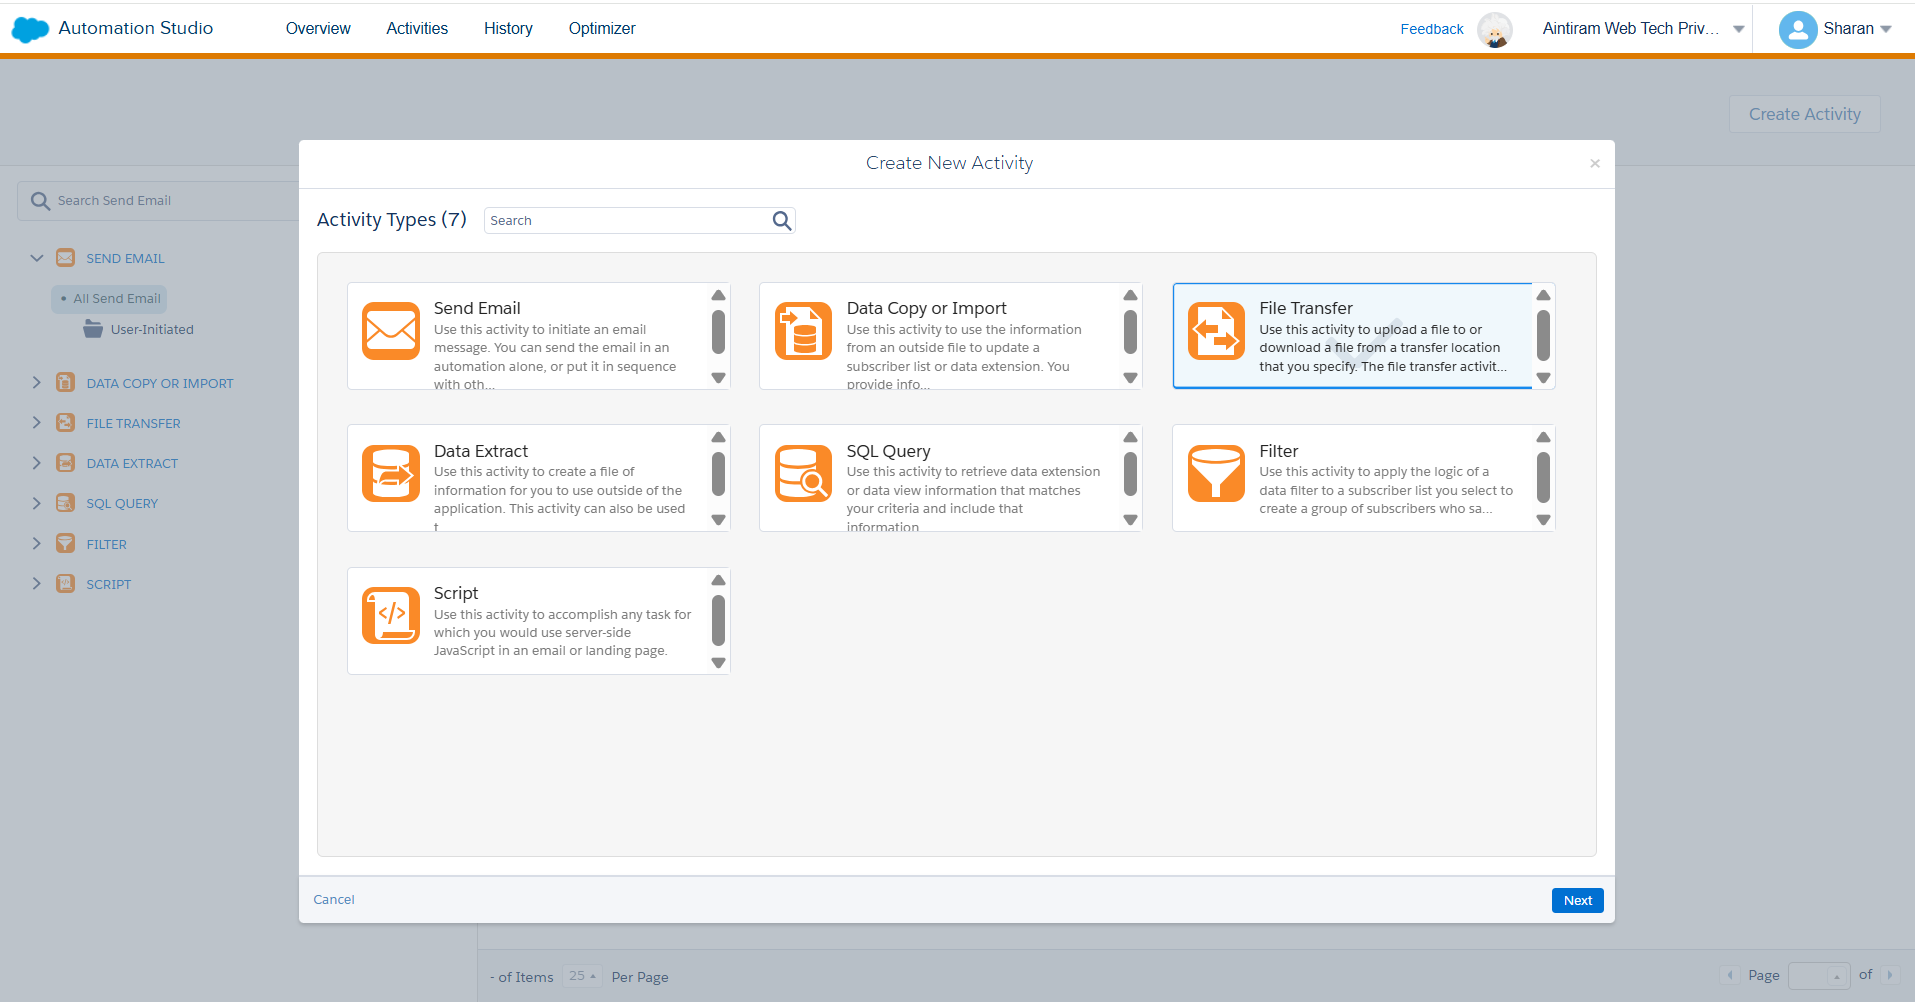
3. Start configuring the file transfer activity.
4. Give it a name, select the second option in the File Action as Move the file from safehouse as shown below. Also, If you need any description for the file transfer activity you can add it.
5. Then, come to the configuration section. Here, we need to give the File Naming Pattern, Destination (i.e., FTP location where the file should be transferred). Also, If you need to encrypt the file check the check box and select the type of encryption that you need.
There are two types of encryption, PGP and GPG. PGP stands for pretty good privacy encryption and GPG stands for Gnu Privacy Guard encryption. Both encryption will secure the data in the files
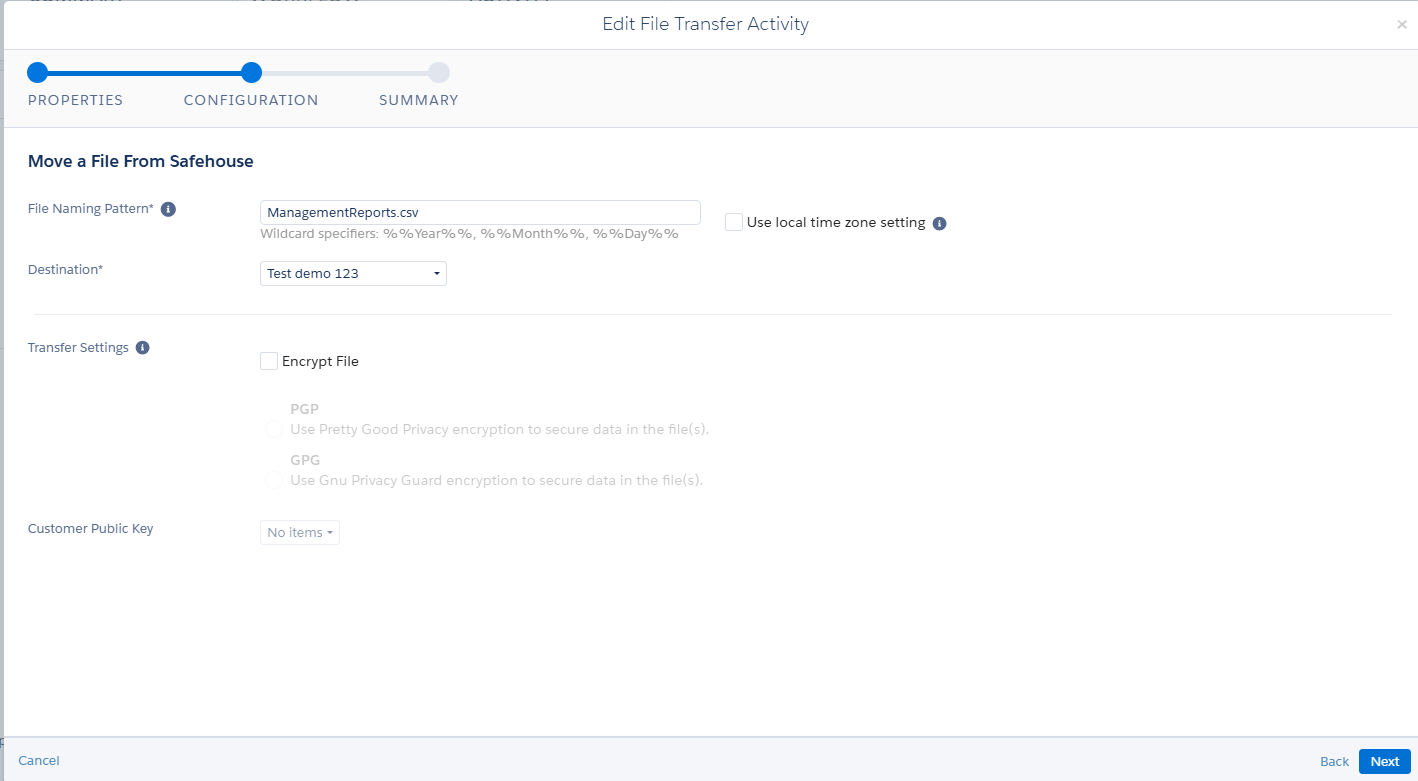
Review the summary and just click on save. You have configured the file transfer activity. (Note: Here, I have not used any protection on the file and I have chosen custom FTP folder that has been created for the file transfer which uses FileZilla.)
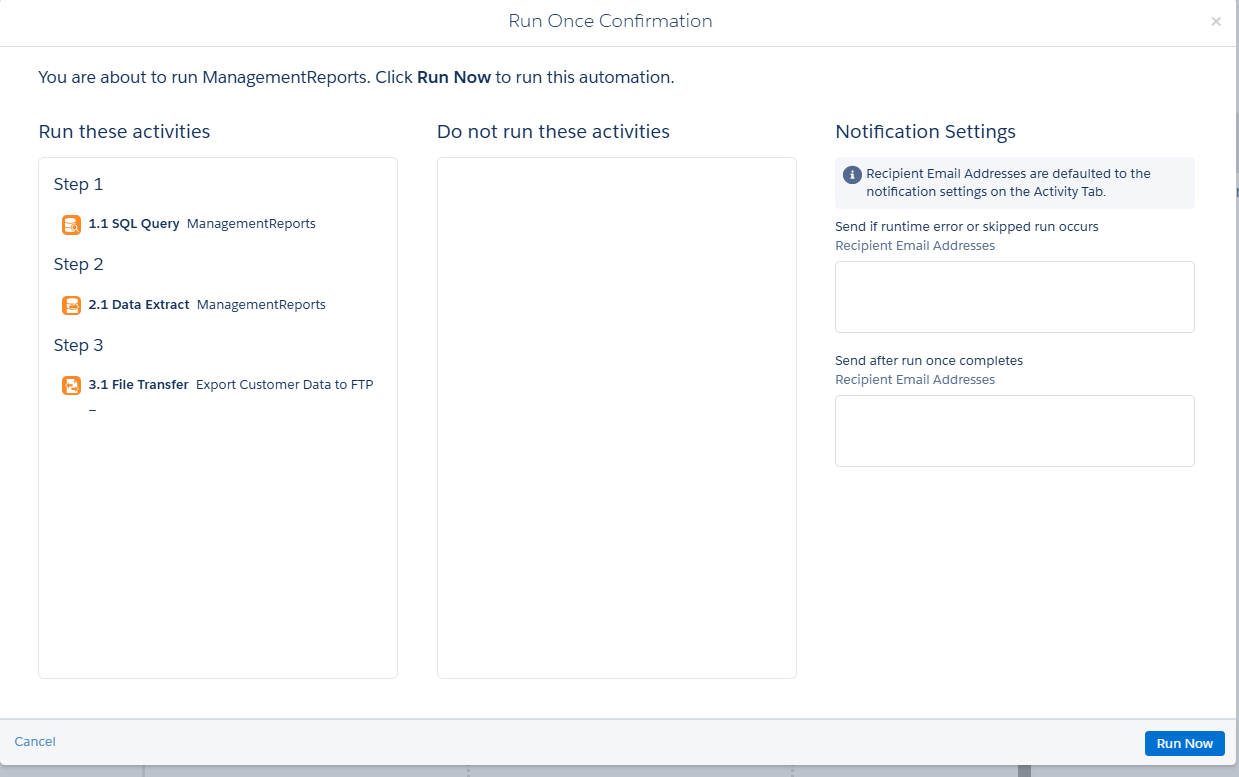
6. Place all the activities that has been created in the automation studio as shown below.
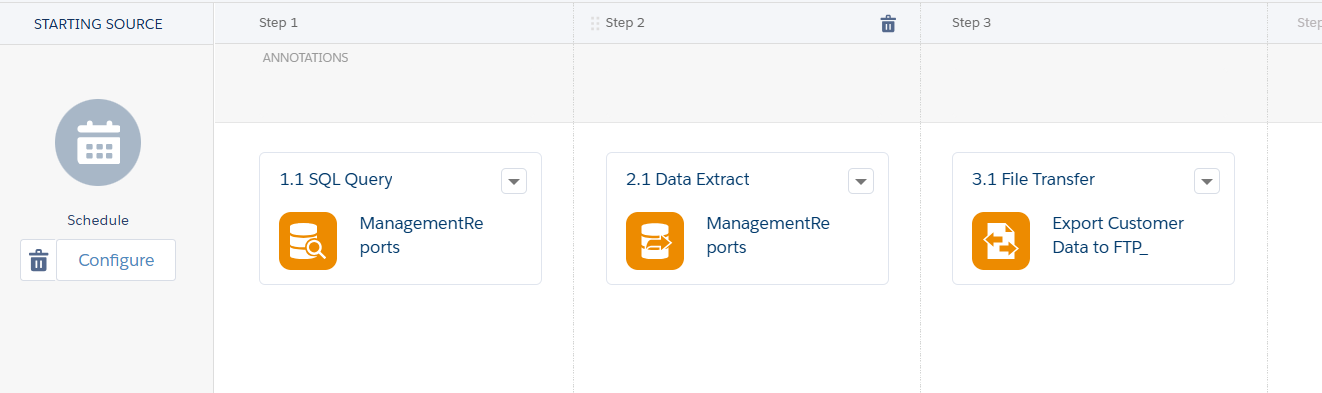
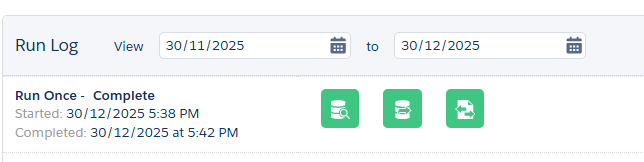
7. Once, after placing the activities save and activate the automation and name the automation. Then run the automation once.
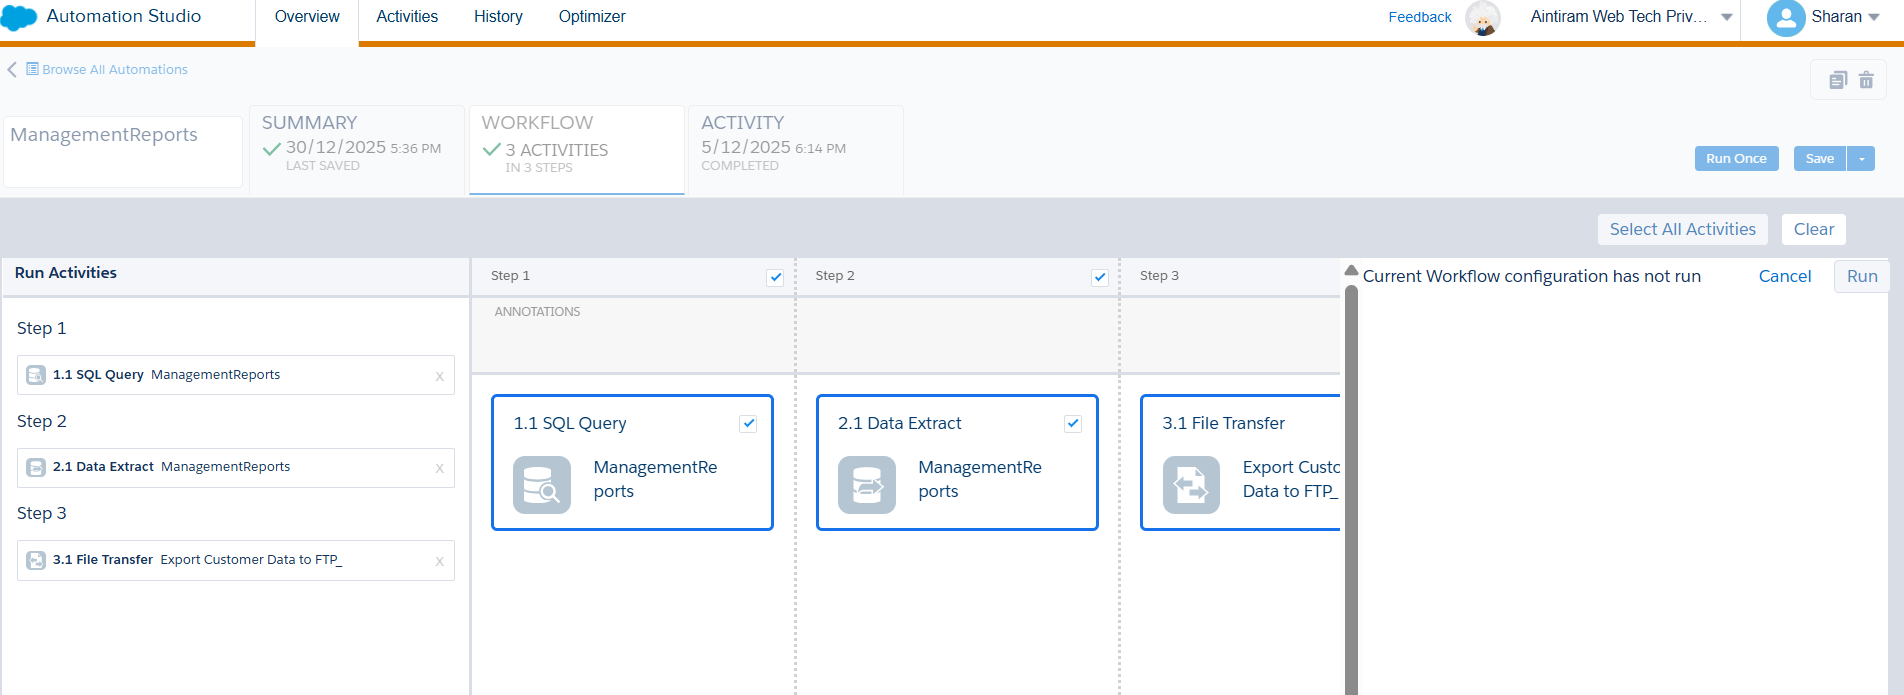
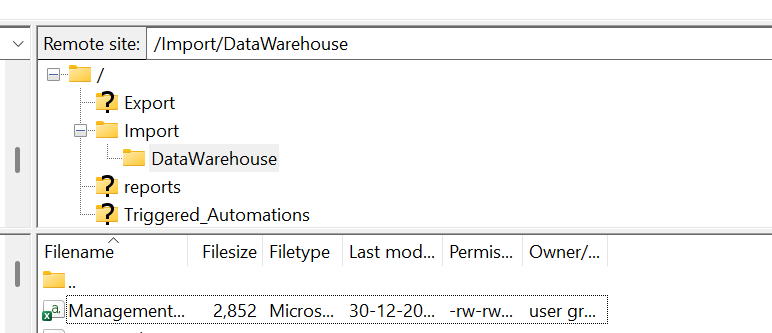
8. Once the activities has been run check the FTP folder whether the report has been generated and able to download from the FileZilla folder location.
Conclusion
I hope this blog helps you to understand how to build an automation to transfer files outbound from the Salesforce marketing cloud. In the upcoming blog we will learn other types of file transfer activities in detail. Follow us for more updates related to Salesforce Marketing Cloud.