

How To Create An Automated File Import In Marketing Cloud?
This blog helps you to understand how the data from the file import used in the automation and how to create an Import automation in Marketing Automation Studio
By Sharan Kumar Mariappan
Assistant Software Developer
How To Create An Automated File Import In Marketing Cloud?
An automated file import process inside the marketing cloud is a great way to get data from your business into the marketing cloud each day without transferring a file. The most common way these kinds of imports are being used is to upload fresh business data such as customers' products and purchases into the marketing cloud each morning for use in daily segmentation activities or for journeys and a marketing set. We are going to create a simple file import process that is automatically triggered as soon as a new file drops into the FTP folder. Let's understand this with a basic scenario now.
Anne is one of the most enthusiastic marketers, running her own company named Anne Hardware. She drives a campaign to capture a lead for her new product named Haptrony. Haptrony is an e-commerce software like Amazon that is specifically designed to sell electronic hardware. She used to collect the information of the leads who were really interested in her products. She had been using the Marketing Cloud for more than a month to store the data. Her business expands day by day. She thought she needed to hire and train a person to run a campaign. She hired one guy and started training him. She thought of a new concept called Automated File Import in Marketing Cloud. Let's walk through with her to understand how she is training her new employee.
Let's get started!
Steps to create an Automated File Transfer Activity in Salesforce Marketing Cloud
Step 1: Installing File-Transfer Server
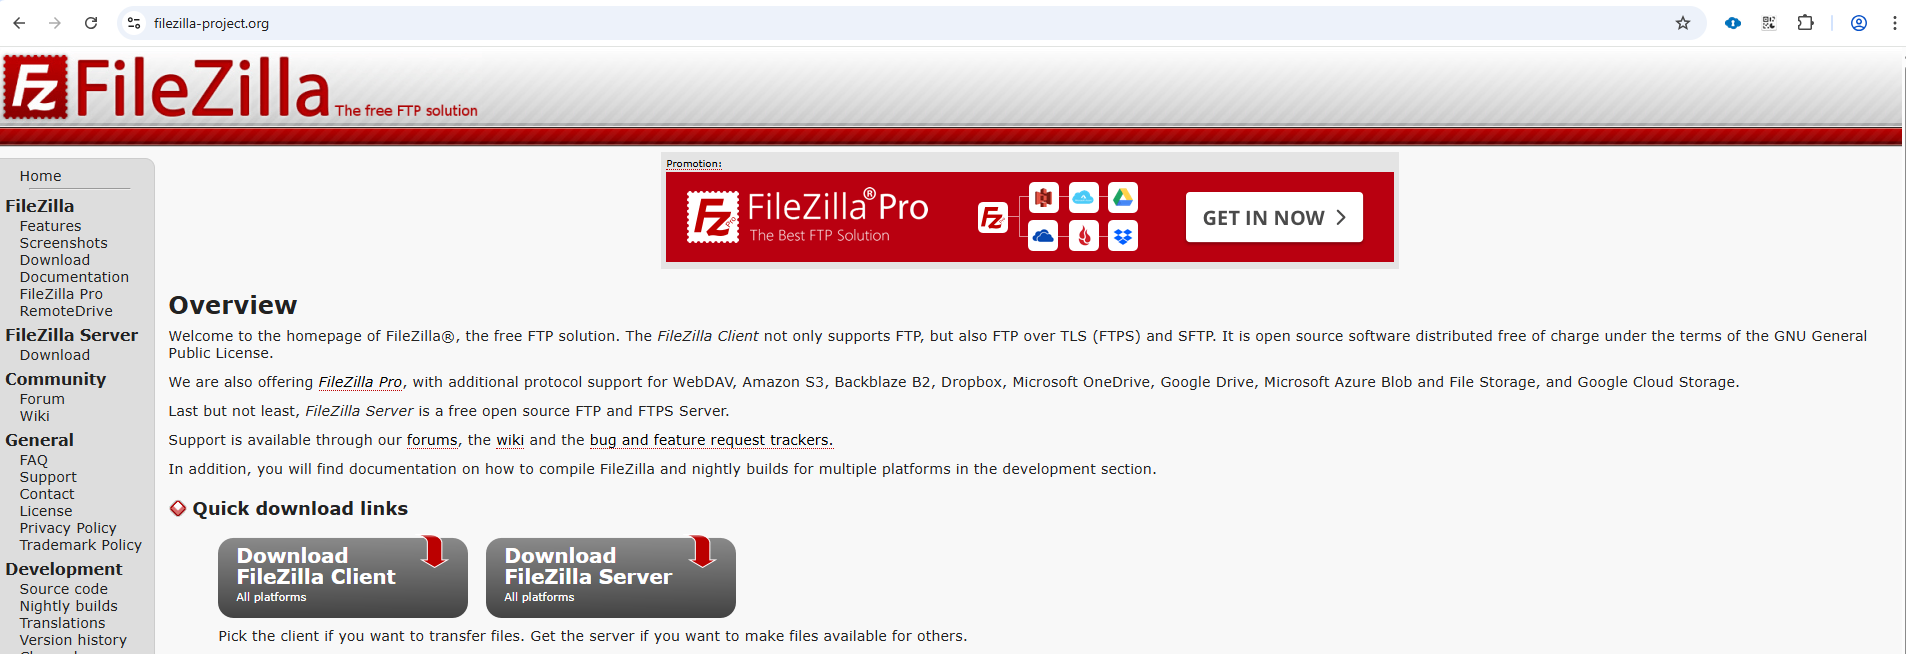
1) Go to the FileZilla server official download page.
2) Click on the client server link to install the version that suites your system configuration.
3) This is optional, If you have any server for file transfer, just skip this step and go ahead with the next step.
4) For an Installation guide click here
Step 2: Create FTP Account
1) Navigate to Setup page in the Marketing Cloud
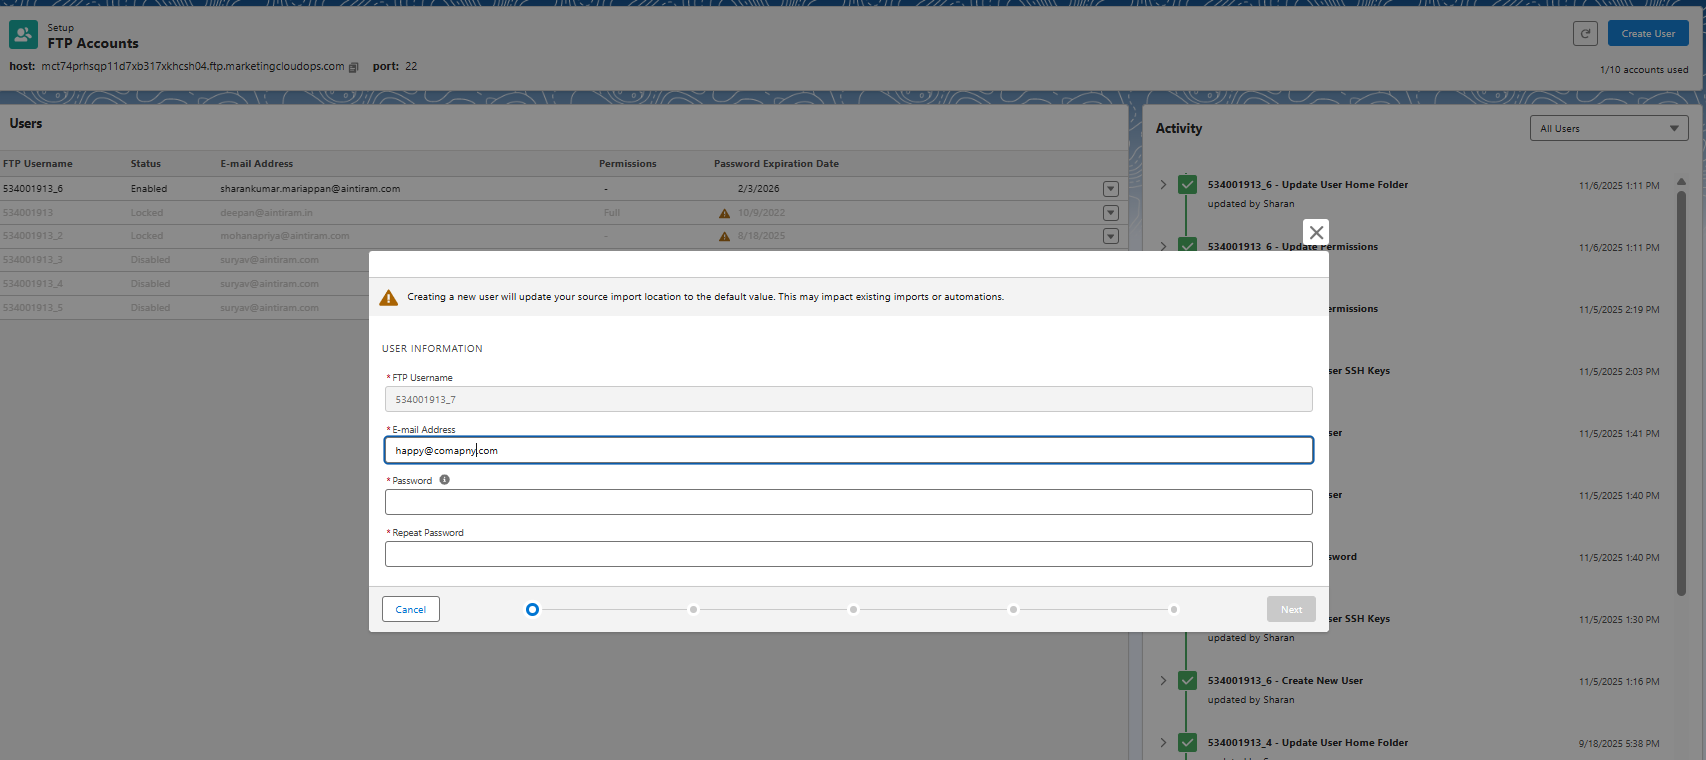
2) Go to FTP accounts under Data management.
3) Fill in the necessary information such as Email Address and Password. Re-enter the password and click on next.
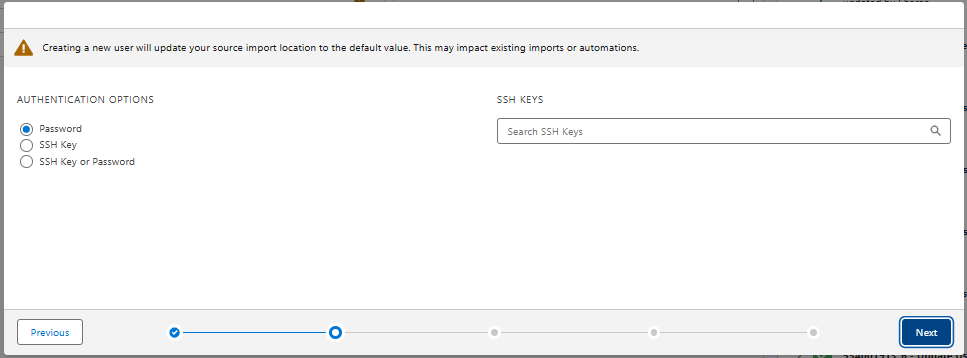
4) Then, we need to select the password option. If you need the data to be more secure, you can create an SSH key and add the SSH key.
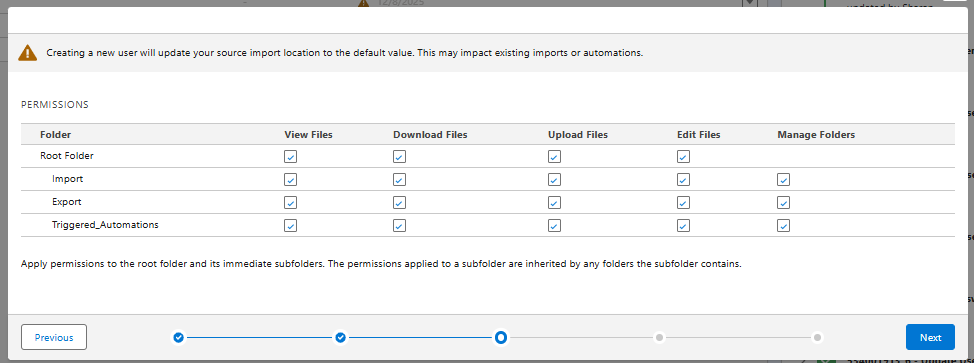
5) Give all the permissions that are required and if you need any specific permission, then go ahead with that. Note: If you are handling sensitive data, make sure you are only giving the required permission to avoid a data breach.
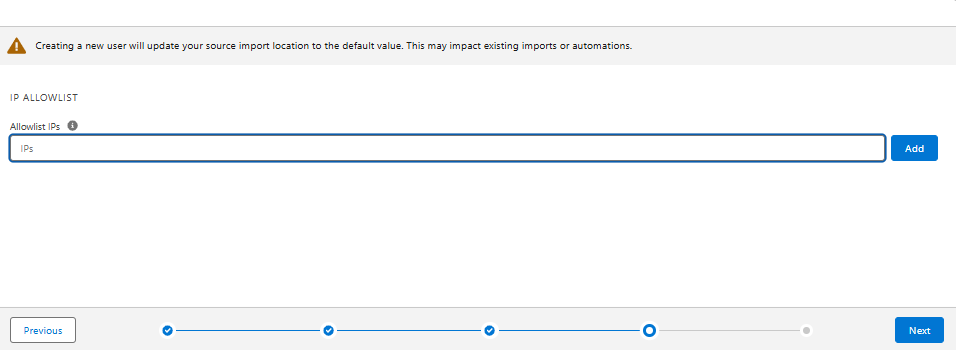
6) If you need to access the data from a specific IP or the data should be received from a specific IP, we can add the IP allow list as shown in the image below.
7) Once after checking all the data, hit save and your FTP account will be created.

8) Make a note of the host, port (usually 22 for all the file transfer activity), FTP username and Email address that has been used for FileZilla configuration.
Step 3: Connect a FileZilla with the marketing Cloud
1) Open the FileZilla software and add the Host, Username, Password and Port that we have copied from the FTP account as shown below.
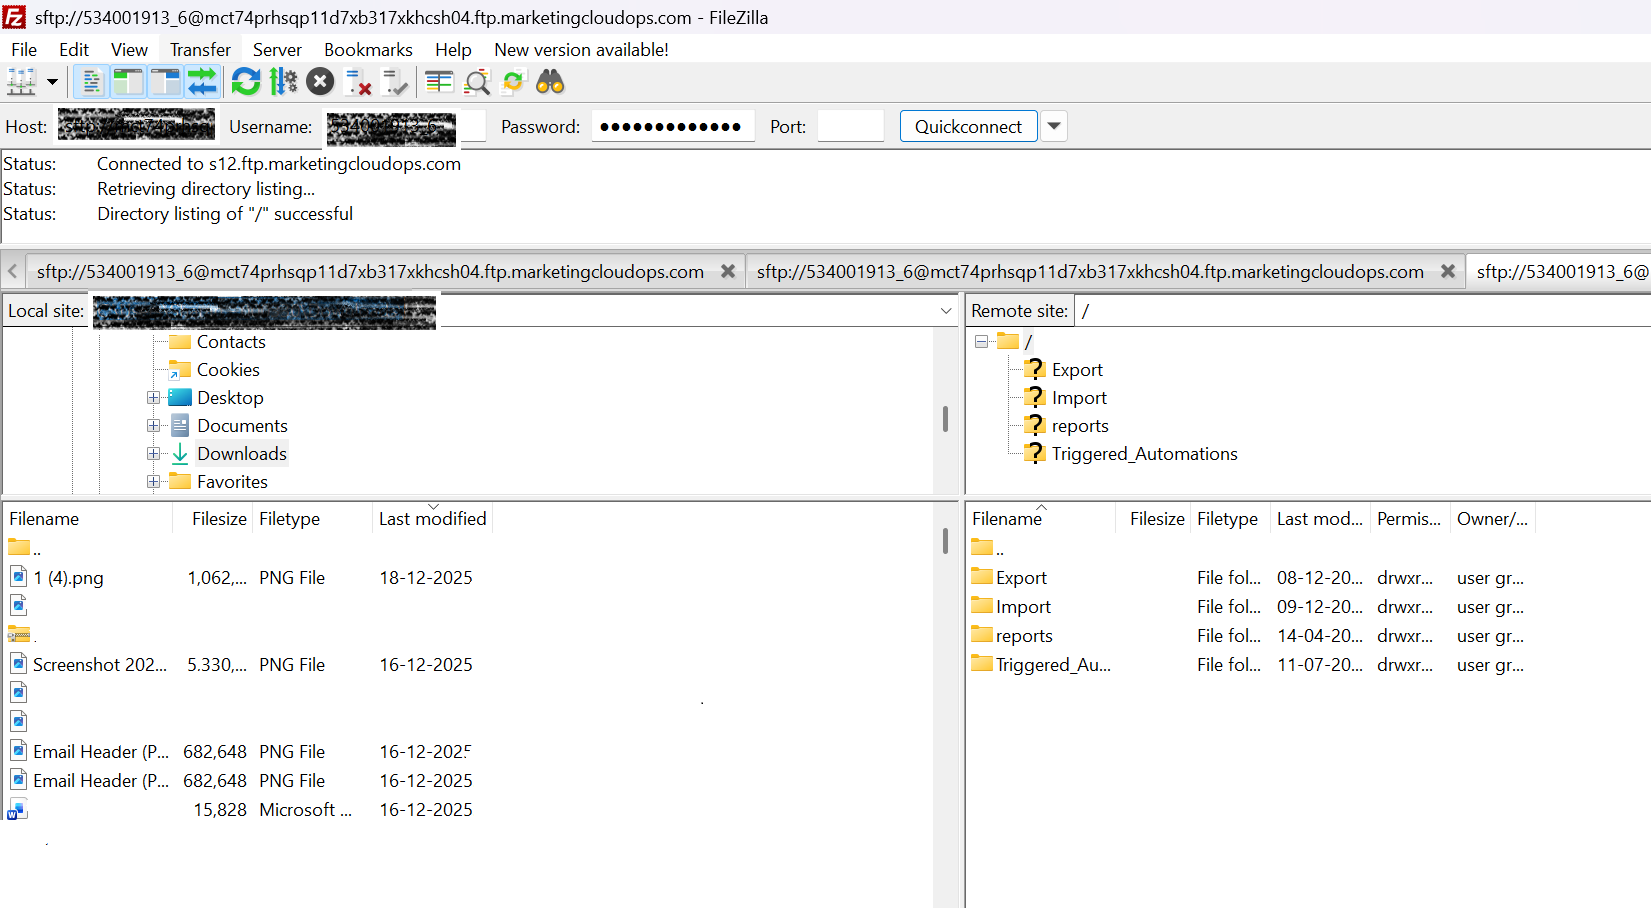
2) Once the configuration has been completed, just click on quick connect.
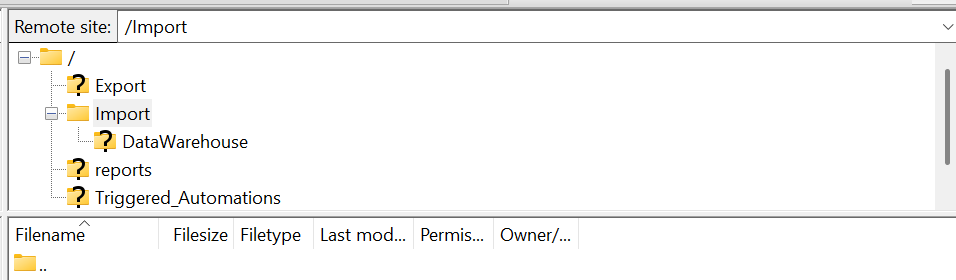
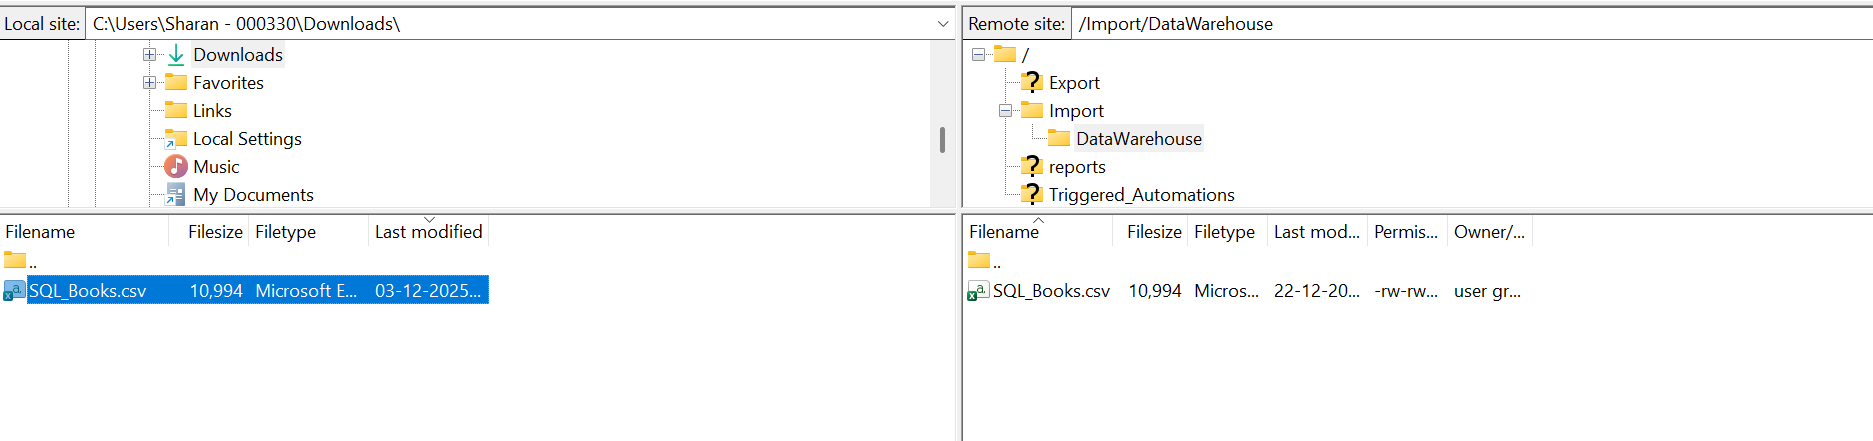
3) After the connection has been established, Go to remote site import activity. In that remote site, just create a subfolder under the import activity to avoid confusion.
4) Here, I have created a subfolder named DataWarehouse under the import folder as shown below.
Step 4: Create a FTP location in Salesforce Marketing Cloud
1) Navigate to setup again
2) Under the data management, navigate to File Location.
3) Create a file location by clicking on create, and we need to fill in the necessary information.
4) External key will be automatically generated, and we need to define the relative location (Note: No forward slashes should be used for relative path, only backward slashes are allowed).

Step 5: Create a data extension
1) Create a data extension to store the data that has been used for automated file transfer activity.
2) If you need assistance with creating a data extension, please click here.
Step 6: Create Import Automation
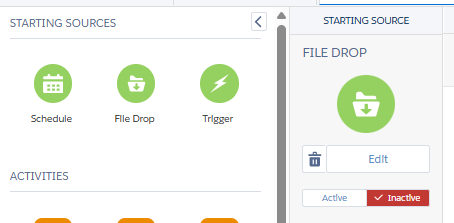
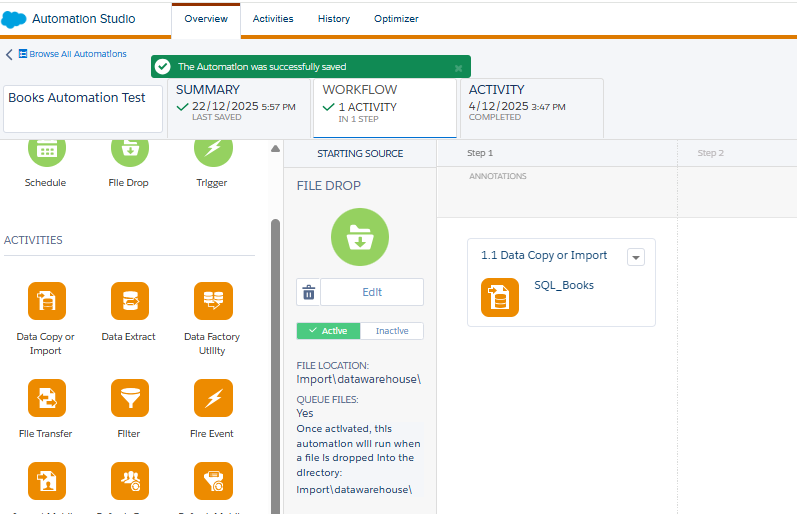
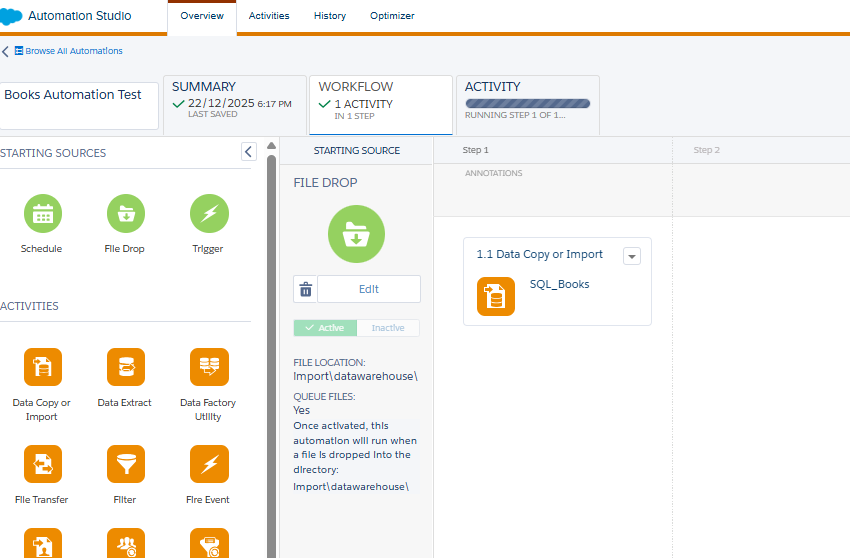
1) Go to the automation studio and add the file drop activity as shown below.
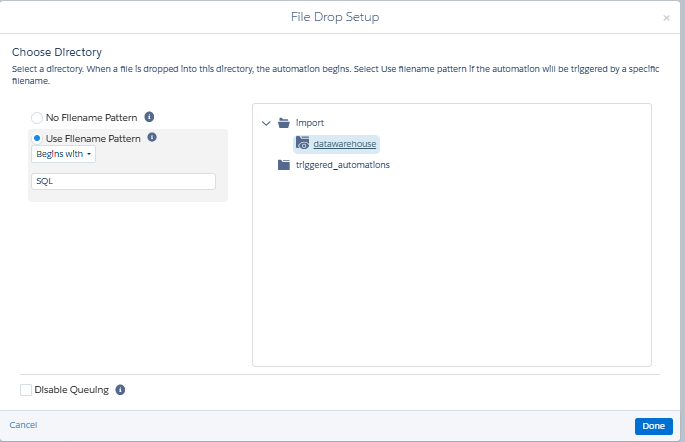
2) Select the file location as datawarehouse from the import which we have created as DataWarehouse earlier.
3) Then use the file naming pattern as per your file you are importing.
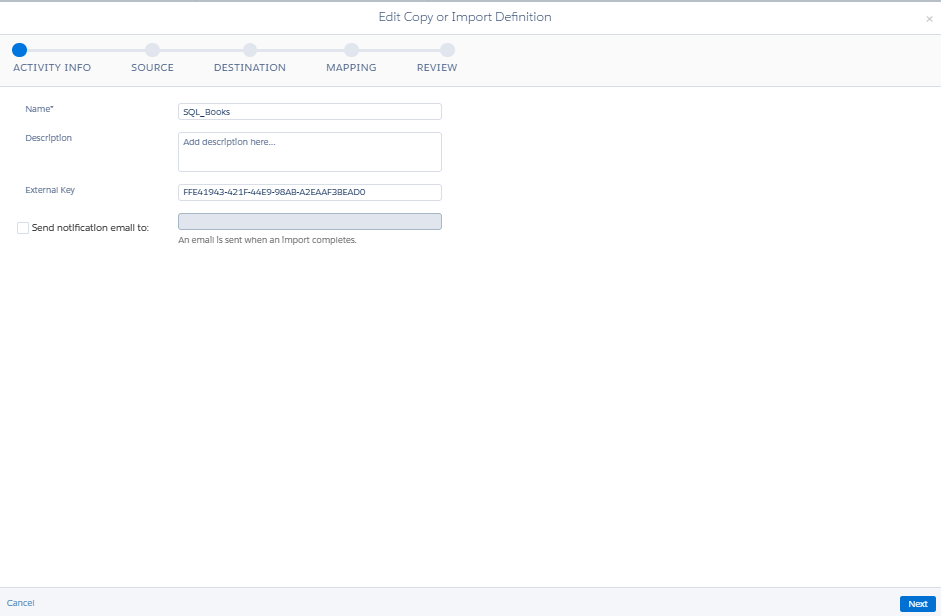
4) Once the file import activity has been created, create a Data Copy or Import Activity as shown below.
5) Give the name to the copy or import definition.
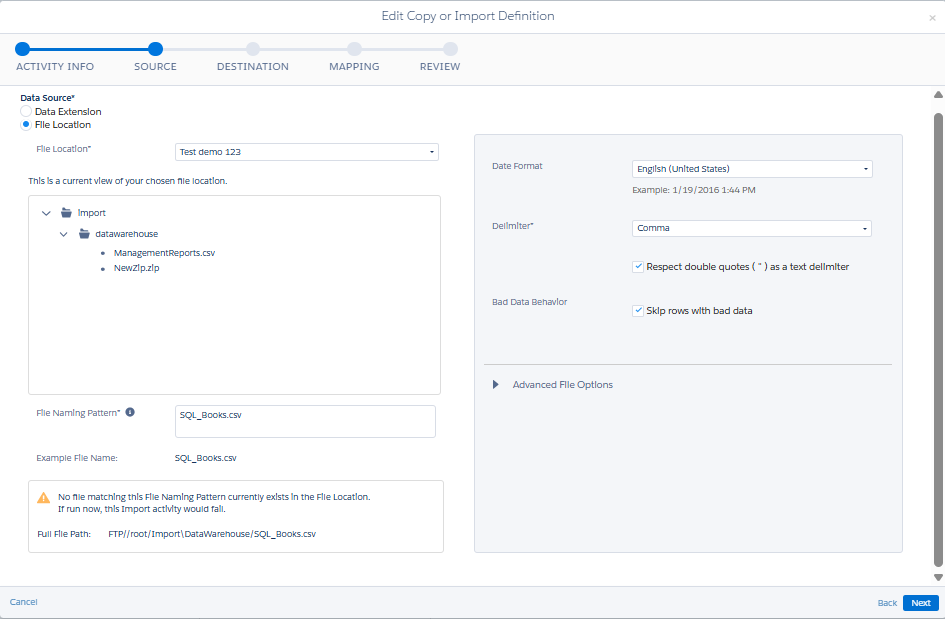
6) Choose file location as a source and give the name that we have created and configured earlier. Also, give the file naming pattern and click on next.
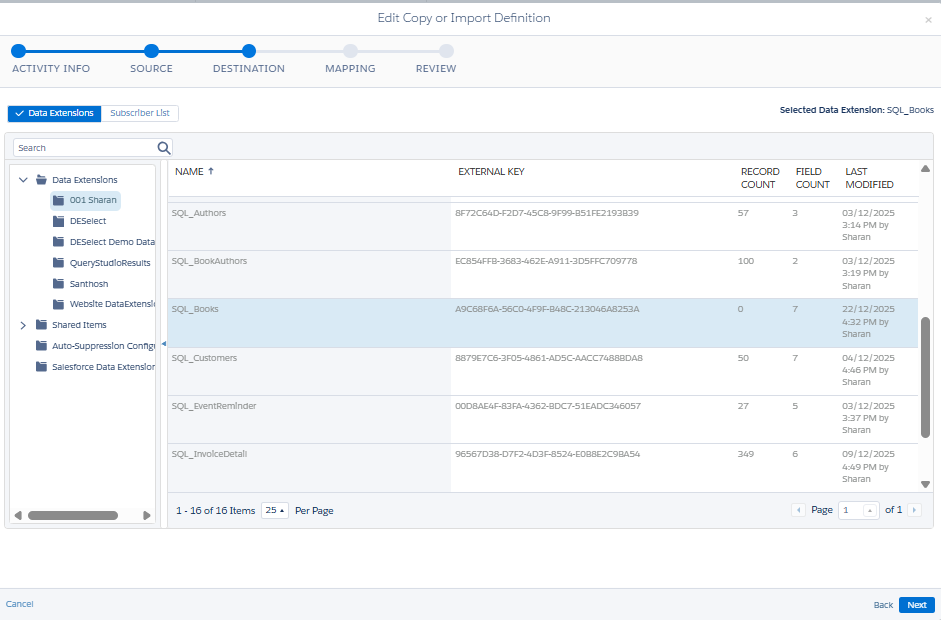
7) Select the data extension to store the data that was imported from the file drop activity (Created data extension to store the data). Then click on next.
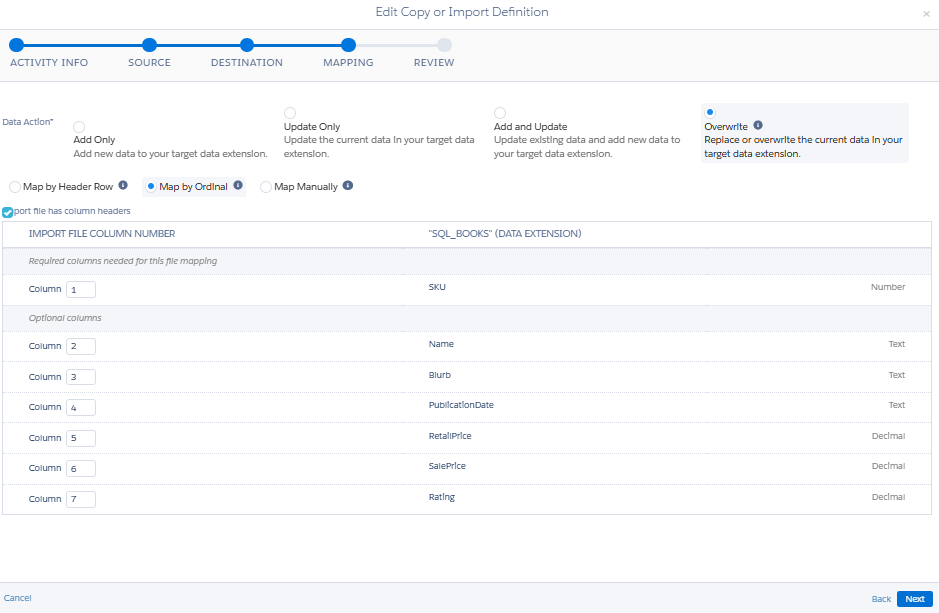
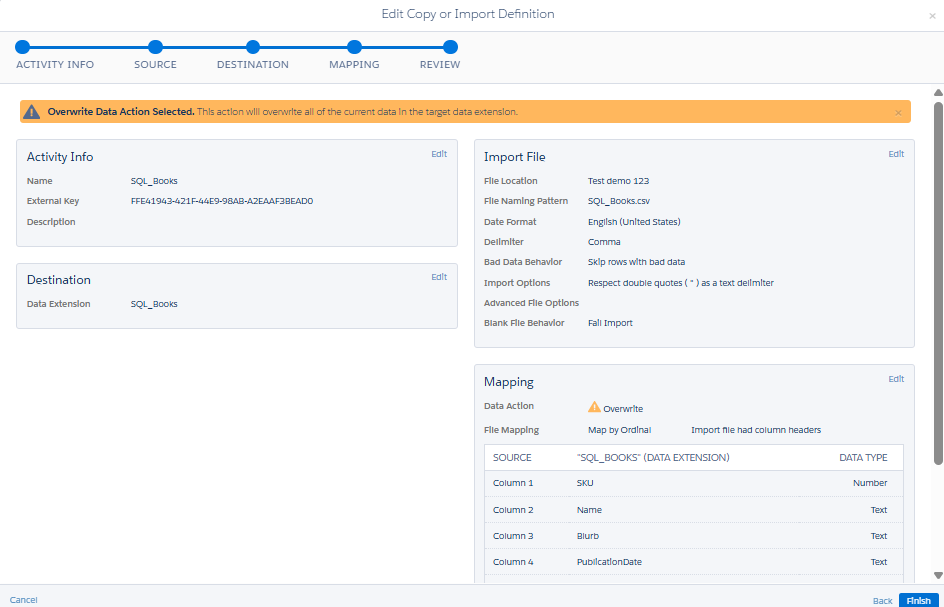
8) Click on Overwrite and select the map by ordinal. Then click on next and you will see the preview icon. Preview the inputs and click on save.
8) Once the automation setup is completed, save the automation and activate it.
Step 7: Dropping a File in File Transfer Server
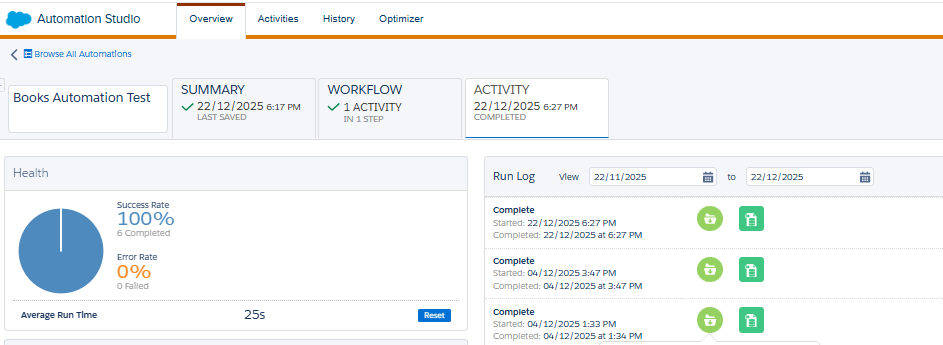
1) Start dropping a file which contains data. (That should match the name that we have configured earlier)
2) Once the file drop has been completed, you will see the automation got triggered and the data from the CSV file has been started copied to the data extension that we have configured.
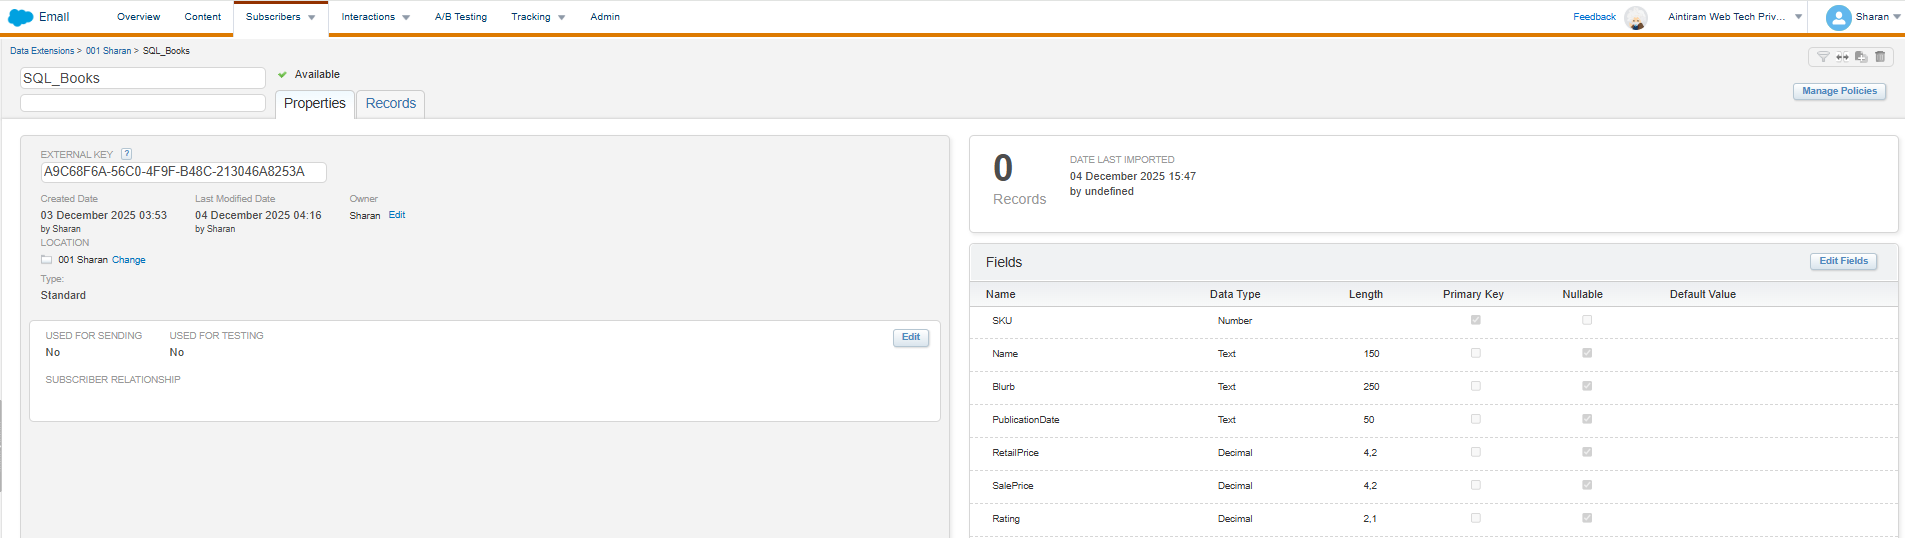
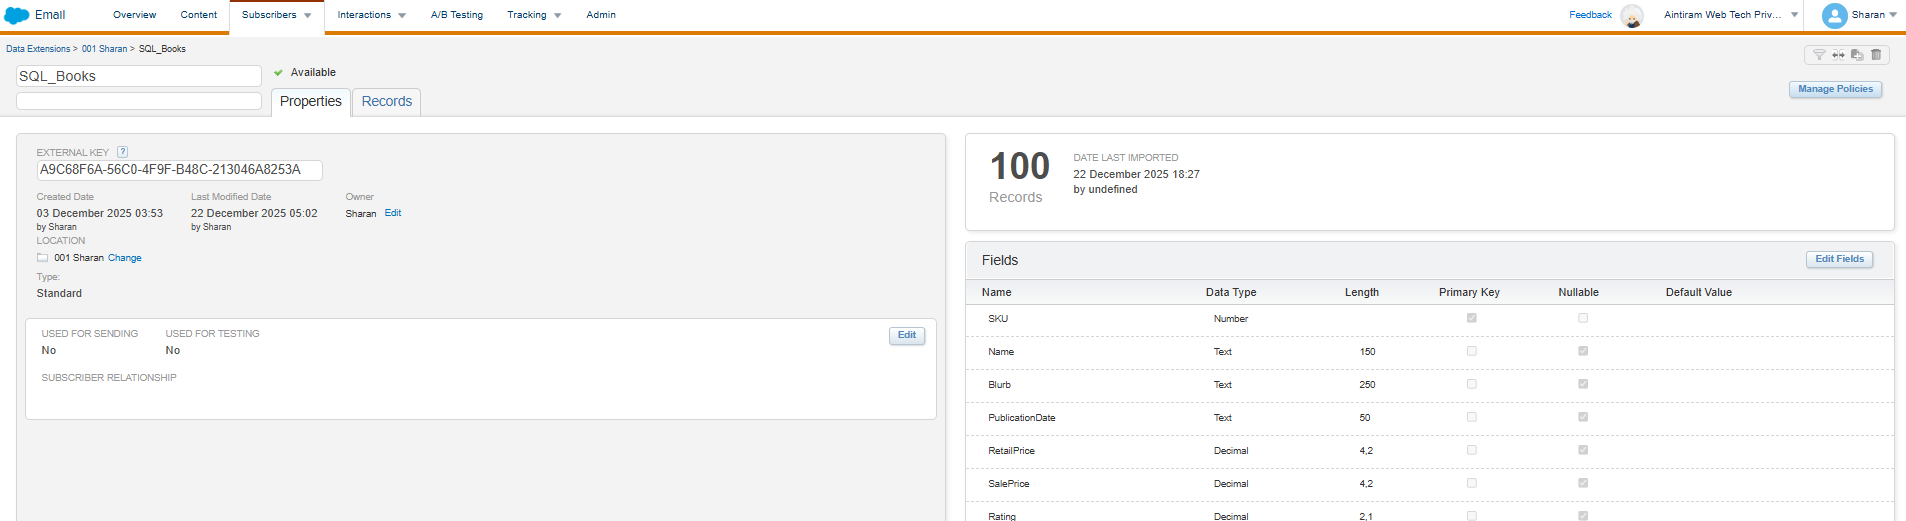
3) We can data in the data extension as shown below.
Conclusion
By this way, Anne thought of her employee. Her employee is curious to learn more about the marketing cloud. Anne insisted he him follow the blog that had been created by the Aintiram Web Tech team, who are ceaselessly developing the content related to the marketing cloud. This blog is interesting, right? As Anne and her employee following our blog for marketing content, please follow our blogs for more content in Salesforce Marketing cloud. See you in the next blog. I hope you have gained some knowledge of automated file import activity. See with more interesting content in the next blog.