

How to Deploy with Salesforce CLI: Step-by-Step Guide
Learn how to deploy metadata and code using Salesforce CLI with this step-by-step guide for developers and admins
By Abirami Rajendran
Senior Salesforce Developer
How to Deploy with Salesforce CLI: Step-by-Step Guide
What Is a CLI?
Salesforce CLI (Command Line Interface) is a tool that lets you interact with your Salesforce environment by typing commands in a terminal instead of using the web interface. It helps developers and admins do things faster, like retrieve or deploy code, run tests, or manage orgs, and is great for automation and working with source control.
CLI is a way to use a program by typing text, instead of clicking around in a window like you usually would on a website or app. To use a CLI, you open something called a terminal. Using a CLI is very different from using a program with buttons and menus. Instead of clicking, you type what you want the program to do. It can be much faster and great for doing repeated tasks, but it also takes more time to learn because there aren’t any visual hints or instructions. You can use simple text commands to:
Create and manage projects
Authenticate orgs
Retrieve metadata
Deploy metadata
Run Apex tests
Environment setup: How to Install Salesforce CLI
Step 1: Go to the Salesforce CLI Download Page
Visit the official Salesforce CLI download page: SFDXCLI
Step 2: Choose Your Operating System
Download the installer for your OS:
Step 3: Run the Installer
Double-click the downloaded file and follow the installation steps.
Step 4: Verify Installation
Once installed, open your terminal (Command Prompt, PowerShell, or Terminal app) and type: sfdx --version

If it returns a version number, it means the CLI is installed successfully.
Set up and handle projects
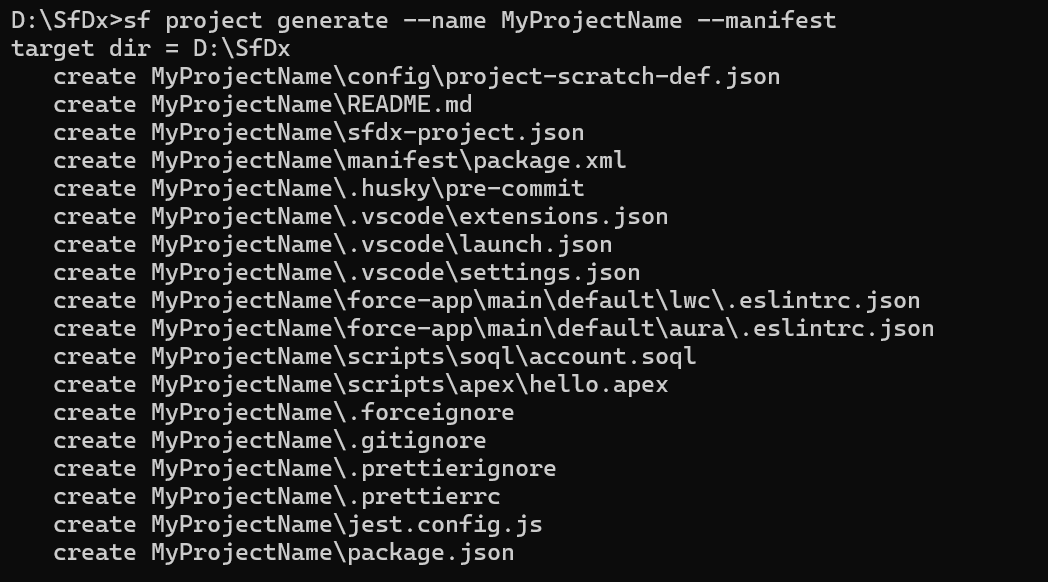
Create Salesforce DX Project: To create a folder structure for your Salesforce project using the command prompt, you can use the Salesforce CLI (sf) with the following command.
sf project generate --name MyProjectName --manifestWhat this command does:
- sf project generate: Command to create a new Salesforce DX project.
- name MyProjectName: Specifies the name of your new project folder. You can replace MyProjectName with your preferred name.
- manifest: Adds a manifest folder inside the project, which will contain the package.xml file used for retrieving and deploying metadata.
Update Login URL: Set the Login URL in the Project Configuration. Open the sfdx-project.json file you were created in the above step and update the login URL (login URL) if you're working with a Sandbox (https://test.salesforce.com) or Production (https://login.salesforce.com) org.
Establish org authentication
After creating the project folder, you need to authenticate your Salesforce org using your username and password. This connects the org with the newly created project, allowing you to retrieve all metadata components specified in the package.xml file.
List existing authenticated orgs:
sf auth:list
- Authorize a Salesforce org:
For our sandbox or production org is done by redirecting to the respective Salesforce login URL, where you can provide your username and password to authorize and connect the org. Use the comments below to navigate the browser for login. Once done that you can see the success message in the command prompts. sfdx auth:web:login -a aliasName
This command launches your browser and directs you to either the sandbox (https://test.salesforce.com) or production (https://login.salesforce.com) login page—based on your configuration.
Enter your Salesforce username and password to authorize access.
Upon successful login, Salesforce CLI will display a confirmation message in the terminal, indicating that your org is now authenticated and ready to use.

Fetch metadata from the org
Metadata forms the backbone of your Salesforce customizations, everything from Apex classes and triggers to flows, permission sets, and Lightning Web Components (LWCs). With Salesforce CLI, you can retrieve and deploy these components seamlessly using simple terminal commands.
Retrieve Metadata Components: To fetch metadata from your source org (e.g., Development or UAT), use the package.xml file to specify which components you want to retrieve—such as Apex, Triggers, LWCs, Profiles, Flows, and more.
Understanding metadata retrieval: In Salesforce development, the package.xml file defines what metadata components should be retrieved or deployed using the Salesforce CLI. Let's decode the following XML snippet to understand its purpose.
Example 1: Retrieve specific Standard Object<?xml version="1.0" encoding="UTF-8"?> <Package xmlns="http://soap.sforce.com/2006/04/metadata"> <types> <members>Account</members> <name>CustomObject</name> </types> <version>61.0</version> </Package>Example 2: Retrieve all Custom Objects
<?xml version="1.0" encoding="UTF-8"?>
<Package xmlns="http://soap.sforce.com/2006/04/metadata">
 <types>
	<members>*</members>
	<name>CustomObject</name>
</types>
<version>61.0</version>
</Package>
Each block in package.xml specifies a group of metadata components by type.<members>Account</members> - This line tells Salesforce CLI to retrieve or deploy the Account object only, under the CustomObject category.
<members>*</members> - The asterisk * is a wildcard. It means to retrieve all custom objects under the CustomObject metadata type.
That includes every custom object created in the org—like Invoice__c, Product__c, etc.Whether you're pulling, Custom Objects, Flows, Triggers, Apex classes, or Lightning Web Components, you’ll use the above structure. Just replace MetadataTypeName with the correct value, like CustomObject, Flow, ApexTrigger, etc.
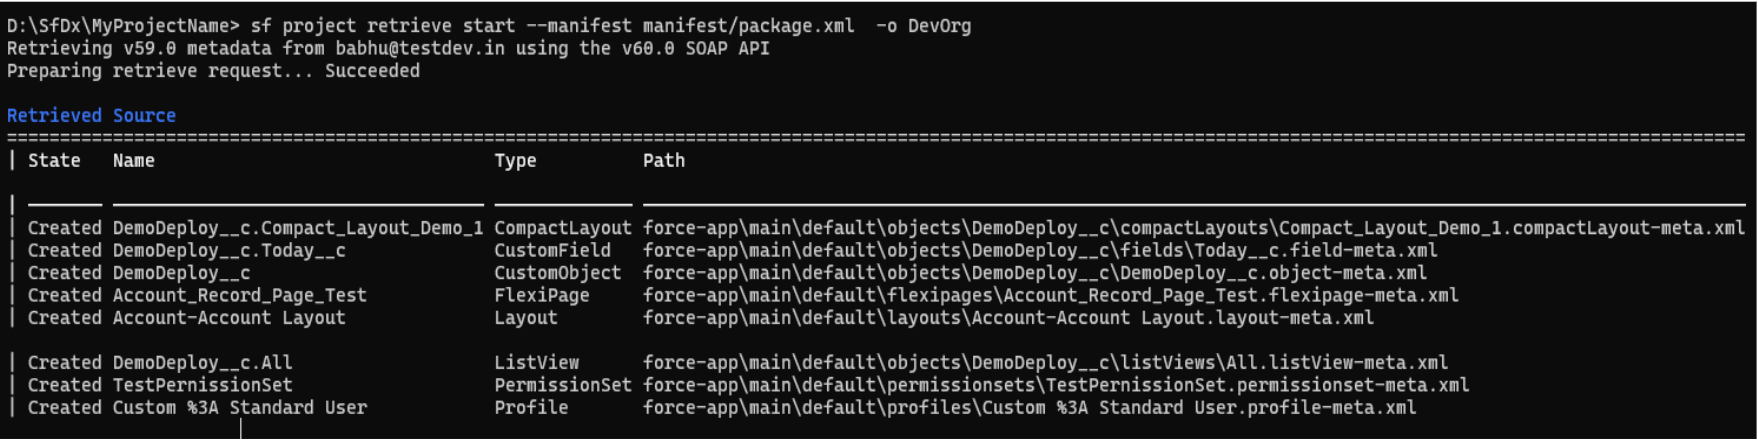
sf project retrieve start --manifest manifest/package.xml -o aliasNameWhat this command does:
- manifest: Points to the package.xml that lists the metadata components.
- o aliasName: Specifies the alias for the source org you authenticated earlier.
- Once executed, you’ll see the retrieval status and progress directly in your terminal, confirming that the metadata files have been pulled into your local project directory.
Apply metadata changes to org
Deploying metadata is the final step in moving components from your dev org to a higher environment—like UAT or Production—for testing or go-live. This command sends the listed metadata components from your local project to the target org. You’ll see a detailed status report in your terminal showing success messages, warnings, or deployment errors. Most modern deployment systems—including Salesforce—support “Automatic Rollback on Test Failure,” meaning no changes are committed if any Apex tests fail.
sf project deploy start --manifest manifest/package.xml -o aliasName 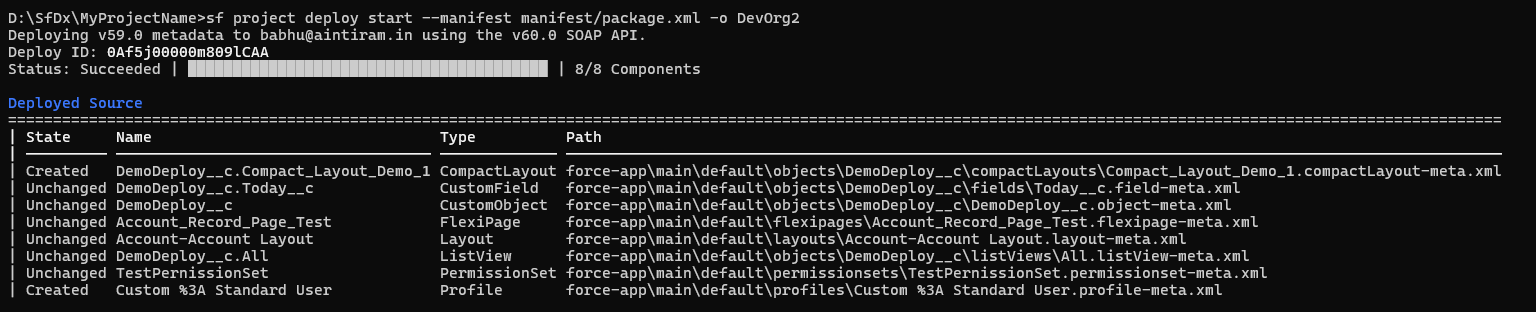
Validation: Ensuring a Safe Deployment
Before running the actual deployment command, it's highly recommended to validate it. Validation performs a dry run to test whether your deployment will succeed without applying any changes to the target org. Think of it as a rehearsal for deployment. It helps identify potential issues before anything goes live.
Use the following command:
sf project deploy validate --manifest manifest/package.xml -o aliasName Validation checks for:
- Errors in deployment logic or structure
- Fulfilment of all required dependencies
- Successful completion of designated test classes
- Adequate code coverage across the org
If your validation passes, you can deploy confidently, knowing that your code and metadata meet all necessary requirements.
Execute Apex tests
It helps to verify the code's functionality and ensure the Apex code (Classes, triggers, etc.) works correctly and produces the expected results.
Run Local Tests:
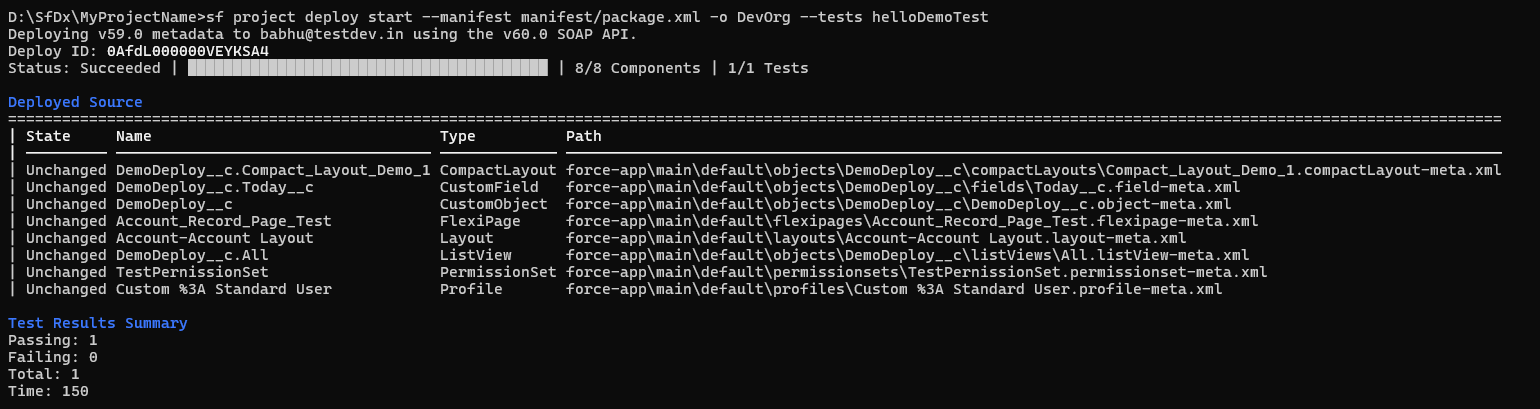
Use the LocalTest option to deploy the components to the target org. This ensures that all test classes in the local environment are executed during deployment, verifying the functionality with test data and helping to catch any potential issues early.sf project deploy start --manifest manifest/package.xml -o aliasName --test-level=RunLocalTests

Run All Tests (including managed packages):
Deploy the components to the target org by running the AllTest option, including those from managed packages. This ensures full validation of both custom code and third-party components during deployment.sf project deploy start --manifest manifest/package.xml -o aliasName --test-level=RunAllTestsInOrgRun Specific Test Classes:
Deploy the components to the target org by using the SpecifiedTest option to run only the selected test classes during deployment.sf project deploy start --manifest manifest/package.xml -o aliasName --test-level=RunSpecifiedTests --tests TestClassName
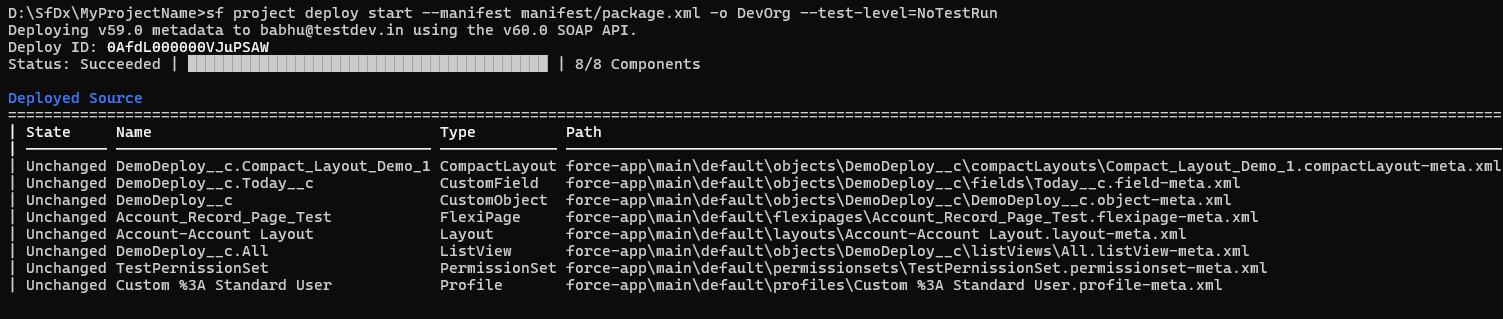
No Test Run (Only Allowed in Developer Orgs):
Deploy the components to the target org without running any test classes. This option is only available for Developer sandboxes. While no tests are executed, the components are still deployed.
Note: This approach is not permitted for production environments.sf project deploy start --manifest manifest/package.xml -o aliasName--test-level=NoTestRun
Recommended Deployment Practices
- Always run Apex tests during deployment (using run Tests or test Level RunLocalTests).
- Use check only for a dry run before actual deployment.
- Validate in UAT or Full Sandbox before pushing to Production.
- Use a package.xml to define exactly what is being moved.
Conclusion:
Salesforce CLI is an essential tool for modern Salesforce development. Whether you're managing metadata, automating deployments, or running tests, the CLI empowers you to work faster and smarter. This guide covered the basics from installation to deploying with tests. So you can start integrating the CLI into your development workflow today.