

Feedback in Pardot Emails: It's a Game-Changer Now..!
This blog will help us to explore more on creating the Feedback/Survey links and to embed them in the Email Templates in Pardot Emails to get a Feedback.
By Sharan Kumar Mariappan
Assistant Software Developer
Feedback in Pardot Emails: It's a Game-Changer Now..!
In recent days, some of the people are facing conflicts with the others whom they are engaged with. The reason is not understanding the perspective of the others. At any point do you feel like we need to find solution to resolve the conflict? How do you react when you receive solution from the same person with whom you have those conflict? It will be easy to sideline the conflicts, right? The same thing will help in the businesses.
Pardot by Salesforce is one of the most common platforms in marketing to achieve a pinnacle in client engagement. We can run email campaigns and gather the audience who all have the common interests or who are looking for the common products. For tracking the prospects and finding out the valuable targeted audiences, we use Pardot Emails for audience engagement.
For this, We can include the Feedback/Survey form directly in the Pardot Client Engagement Emails. We can create a rating button in email by following some simple steps. Do you think creating a rating button in Pardot is complex? That's not true. Won't it be a life saver...? Yeah...! We can use some simple steps to create a Feedback/Survey in the Pardot Email templates. Let's dive into this blog.
We Can Create Our Own Feedback Button in Pardot Emails by Following These Steps
As mentioned above, we will create a simple rating button to get a Feedback/Survey from the audiences by attaching that rating button in Pardot Emails, following the detailed steps mentioned below.
Step 1: Create Custom Fields in Prospect Records
We have separate records for every prospect available in the system. We group the prospects according to our business requirements or based on the regions where they reside. In the prospect records, we will create custom fields to store the buttons they are clicking initially.
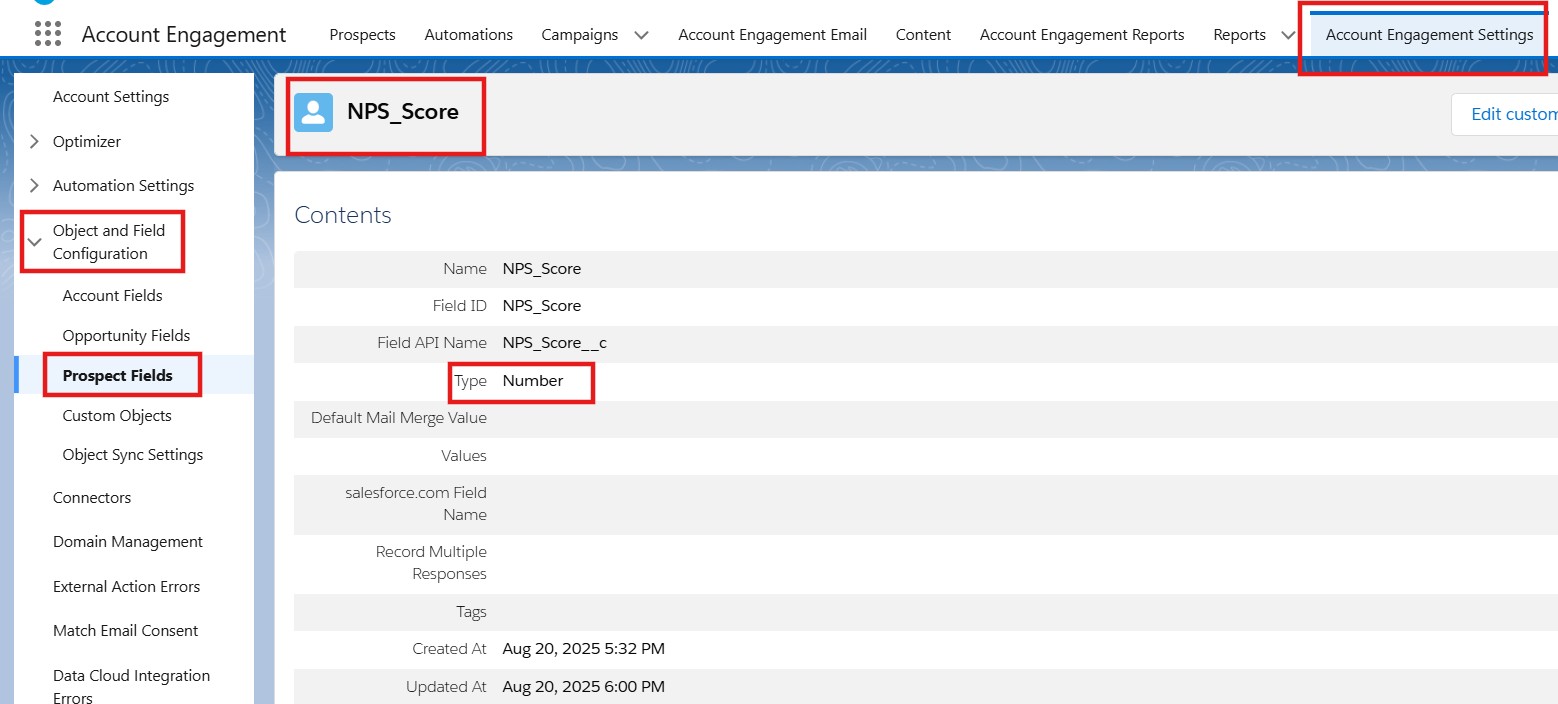
For example, we must create two fields named NPS_Score and NPS_Score_Temp of number datatype in the prospect records.
Go to the Pardot Setting and select the Prospect Fields in the Object and Field Configuration. Create the above-mentioned custom fields in the prospect custom field.
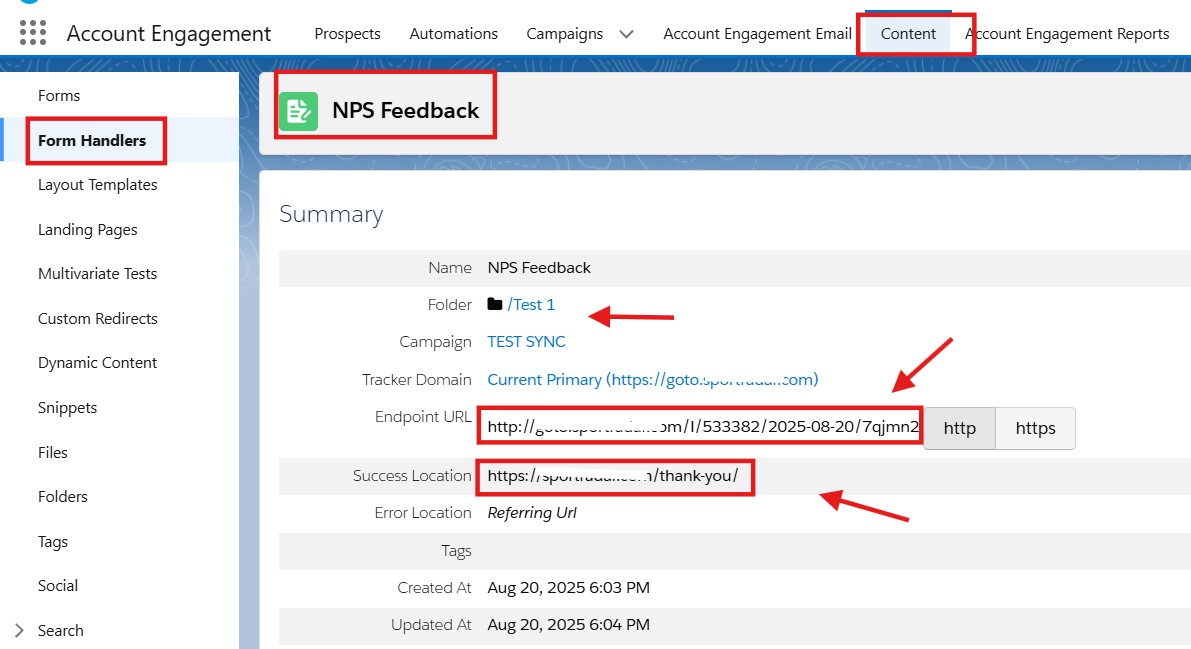
Step 2: Create a Form Handler in Pardot
The form handler we are creating will collect the email and feedback score when an audience clicks a feedback button in the received email. To create a form handler, we need to provide the following information:
Form Handler Name
Folder
Campaign
Success location
Error Location
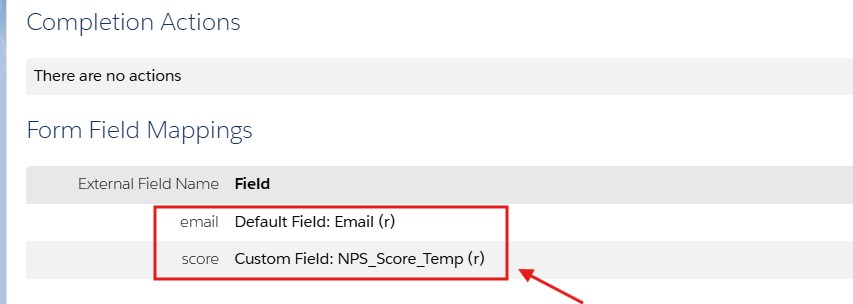
Also, add the Form Action field and here we need to add the email and Score fields (link with the NPS_Score custom field),
Email (*required field)
Score (*required field)
Save the form handler and copy its link, which will be used later in the HTML email template. We need to copy the endpoint URL from the form handler.
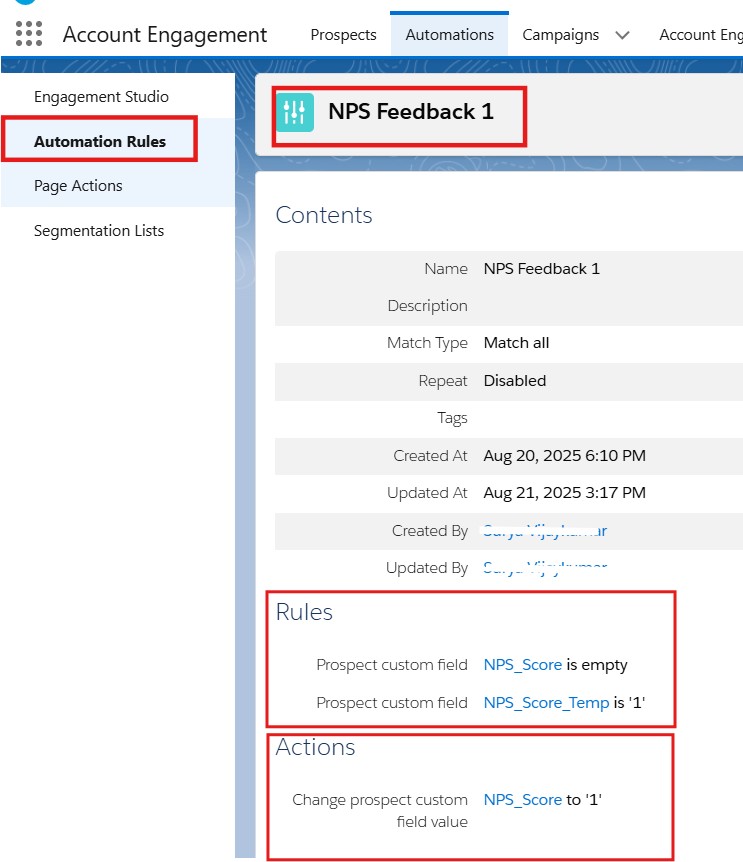
Step 3: Creating Automation Rules
We need to use the endpoint URL from the form handler to create the automation rules. For example, if we are using 10 rating buttons in this case, we need to create 10 automation rules individually for each button. In each automation rule, we must first set the criteria as:
If the NPS_Score is set to be empty and
If the NPS_Score_Temp= 1 to 10 (say for example for button 1 we need to set the NPS_Score_Temp which equals 1).
Also, we are setting the Rule Action,
In the Rule Action, we are going to change the NPS_Score to respective rating button. For example for rating button 1. We need to change the NPS_Score to 1 in the Rule Action.
Finally, save and activate the automation rule.
Step 4: Create Email Template Feedback Links (Use HTML and CSS)
You can paste the endpoint URL from the form handler, and in the link, you need to append the recipient’s email address and set the NPS_Score to the respective button value. In this case, we are setting it as 1. The Recipient. Email will store the email address of the prospects who are providing the feedback/survey, and the score is set as 1 for the first button. Here, the score refers to the form handler’s Score field..

Step 5: Test it and send it to the target audience
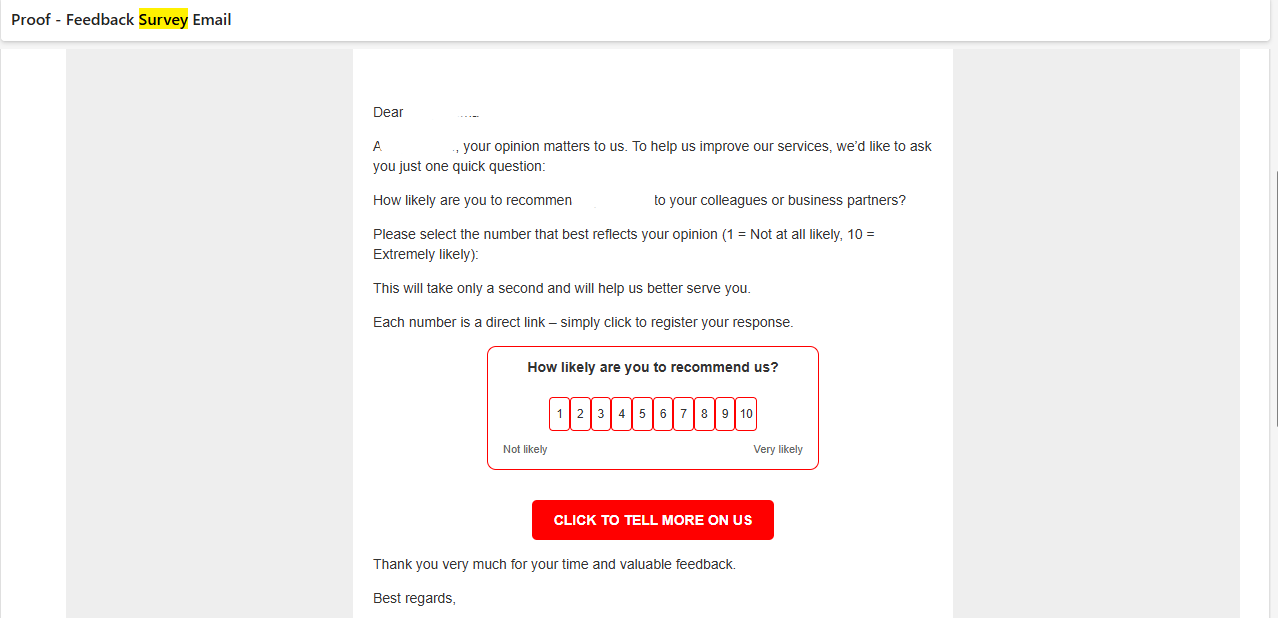
Finally, send it to your peers to test the functionality of the button as part of quality analysis. After testing the survey form’s functionality, send it to the mass or target audiences. In this way, we can receive responses from customers or stakeholders who genuinely wish to provide feedback, which will be helpful for the business. Please refer to the image below for reference.
Advantages in Adding Feedback/Survey forms in Builder
Simple and easy design.
We can modify the styles and content as per our business requirement.
There are many ways we can include the Survey link (<iframe></iframe>, <script> </script> and <button></button>), but this is the only way we can embed the Survey directly in the Pardot Emails.
It will be helpful for business to track the audience responses and Feedback.
Benefits of Getting Feedback
Boost the customer interaction.
Help us to find the valuable prospects.
To find a better solution for the emerging businesses.
Help us to understand the prospects’ requirements.
Limitation
The only limitation in Pardot Survey is that we can track only the initial click of a specific user who clicks the feedback button in the survey form we have embedded.
Conclusion
Hope you found this information fascinating about how we can add feedback/survey forms directly in Pardot Emails and how easy it is to build them using the Content Builder in Pardot. Follow our upcoming blog updates to boost your marketing strategies!