

CRM Settings To Integrate Salesforce Marketing Cloud
Learn how to integrate Salesforce Marketing Cloud with Salesforce CRM (Sales/Service) by configuring user layouts, permissions, and API settings.
By Vijay Raju Kumaravel
Salesforce Developer
CRM Settings To Integrate Salesforce Marketing Cloud With Salesforce CRM (Sales/Service)
After installing the managed package, your Salesforce CRM account needs to undergo a few preliminary configuration changes. If you haven't already, go ahead and use your admin credentials to access your Salesforce CRM account.

Modify User Page Layout
Click on Setup > Object Manager > User in the Salesforce CRM organization.
Click User Page Layouts under User.
Click Edit next to User Layout under User Page Layouts.
To see the Additional Information portion of the user page layout, scroll down.
From the palette, drag Marketing Cloud for AppExchange Admin to the user page layout's Additional Information area.
Drag AppExchange User Marketing Cloud to the same area.
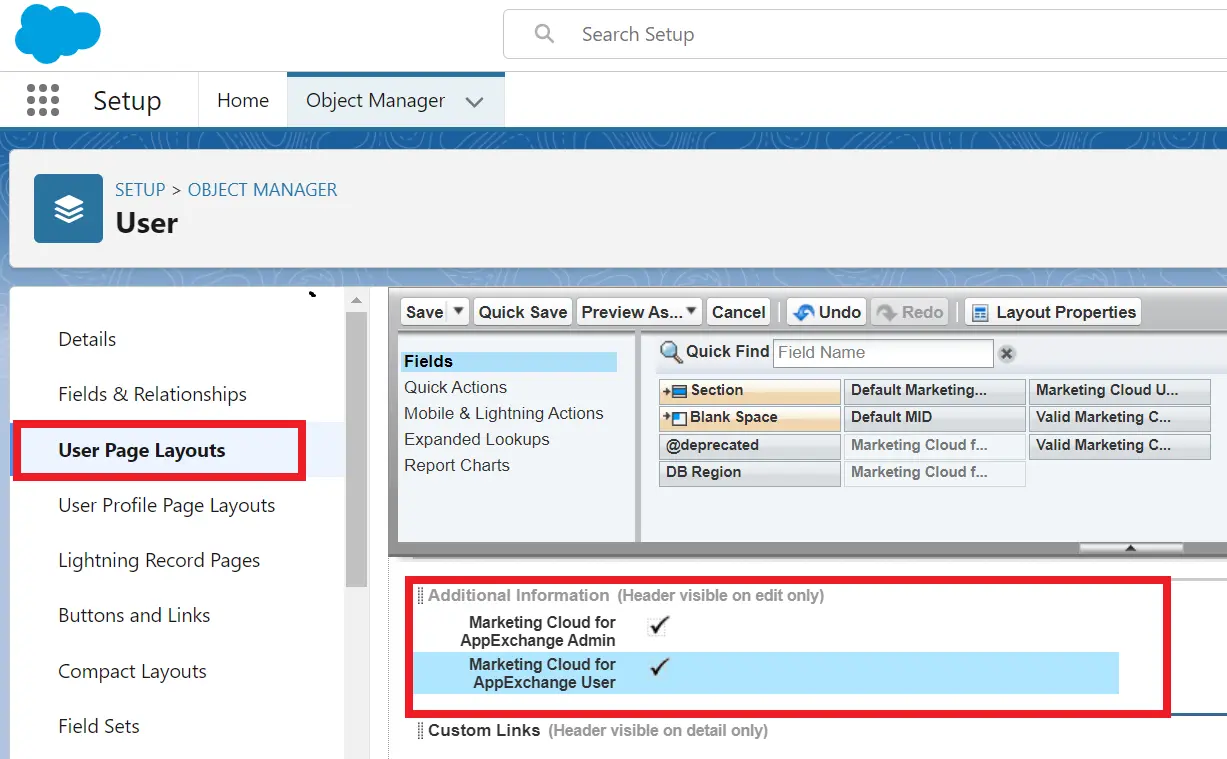
Click Save.
Modify User Page Layout
Click Setup > Object Manager > Lead in CRM Setup.
Select Page Layouts.
Click Edit after selecting a page layout to work with.
Choose Related Lists from the tool palette options in the layout you have chosen.
To make a new linked list, drag Email Sends from the palette to the bottom of the Lead page layout (1).
Next, build a new linked list by dragging Individual Email Results from the palette to the bottom of the Lead page layout.
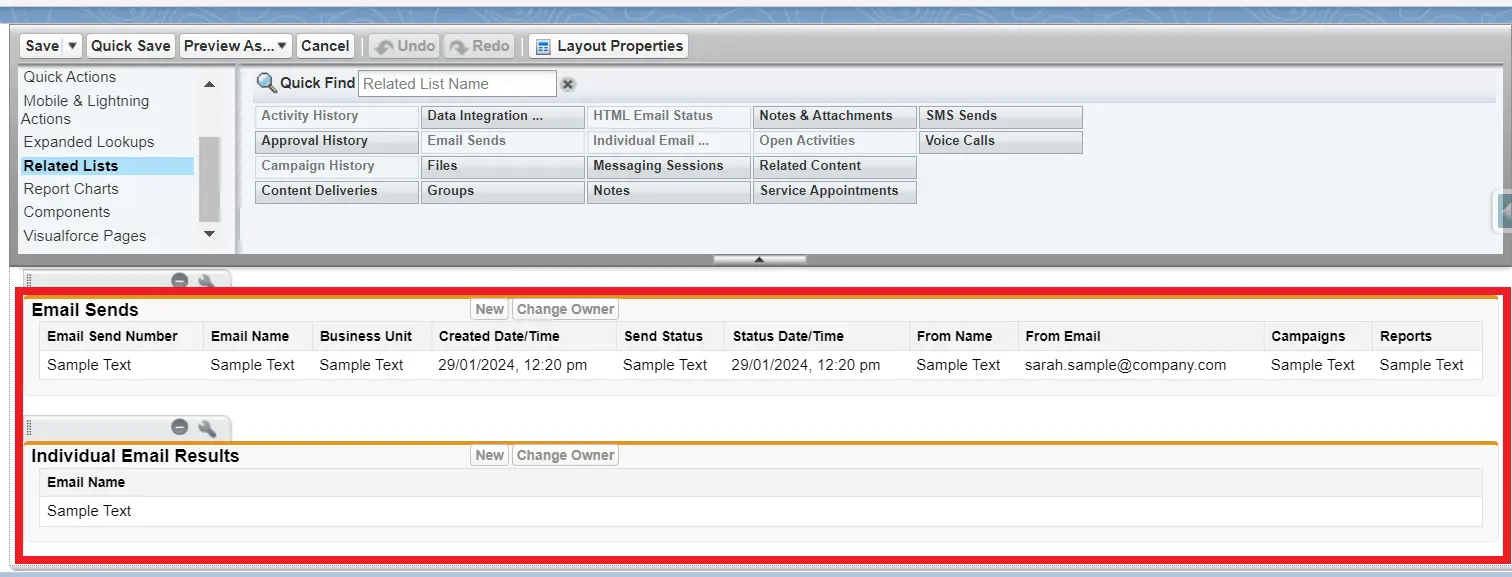
Then, from the palette selections, choose visualforce pages.
From the palette, drag Lead Actions to the Lead page's Description Information area.
Click Save.
To overwrite users' related list customizations, click "Yes."
Change the Layout of the Contact Page
Note: Use the guidelines in the previous section to modify the contact page's appearance.
Grant Admin Access to Your Marketing Cloud Connect
- In the Quick Find box, type "Users" and then click "Users."
- After identifying the admin user, click Edit next to their name.
- Choose Marketing Cloud for AppExchange Admin and Marketing Cloud for AppExchange User under Additional Information.
- Click Save.
Set up the CRM API User
Type Users into the Quick Find box after selecting the Setup option, then select Users.
Select "New User."
First Name: Test.
Last Name: Admin-User.
Email: Make use of a working email address.
Username: Unique and in the format of an email address.
User License: Salesforce.
Profile: System Administrator.
Role: NA.
Make sure to tick the Marketing User box under General Information.
Check the boxes for Marketing Cloud for AppExchange Admin and Marketing Cloud for AppExchange User under Additional Information.
To generate a new password and instantly alert the user, click the box.
Click Save.
Create a Salesforce CRM Permission Set
Select Setup, type Permission Sets into the Quick Find box, and then select Permission Sets and New.
Label: Marketing Cloud Connected App.
Description > Provides access from CRM to Marketing Cloud.
Click Save.
Click Manage Assignments, then Add Assignments.
Select the CRM API User account that you created in the previous stage.
Click Assign, then Done.
Update Field-Level Security
Click Leads after selecting Setup > Object Manager > Leads.
Click on Relationship & Fields.
Click Email Opt Out in the list of standard fields.
To enable field-level security, click Set
For every user profile, check the Visible option.
Click Save.
Click Contacts after selecting Setup > Object Manager > Leads.
Click on Relationship & Fields.
Click Email Opt Out in the list of standard fields.
To enable field-level security, click Set.
For every user profile, check the Visible option.
Click Save.
After configuring your CRM settings, please move on to Configure Marketing Cloud Engagement to complete the necessary marketing integrations.Configure Marketing Cloud Engagement