

Implement Multi-Language Translations And Custom Labels
Learn how to implement multi-language in Lightning Web Components (LWC) using custom labels and translations via the Setup page and Tooling API.
By Dharma Prakash Eswaran
Senior Salesforce Developer
How to Implement Multi-Language in Lightning Web Components (LWC)?
How to create custom labels and translations?
Custom labels can be created from the setup page and apex code.
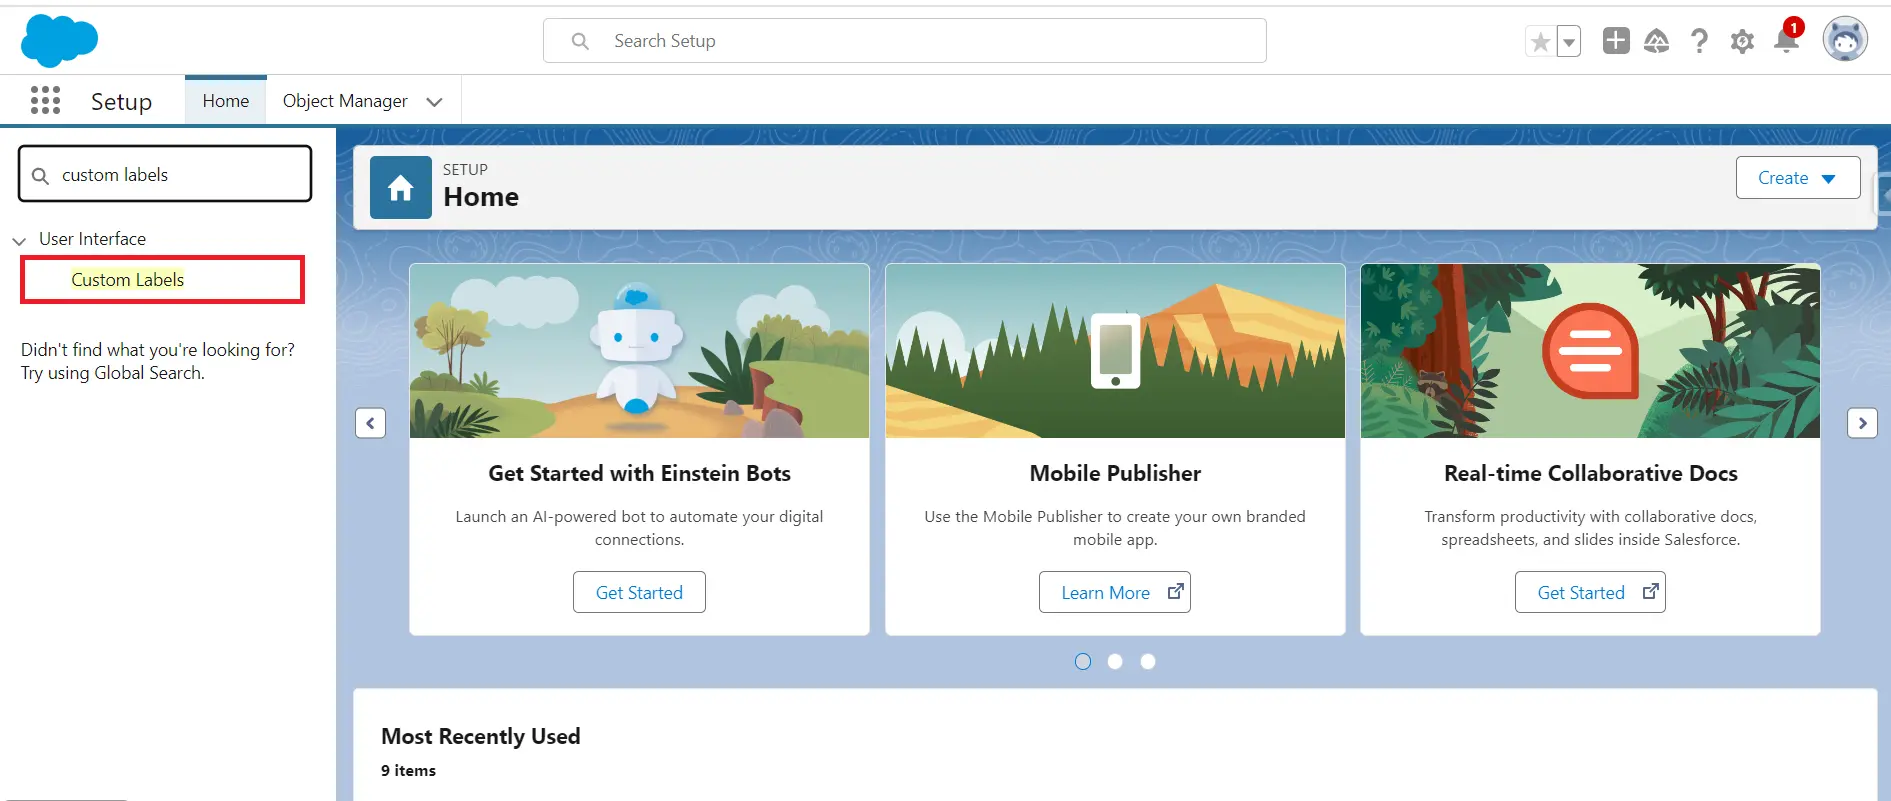
Create custom labels from the setup page
Go to setup → Search for Custom Labels and Select Custom Labels.
- Click the New Custom Label button. Fill in the Label Name, and value details and Click Save.

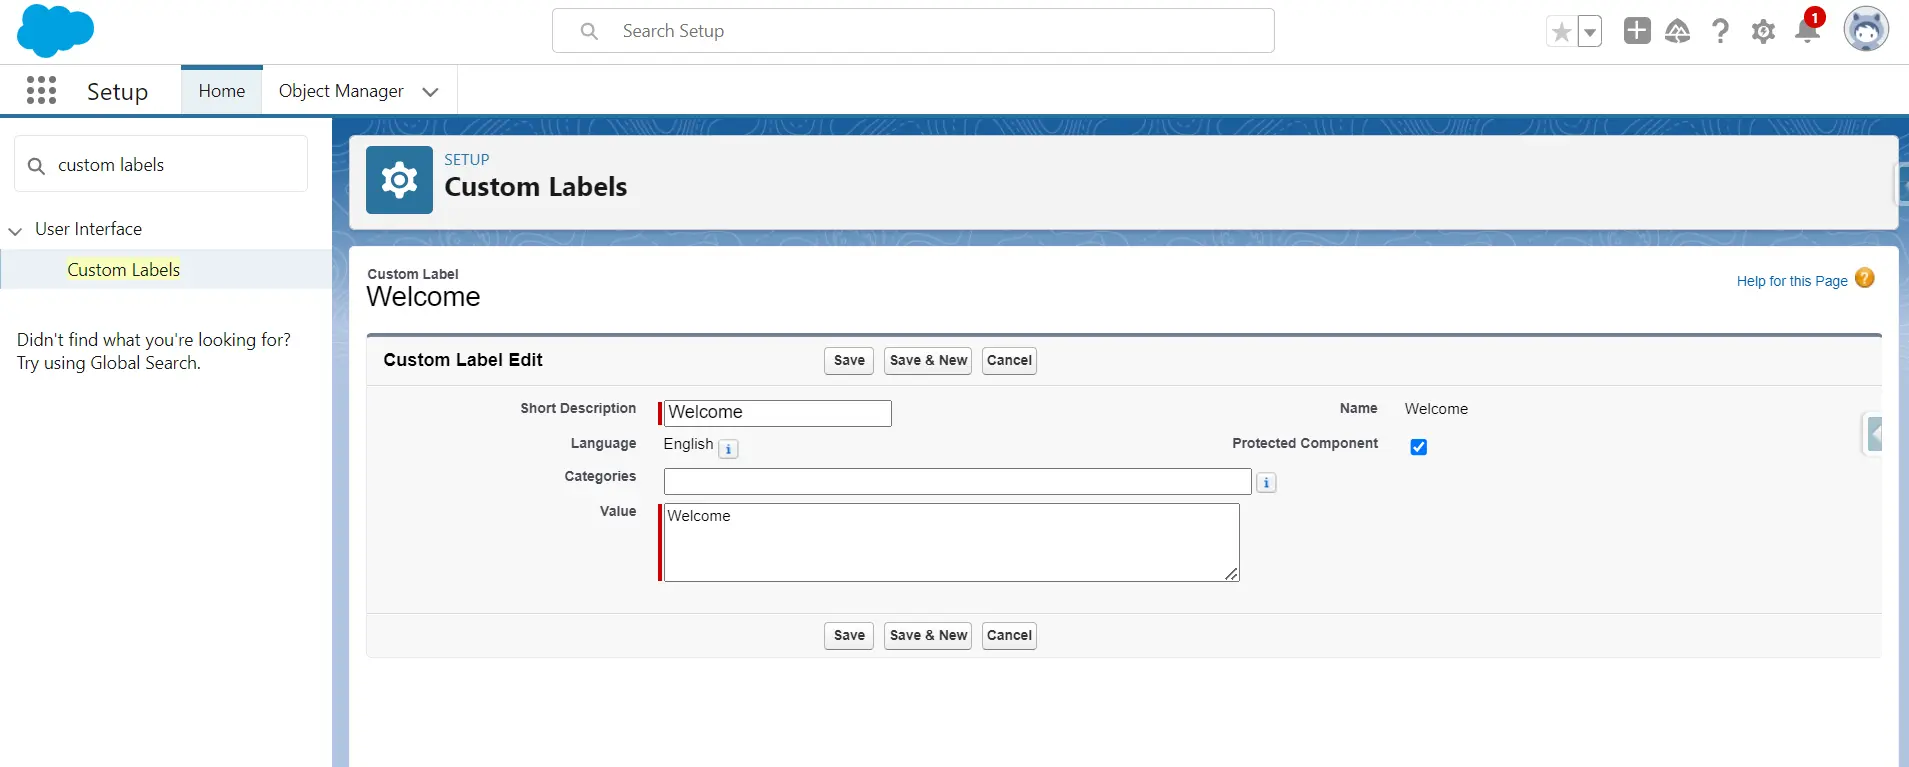
Open the newly created label and click “New” in the Translation section. Select language, add translation value, and save.
Create custom labels from Apex
Custom Labels are records of the standard object called External String and translations are stored in its child object named external String Localisation. Both can be accessed from the Tooling API.
Create a Custom Label by using Tooling API

Sample Request Body:

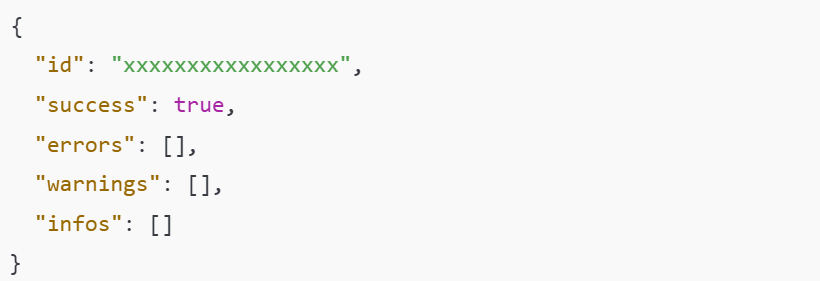
Sample Response Body:
response.getBody() will return the following response with custom label Id.
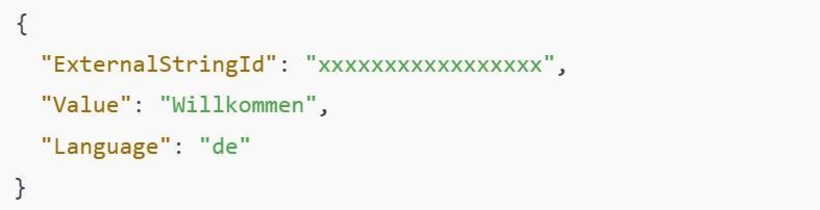
Create Translation by using Tooling API

Sample Request Body:
Another salesforce standard Functionality Translation workbench can be used for providing translations for Custom fields, Actions, Lightning page Tabs, Picklist values, etc...
Now you have learned about how to create custom labels. Use the link below to Know about next step of How to import custom labels in Lightning web components