

Salesforce User Access Policies: Complete Guide
A complete guide to configuring, automating, and managing Salesforce User Access Policies for secure, efficient, and compliant access control.
By Abirami Rajendran
Senior Salesforce Developer
Salesforce User Access Policies: Complete Guide
Introduction
In today’s digital-first world, securing data is more than just a checkbox — it’s a business imperative. Salesforce’s User Access Policies give organizations the tools to control who can access their environment, under what conditions, and with what level of permissions. In this blog, we’ll explore what User Access Policies are, why they matter, and how to set them up, with practical examples you can apply right away.
What Are User Access Policies?
User Access Policies are declarative rules that continuously evaluate users and automatically grant or remove access based on defined conditions. They help ensure the right access at the right time, without manual intervention.
Using User Access Policies, admins can:
- Control login behavior based on context
- Automatically assign or revoke permissions
- Enforce adaptive security like MFA
- Reduce risk by applying least‑privilege access
- Respond instantly to access‑related changes
Key Capabilities of User Access Policies
- Control login behavior based on conditions (location, role, profile, device)
User Access Policies let admins control how and when users can log in based on specific conditions.
How this works in practice:- You can restrict access based on IP address ranges (for example, allow logins only from the corporate network).
- Different rules can apply to different roles or profiles (for example, contractors vs full‑time employees).
- You can enforce stricter controls when users log in from untrusted devices or unusual locations.
Why this matters:
This helps prevent unauthorized access if credentials are compromised and ensures users only log in under approved conditions.
Automatically grant or remove permission sets, group memberships, or licenses
Instead of manually assigning or removing access, User Access Policies can do this automatically when conditions are met.
Examples:
When a user’s profile changes to Support Agent, the policy automatically:- Grants a Support permission set
- Removes Finance access
When a contractor’s end date is reached:- Removes Salesforce licenses
- Revokes access to sensitive groups
Business benefit:
- Eliminates human error
- Saves admin time
- Ensures access is always aligned with the user’s role
Enforce multi‑factor authentication (MFA)
User Access Policies can require MFA either:
a. For all users, or
b. Only when certain risk conditions are detectedExamples:
- Require MFA when users log in from outside the company IP range
- Trigger MFA for users with elevated permissions (admins, finance, healthcare users)
Why this is important:
MFA significantly reduces the risk of account breaches, even if passwords are stolen.
- Reduce risk by limiting access to sensitive data
Policies ensure users only have the minimum access they need—often referred to as the principle of least privilege.
How it helps:- Automatically remove sensitive permission sets for users who no longer need them
- Prevent access to critical data based on role, department, or region
- Ensure compliance with regulations like GDPR, HIPAA, or SOX
Example:
A support user can access case data but is automatically restricted from billing or payroll information.
- Automate responses to access changes or risky conditions
User Access Policies continuously evaluate users and respond automatically when conditions change.
Examples:- If a user’s department changes → update permissions immediately
- If a user logs in from an unusual country → enforce MFA or restrict access
If a user becomes inactive → remove unnecessary licenses and permissions
Why this is powerful:
Security is no longer reactive. Salesforce takes action in real time, reducing the window of exposure and improving overall governance.
How to Set Up User Access Policies
- Go to Setup → Click the gear icon and select Setup.
Search for User Access Policies → Use the Quick Find box.
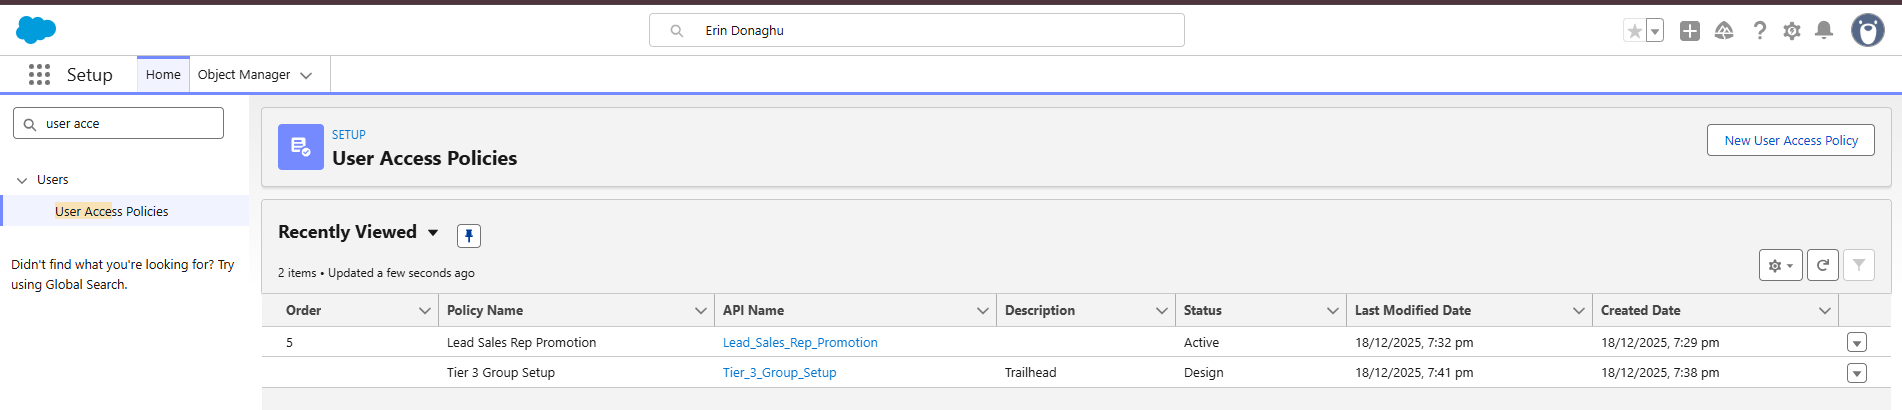
Create a New Policy → Click New Policy,
Enter a Policy Name and Description,
Save the policy (it will be created in Design status).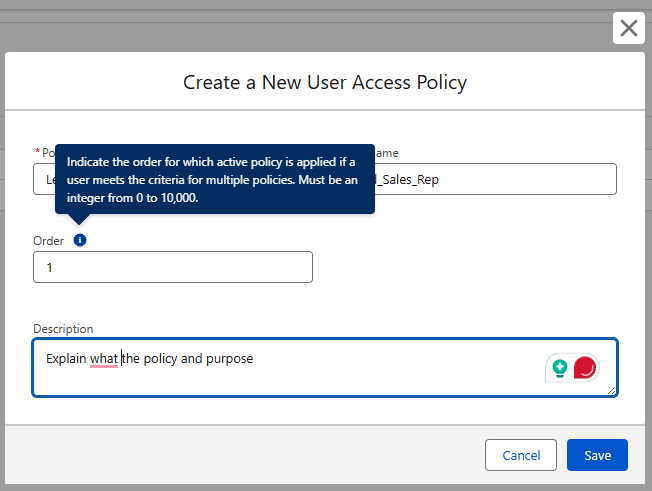
Define Conditions → Choose criteria like profile, role, or location.
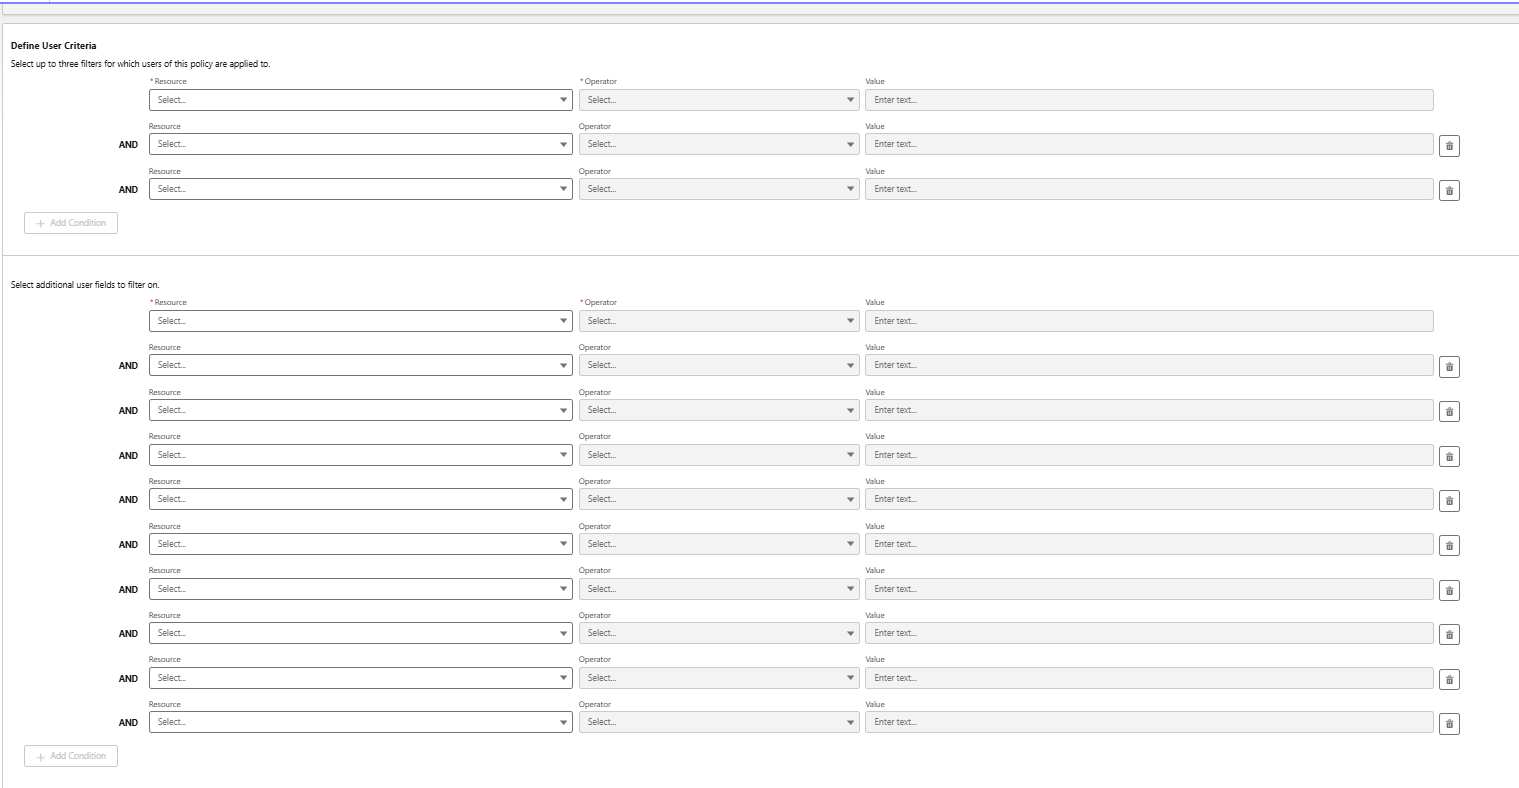
Conditions determine which users the policy applies to. There are two sections to configure:
1. User Filters: You can use up to three filters to narrow down which users a policy applies to. The filters can be based on things like
Profile, Role, Permission Set, or Group, Package License, and Public Group or Queue.
2. Additional User Fields: You can add up to ten extra fields to refine the user selection even further. These can be either standard or custom fields from the User object,
such as Text, Picklist, Number, or Checkbox fields. Policies will then apply only to users who meet the criteria you set in these fields.
The policy will apply only to users who meet both the User Filters and Additional User Field criteria.
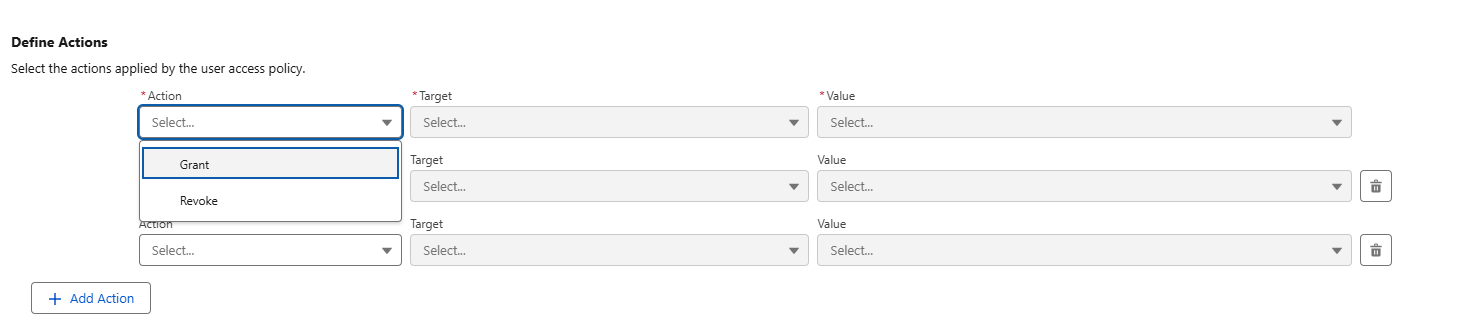
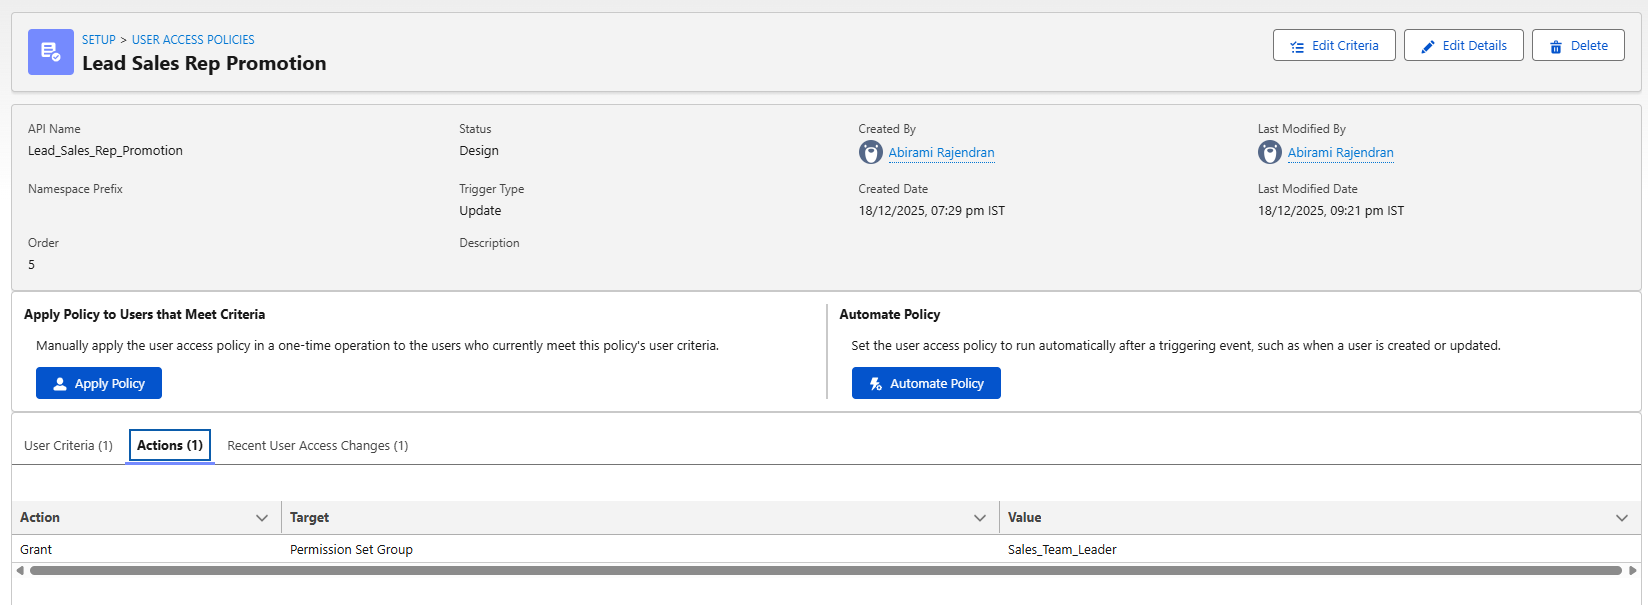
Define Action in Salesforce User Access Policies
An action is what happens after the policy criteria are met. You can either grant access (like permission sets, groups, or licenses) or remove access.
Each policy can include multiple actions, so you can combine them — for example, granting a support permission set while removing finance access.
Setting the User Access Policy to Run Automatically
Once you’ve set up the criteria and actions, the next step is to decide whether the User Access Policy should run automatically. By default, the policy status is “Design”, which means it is not active yet. The policy will stay in this Design state until automation is enabled. Only after automation is turned on will Salesforce start applying the policy to users automatically.
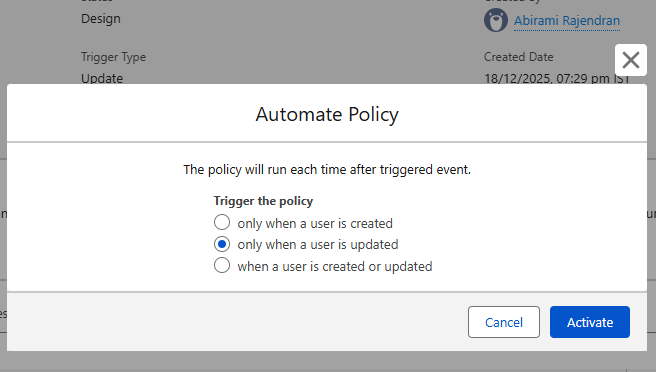
When you click the Automate Policy button, Salesforce shows you a few options that control when the policy should run. These options are similar to record‑triggered Flow settings (except there’s no option for delete). You can choose to run the policy:1) When a user is created or updated
2) Only when a user is created
3) Only when a user is updatedAfter selecting the option that fits your requirement, click Activate. Once activated, Salesforce will automatically run the policy based on the trigger you selected.
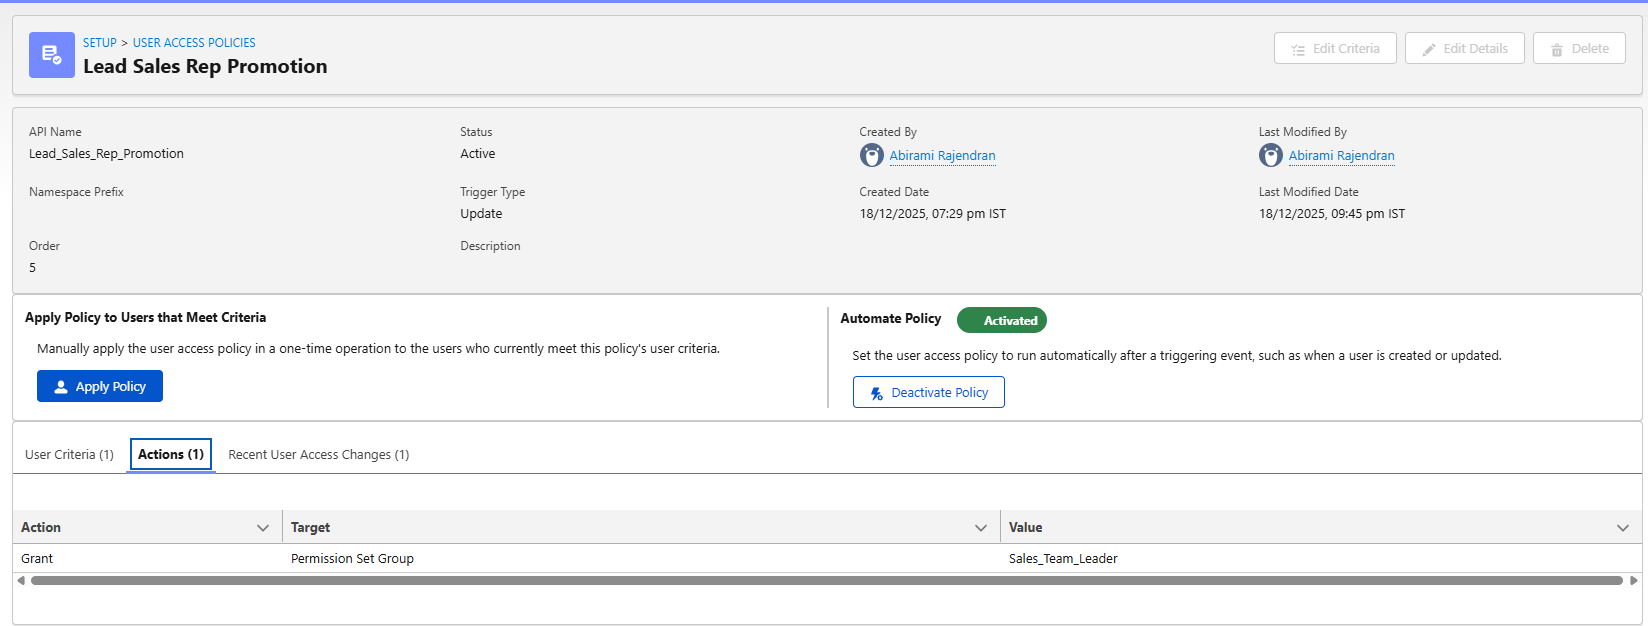
Once you choose when the policy should run, the Status of the policy changes to “Active.” At this point, the options to edit or delete the policy are disabled (greyed out).
If you need to make any changes later, you must first deactivate the policy. After deactivating it, you can update the criteria or actions as needed. Once the changes are complete, click Automate Policy again to reactivate the policy.
You do not have to automate the User Access Policy if you don’t want to. This is useful for one‑time access changes, such as migrating access for multiple users at once,
where you want full control over when the policy runs.
When you click Apply Policy, Salesforce will ask whether you want to apply the policy:
1) Only to specific selected users, or
2) To all users who meet the policy criteria
After you make your selection, the policy is applied, and the access changes take effect.
Whether the User Access Policy runs automatically or manually, any access changes it makes are recorded in the Recent User Access Changes tab for each user.
For every time the policy runs, you can see:
1) Whether the run was manual or automatic
2) Who ran the policy
(i) If it ran automatically, the user would show as Automated Process
You can also drill down into the details to see exactly what access was granted or removed, such as permission sets, groups, or licenses.
Best Practices
- Start with a baseline policy
Enforce MFA for all users to establish a strong security foundation. - Use location‑based rules for higher risk areas
Apply stricter access controls or additional authentication for users logging in from high‑risk regions. - Review audit logs regularly
Monitor user access changes to quickly identify unexpected or unauthorized activity.
Conclusion
User Access Policies in Salesforce aren’t just about locking doors — they’re about opening the right ones safely. By combining conditional rules, multi‑factor authentication (MFA), and adaptive security, organizations can protect sensitive data while still enabling employees to work efficiently and productively.