

Understanding Email Domain Verification & DKIM in Salesforce
Email Domain Verification and DKIM in Salesforce help ensure secure email delivery by authenticating domains and preventing email spoofing and spam issues.
By Pradeepa Singaravelan
Associate Salesforce Developer
Understanding Email Domain Verification and DKIM in Salesforce
When I started exploring Email Domain Verification and DKIM in Salesforce, it felt quite confusing. I couldn’t find a clear, step-by-step guide that explained everything in one place. Most of my understanding came from Salesforce documentation, which is useful but not always beginner-friendly.
To simplify this process, I decided to write this blog. In this guide, I’ll explain how Email Domain Verification works, what DKIM means, and how you can set it up easily in your Salesforce org.
What is Email Domain Verification?
Email domain verification is a process that confirms you own the domain you are using to send emails through Salesforce. For Example: If you are sending email from test@pscompany.com salesforce need to verify that you own pscompany.com.
What are the Advantages?
Improves Email deliverability.
Prevent email from being marked as spam.
Builds trust with email providers.
Ensure secure communication.
What is DKIM?
DKIM (DomainKeys Identified Mail) is an email authentication method that adds a digital signature to outgoing emails. The signature allows the mailbox provider to verify that the email was actually sent by the claimed domain.
The DKIM signature is included in the email header and is validation by matching it with record published in the sender’s DNS (Domain Name System). This process uses encrypted keys to help detect forged or spoofed email addresses.
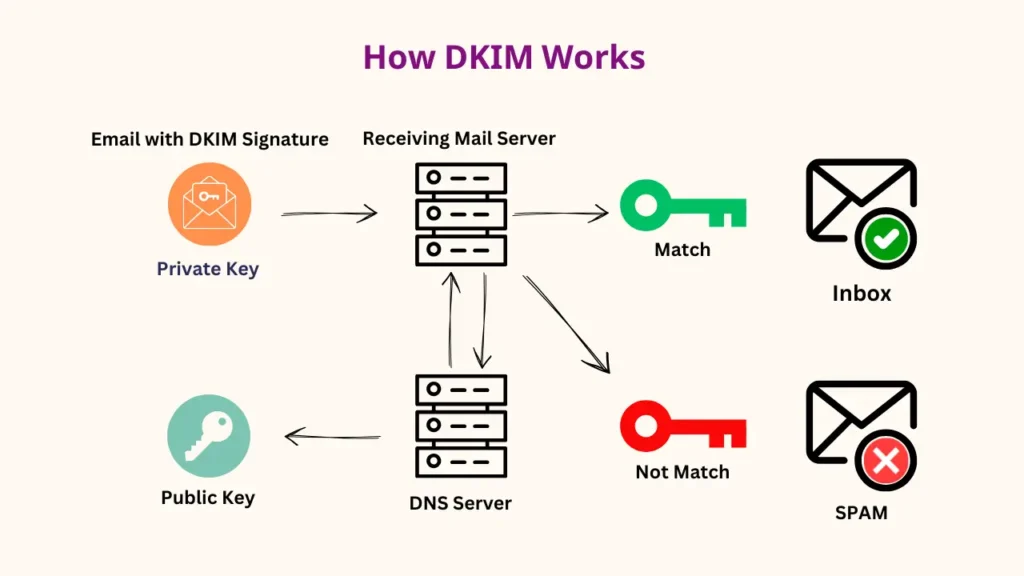
How DKIM Works?
When you configure DKIM, you are informing email providers that your email system is authorized to send email on behalf of your domain and that these emails are genuine and not spoofed.
DKIM links your domain to outgoing emails using DNS records, which act as proof that the email is authentic.
Key Components
A public key is published in your domain's DNS (TXT record).
A private key is securely stored on the sender's side.
Step-by-Step Process
Email is Sent: When you send an email, the mail server generates a digital signature using the private key.
Signature is Created: A hash (unique string) is created from parts of the email (like subject and body), then encrypted using the private key.
Signature is Added: This encrypted value is added to the email header as DKIM-Signature.
Public Key is Published: The public key is stored in DNS as a TXT record.
For example: selector._domainkey.example.com TXT "v=DKIM1; k=rsa; p=PUBLIC_KEY"
Email is Received: The receiving server checks the email header for the DKIM Signature.
Verification Happens: The server retrieves the public key from DNS, decrypts the signature, and compares it with the email content.
Verification Outcome: If the comparison is successful- The email is authenticated and delivered to the inbox, or if the comparison fails— The email may be rejected or marked as spam.
What is DNS?
The Domain Name System (DNS) is often called the phonebook of the internet. It allows users to access websites using easy-to-remember domain names instead of complex IP addresses. For example, when you type a domain like pscompany.com., your browser does not understand these names directly. Instead, DNS translates them into IP addresses, which computers use easy-to-remember domain names instead of complex IP addresses.
Why is DNS Needed for Email Verification?
Every domain must be authenticated before sending emails to ensure security and prevent spam. DNS helps in this process by:
Verifying domain ownership (using TXT records)
Identifying mail servers (using MX records)
Ensuring email authenticity (using DKIM records).
How DNS Works in Email Verification?
When you configure email services (like sending emails from your domain), DNS is used to verify and authenticate your domain. For example, when you use a domain like pscompany.com for sending emails:
You add specific DNS records (such as TXT, MX, DKIM) in your domain’s DNS settings.
These records act as proof that you own the domain.
Email services (like Salesforce or other platforms) check these DNS records.
If the records match correctly, the domain is verified successfully.
What is the difference between Authorized Email Domains and DKIM keys in Salesforce?
In Salesforce, Authorized Email Domains and DKIM (DomainKeys Identified Mail) serve different purposes in email management and security. Authorized Email Domains are used to control which email domains users are allowed to send emails from, ensuring that only approved domains (like your company domain) can be used and preventing misuse of unauthorized email addresses. On the other hand, DKIM is a security mechanism that authenticates outgoing emails by adding a digital signature to each message, which is verified using DNS records to confirm that the email genuinely comes from your domain and has not been altered. In simple terms, Authorized Email Domains restrict who can send emails, while DKIM ensures the email is trusted and not spoofed.
How to set up Domain Verification in Salesforce for email sending:
Step 1: Log in to your Salesforce org.
Step 2: In the Quick Find box, type “Authorized Email Domains” and select it.
Step 3: Click “Add” to create a new authorized domain.
Step 4: Enter your domain name (e.g., test.com).
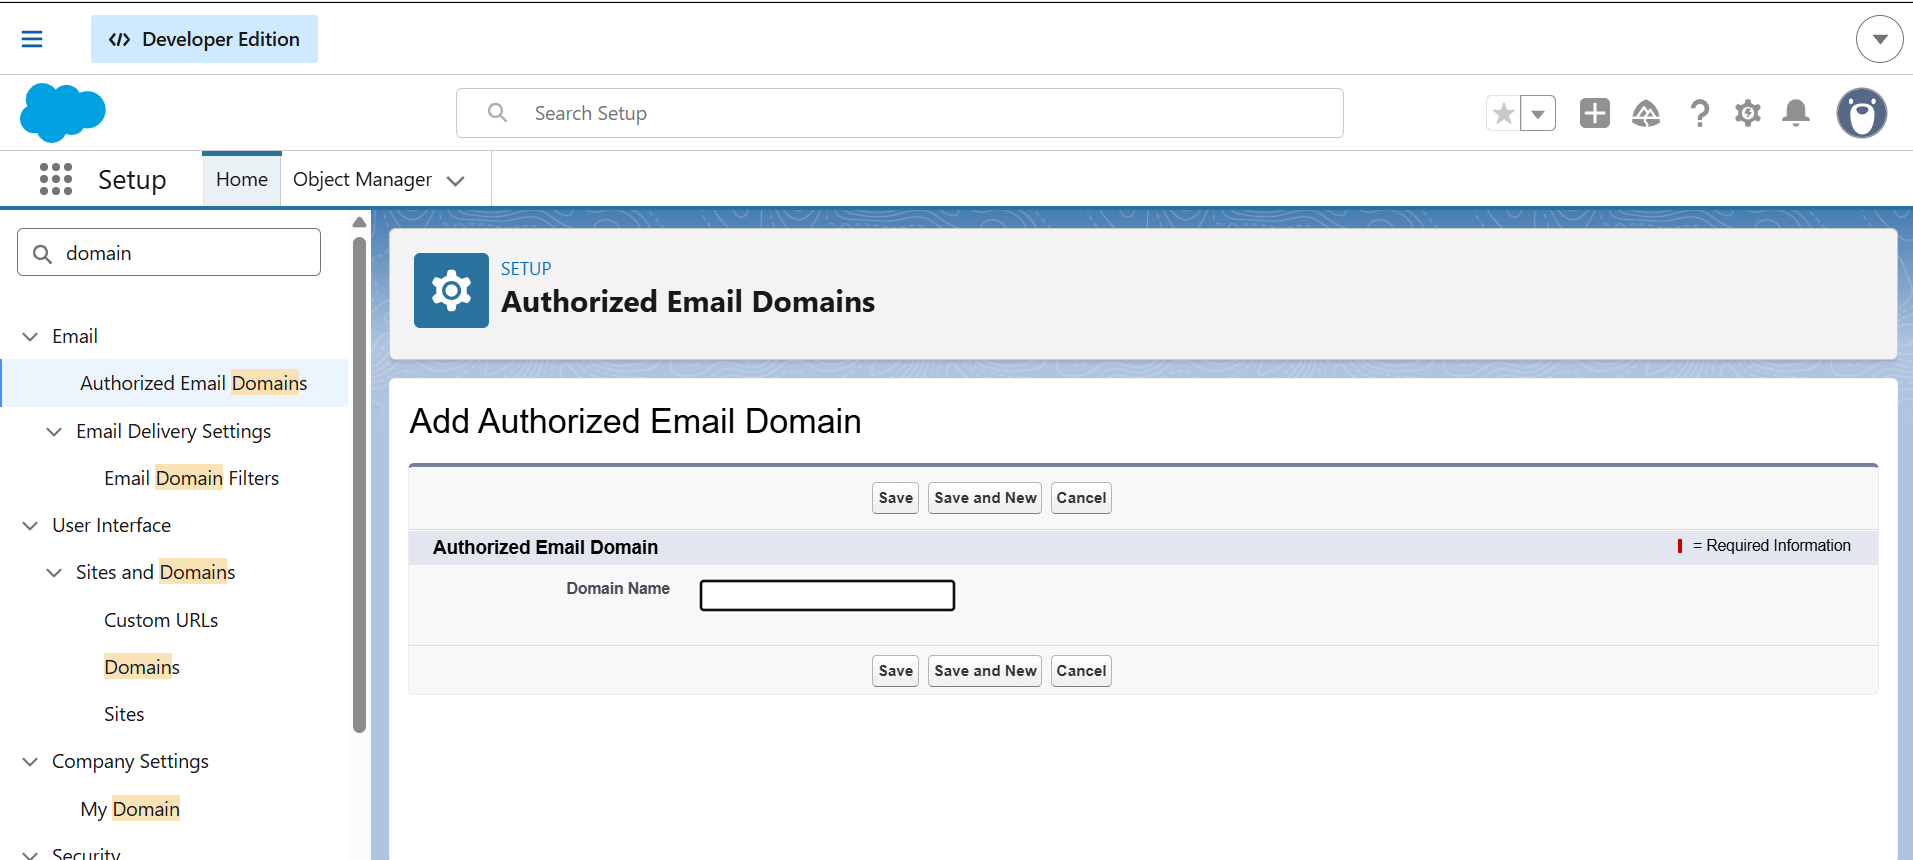
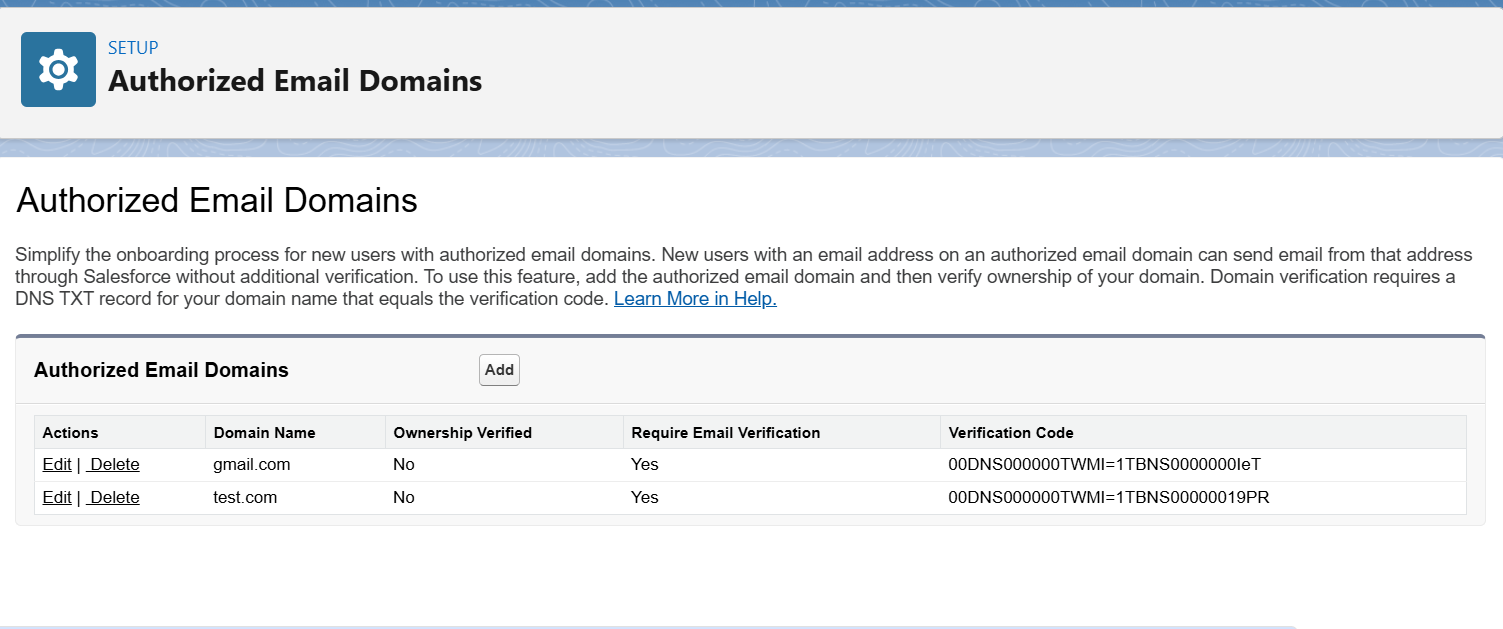
Step 5: Click "Save." Salesforce will generate a verification code for your domain.
Step 6: In the Quick Find box, type “DKIM Key” and select it.
Step 7: In the DKIM Key, click Create New Key.
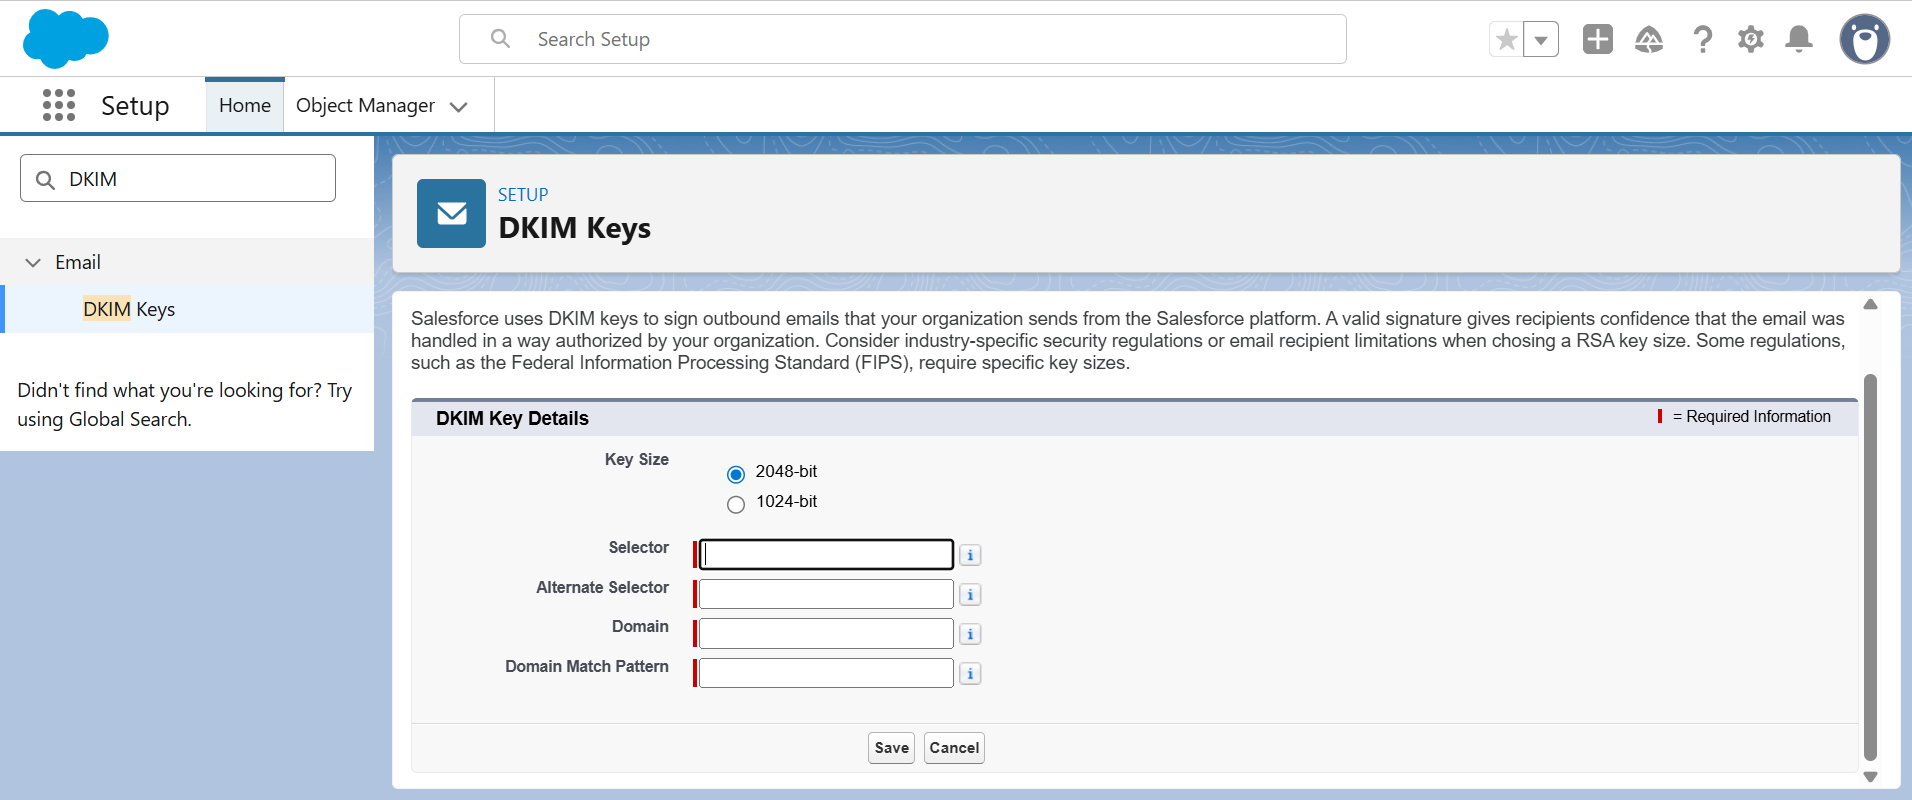
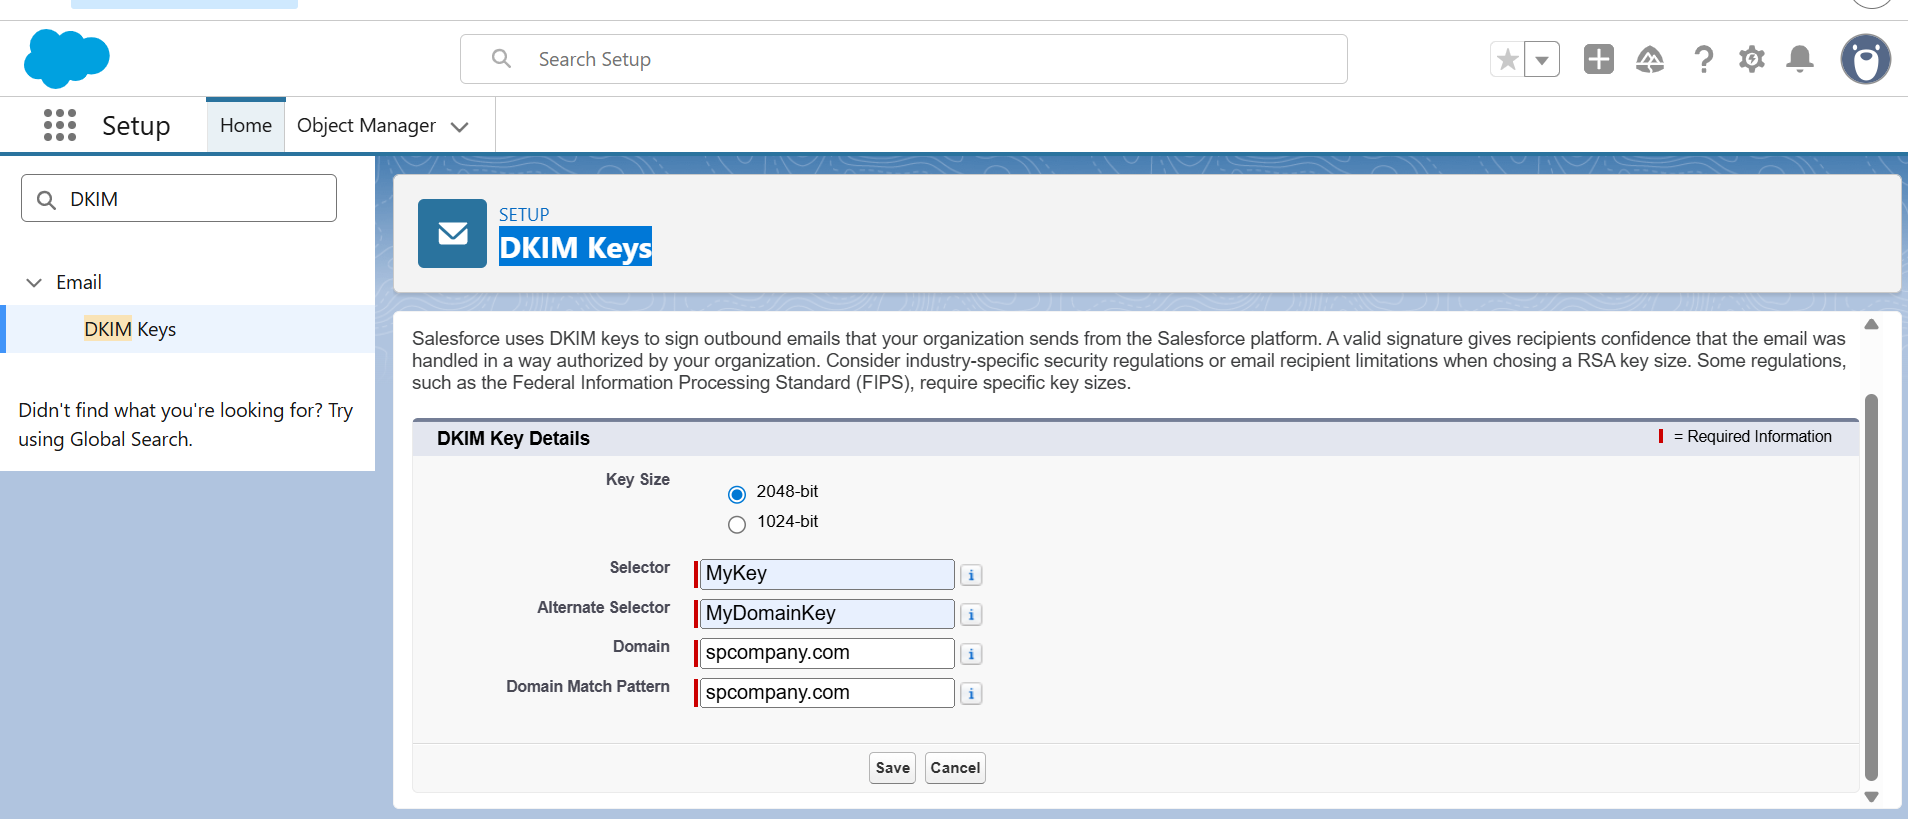
Step 8: Fill in the required fields, such as Selector, Alternate Selector, Domain, and Domain Match Pattern, as shown in the example modal below. Ensure that the values entered match your organization’s email domain configuration so that the DKIM setup works correctly.
Step 9: Go back to the DKIM Keys page and click on the newly created DKIM key. You will see the key details displayed, including the CNAME and Alternate CNAME records. These records need to be copied and added to your domain’s DNS settings to complete the DKIM configuration.
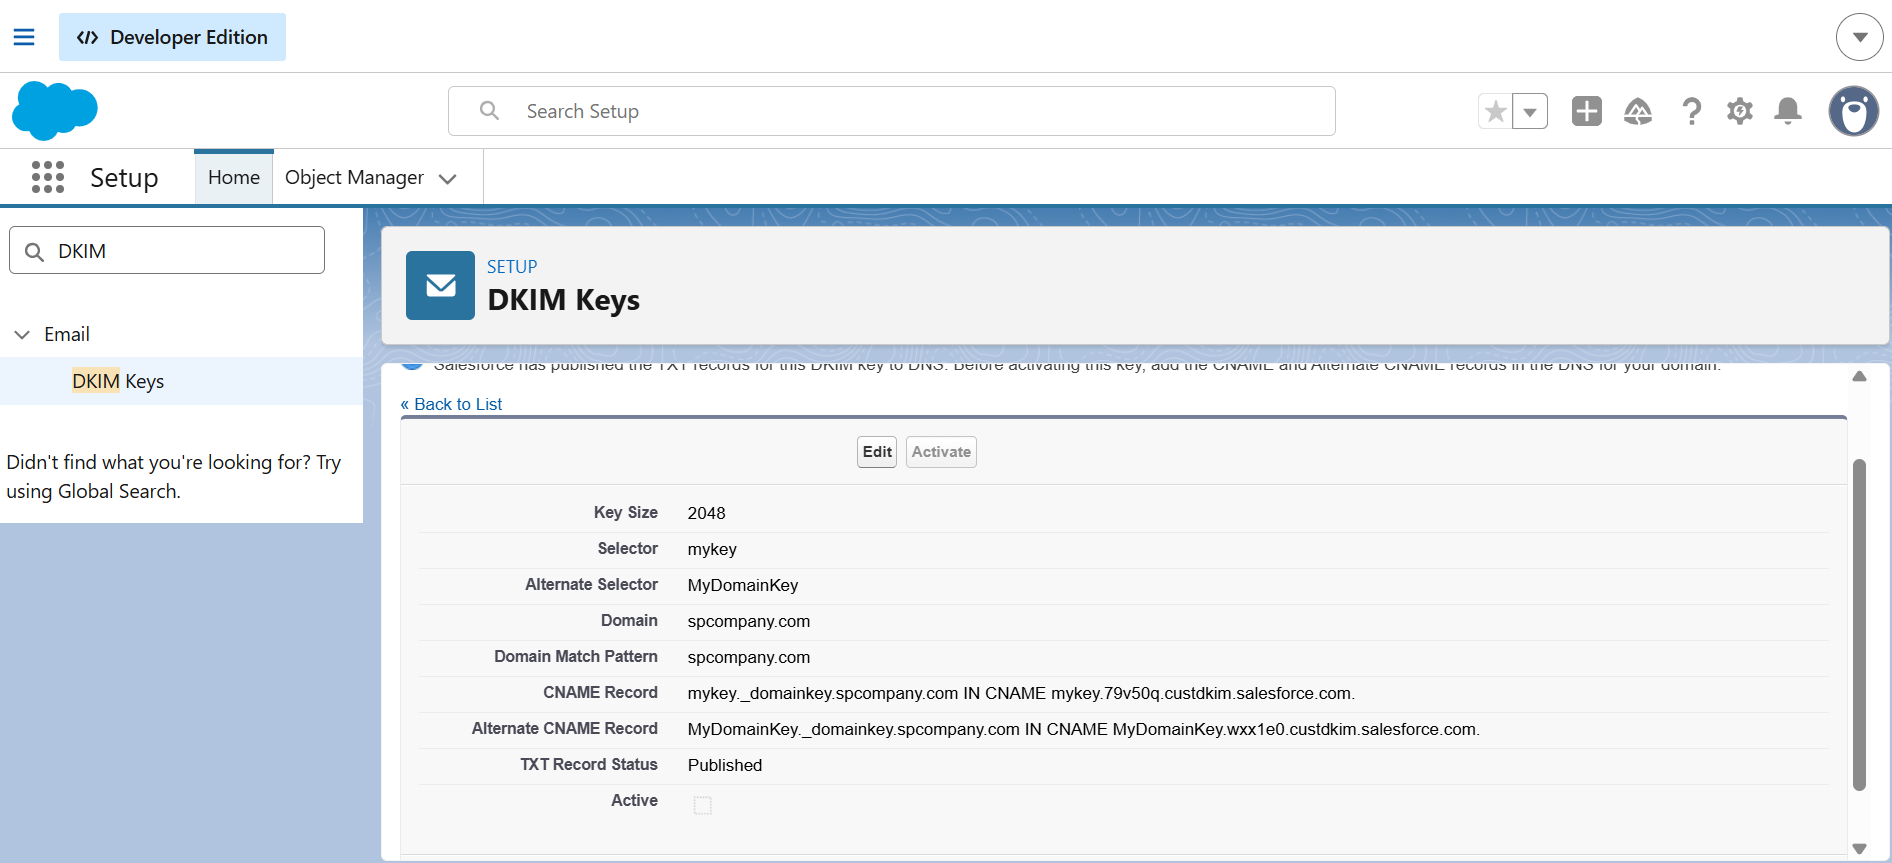
Step 10: Copy the CNAME Name (before “IN CNAME”) and Value/Target (after “IN CNAME”) for both primary and alternate records.

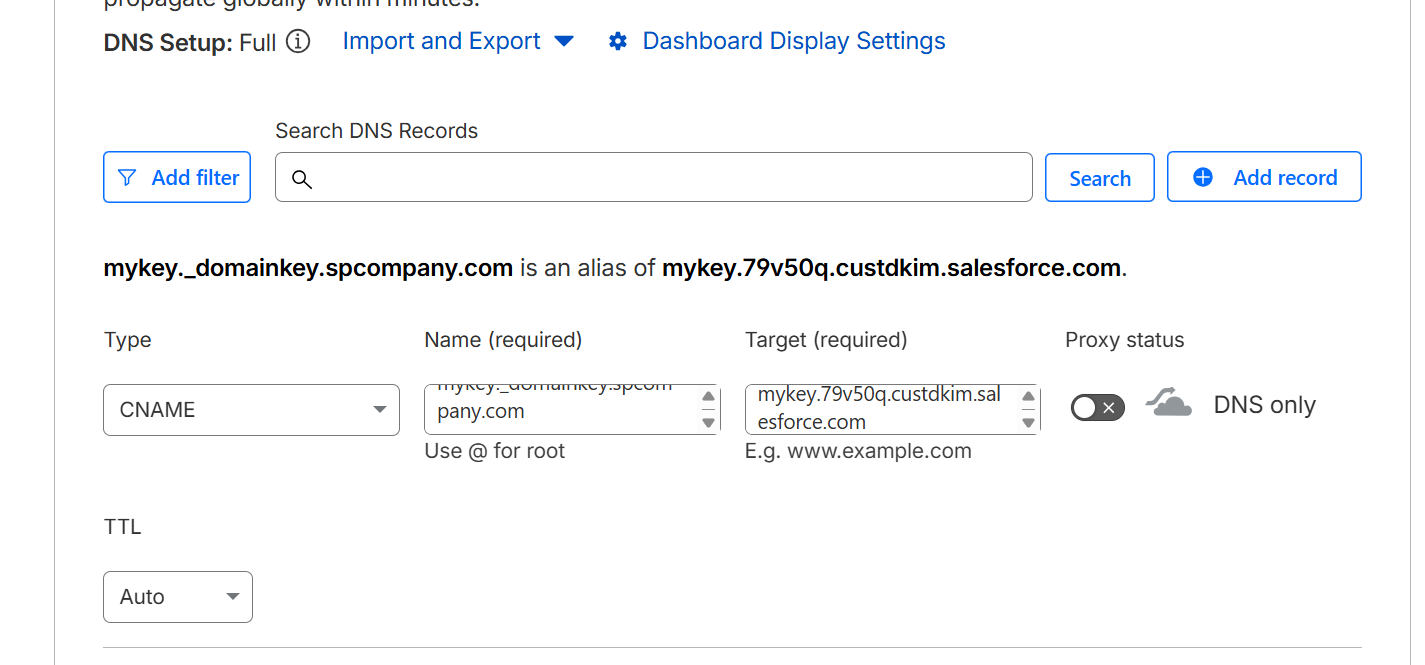
Step 11: Log in to your DNS provider and navigate to the DNS management settings. Add the CNAME records as shown in the image.
Before copying the values from Salesforce:
Copy the CNAME Name (this appears before the “IN CNAME” part).
Copy the CNAME Value/Target (this appears after “IN CNAME”)
Ensure both the primary and alternate CNAME records are added correctly in your DNS.
Step 12: After adding both the CNAME and Alternate CNAME records in your DNS, wait for a few minutes for the changes to propagate. Once the DNS is updated, the DKIM key status in Salesforce will automatically change to Active.

Step 13: Go back to your Salesforce org and activate the DKIM key. Once activated, your email domain will be authorized.
Step 14: Check if the DKIM key status is Active. If not, verify your DNS records and wait for propagation. If already active, proceed to testing.
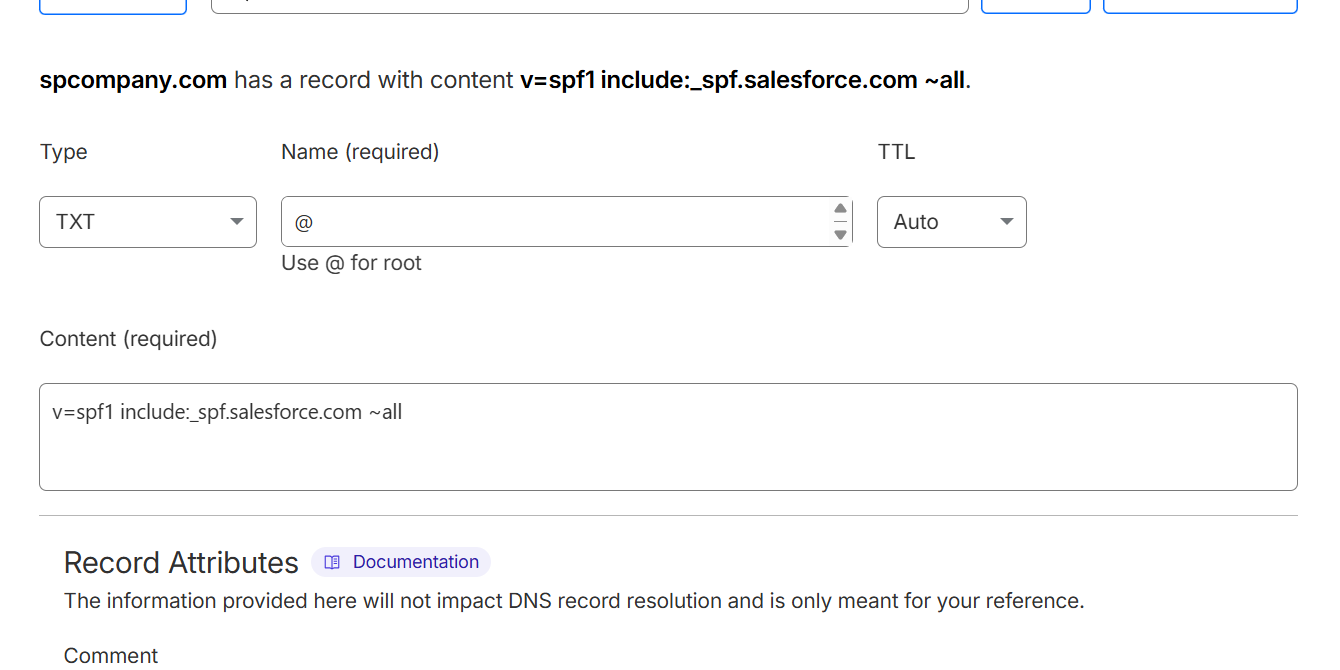
Step 15: Open your DNS server and add the required TXT record (SPF or verification record), then save the changes.
Step 16: Test your email by sending it through Flow, Apex, or standard Salesforce email functionality.
Conclusion
I hope this guide helps you clearly understand the Domain Key authorization process, how DKIM works, and how to connect it with your DNS server. Stay tuned for our next blog, where we’ll explore new Salesforce features.