

How to Configure CMS in Salesforce Account Engagement?
This blog explains how to configure the CMS(Content Management System) in Pardot and how content personalization uses CMS files to create personalized content.
By Sharan Kumar Mariappan
Assistant Software Developer
How To Configure CMS In Salesforce Account Engagement (Pardot)?
In Pardot, the term CMS (Content Management System) refers to content management inbuilt features within Pardot. It help managing marketing content used in campaigns. The generally used contents are email templates, forms, landing pages, file uploads, custom redirects and content personalization.
In this blog, we are initially going to set up, what is called content setup in the Pardot. This content setup will allow you to use a much more advanced, modern, easy, and user-friendly design system that the new Pardot offers. It allows you to add extra options and configure this builder for both landing pages and emails. Then, we will configure the CMS, to upload files.
Many times, beginners find it difficult to find what this is, so we will see this concept with some examples to make it easy to understand what CMS is and how to configure that. In addition we will understand the usage of configuring CMS with a simple email creation using email builder. In this scenario, we would understand how the files stored in the CMS will be used for building templates. It will also helps you to understand the importance of configuring CMS.
Setting Up a CMS & Handling Media Files
Step 1: Content Setup
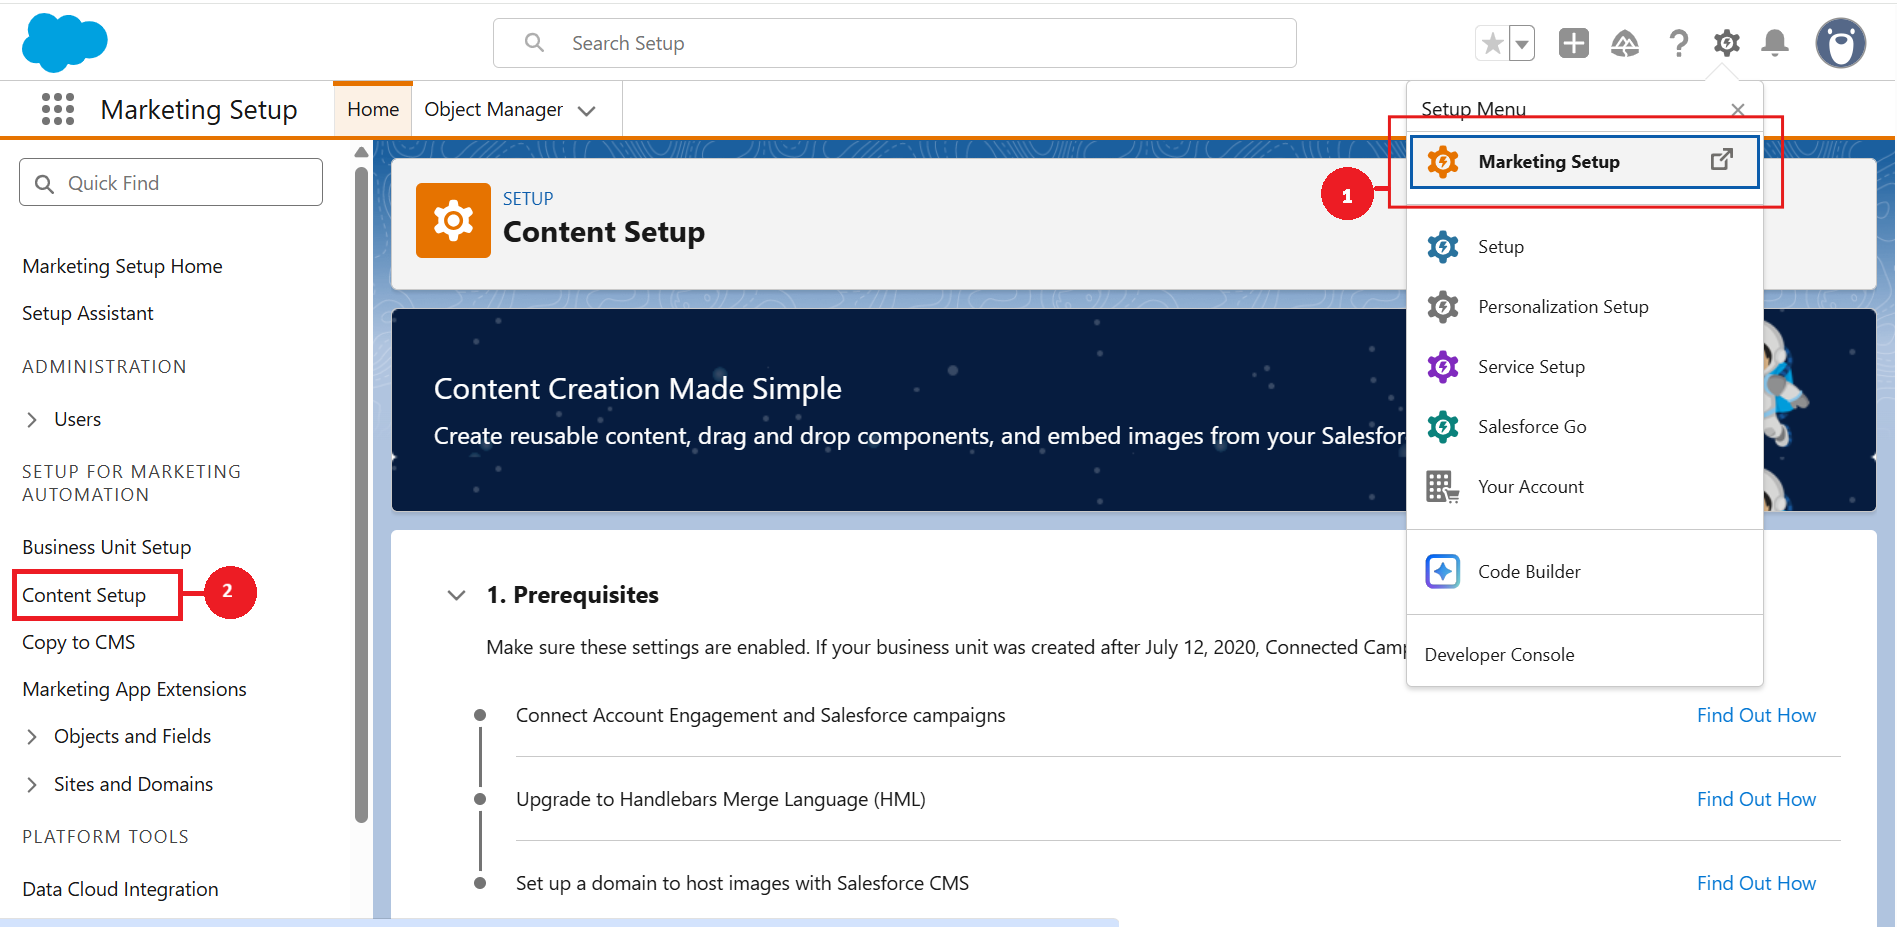
Navigate to the Marketing Setup (1) in the Setup menu, Select the Content Setup (2) from the Marketing Automation section.
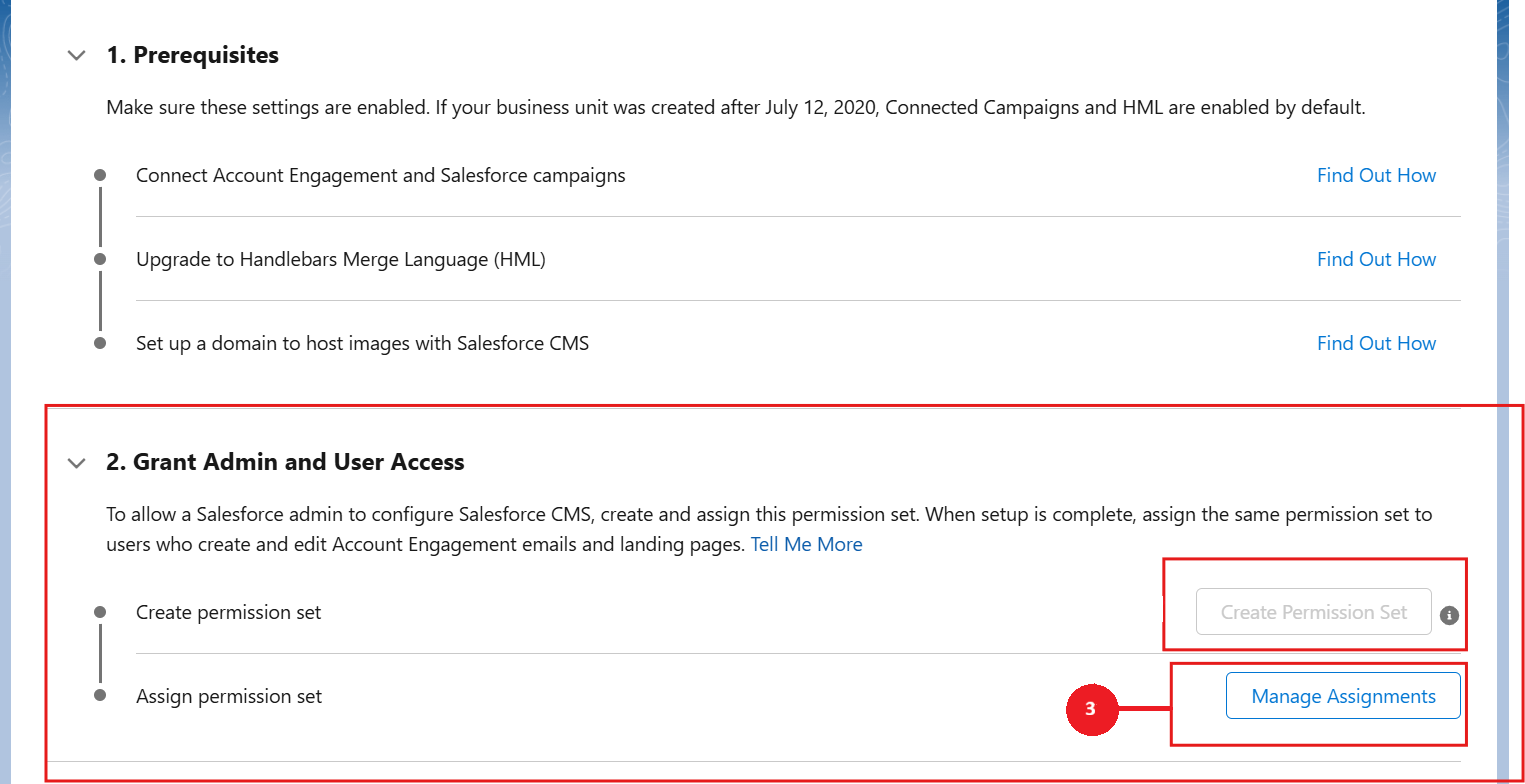
In the Grant Admin & User Access section, Permission sets in the step number one is inbuilt from year 2020 and configured by default. We need to click on the Manage Assignments (3) in the Assign permission set section.
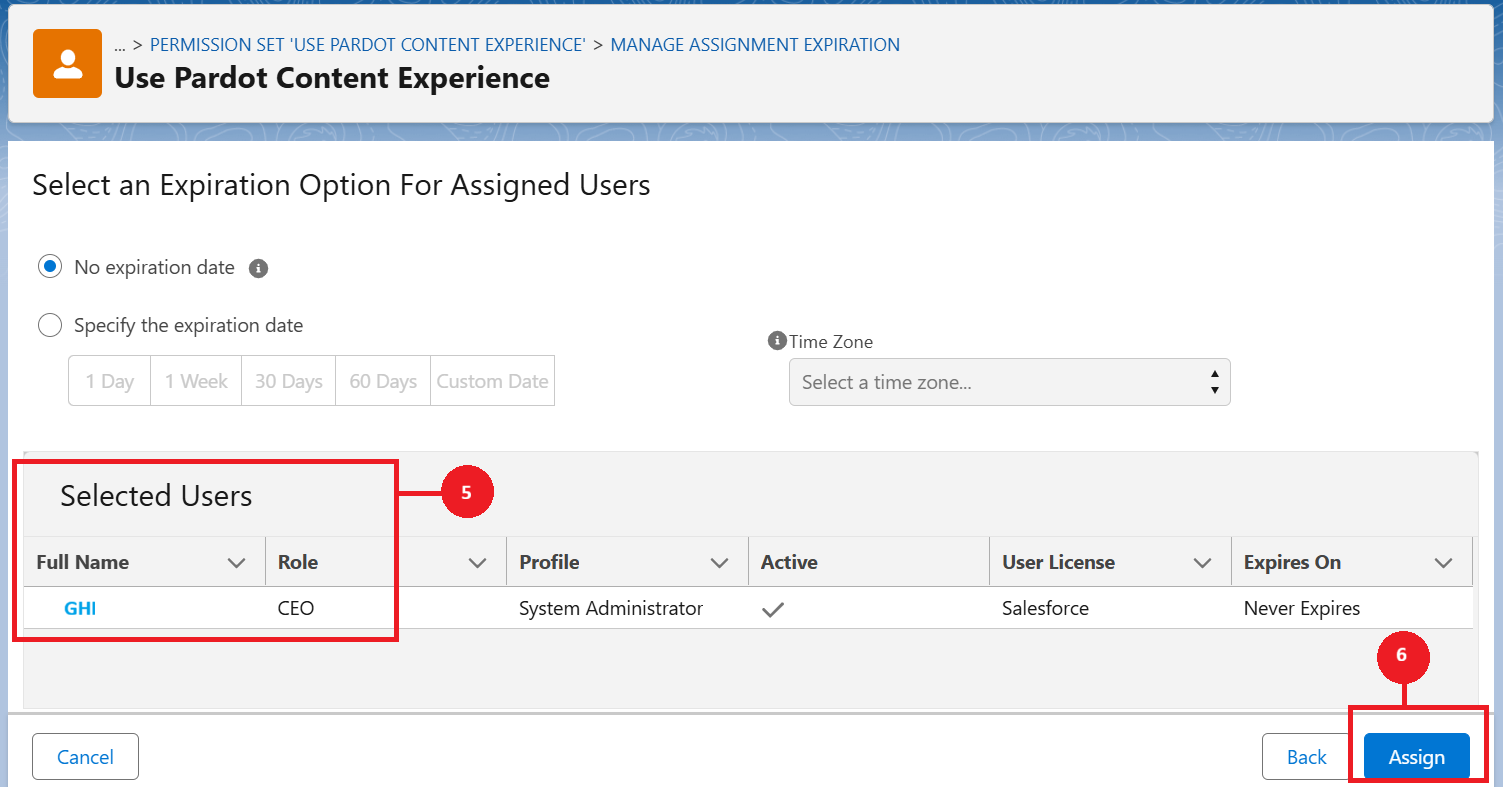
Add assignment --> Users--> click on next --> Assign
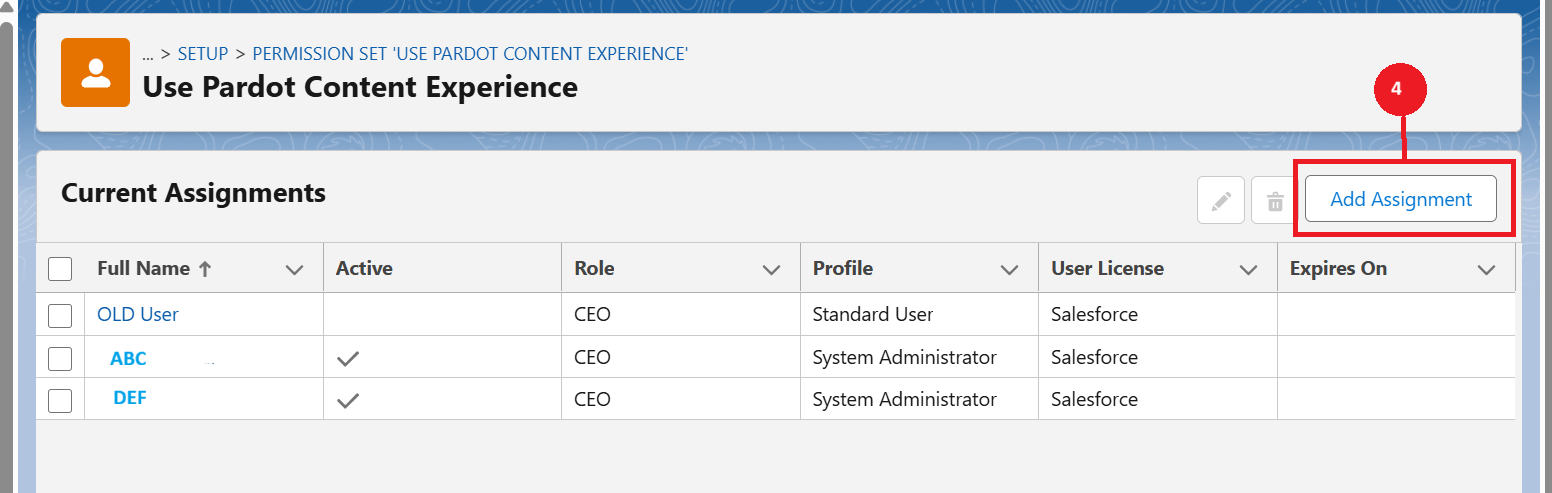
Sometimes, it will redirects to Permissions Sets directly. In case of that, we need to select the manage assignment. After selecting that, we need to click on Add Assignment (4) as highlighted below. Assign Users (6) as per the requirements by clicking the Assign Button (6) as highlighted below. For this instance, I have shown you how to add and assign a user.
Step 2: Create a CMS workspace
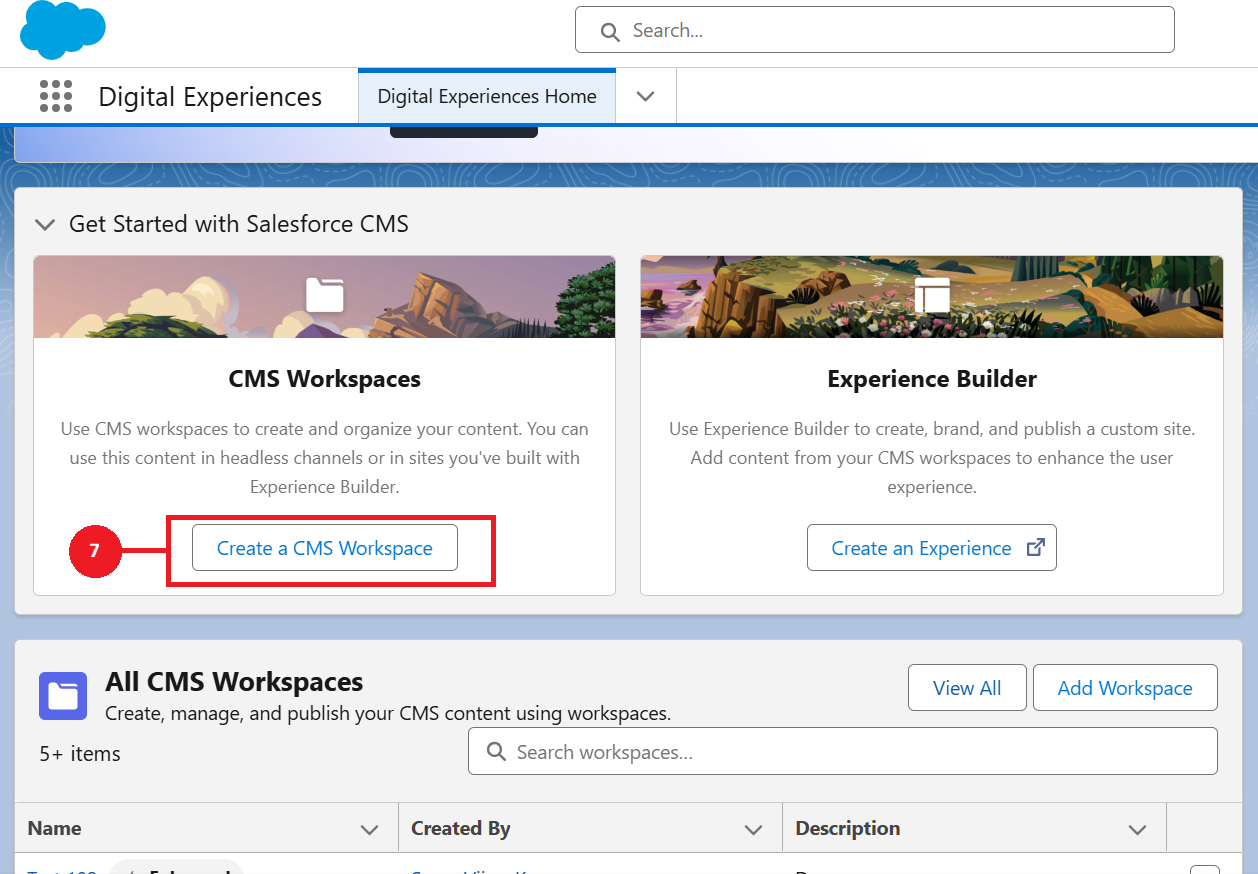
Navigate to the Digital Experience Application and just start Creating a CMS Workspace (7).
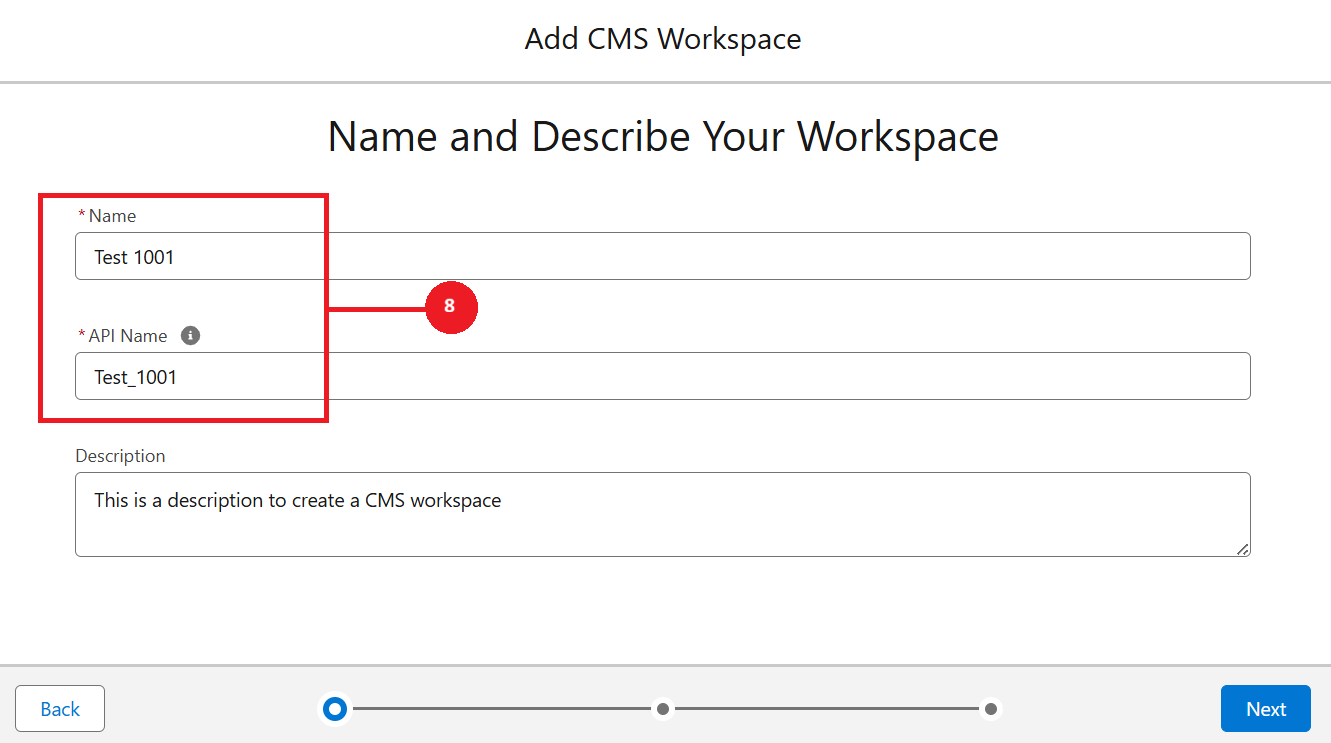
Give it a name, description for the CMS workspace and click on Next (8).
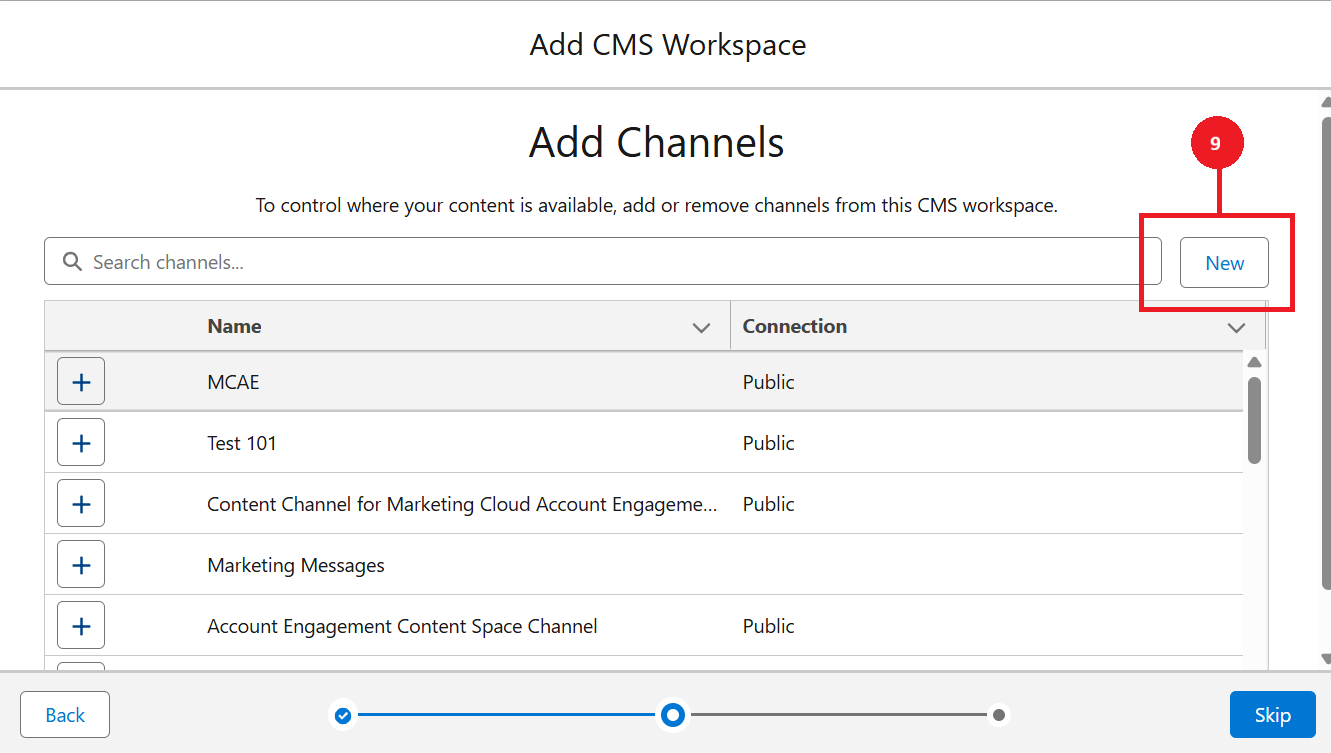
Then, we need channels to store the files inside the CMS workspace. For that, we have to create a channel. If you have existing channels created for the CMS, just use it. If you are creating from the scratch, please follow the steps. For creation of the channel, we need to click on the New (9) channel as indicated in the below image.
Start giving the name select the cache duration as per your requirements to create a channel and click on Next (10).

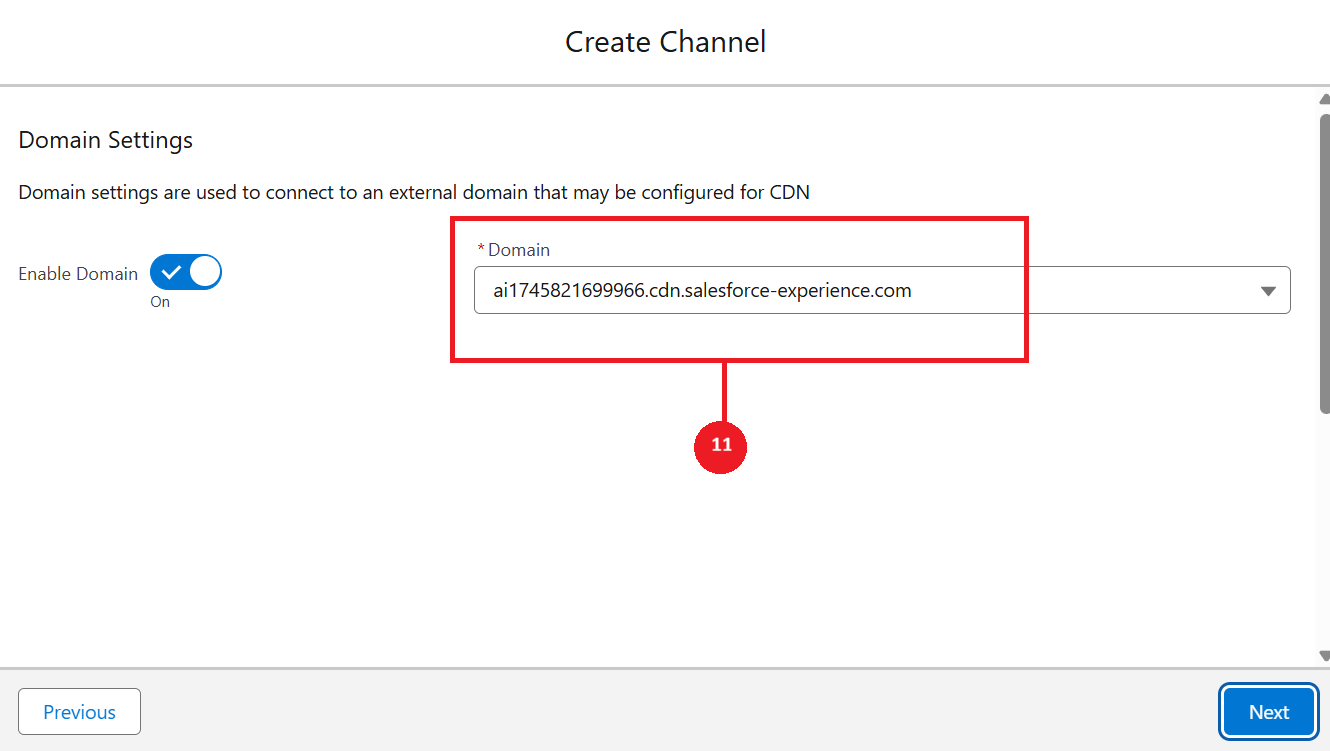
If you have multiple domains, select the Domain (11) through which the contents will be viewed.
Now, add this channel to the Workspace (12) to access the files which we are adding to the channel.
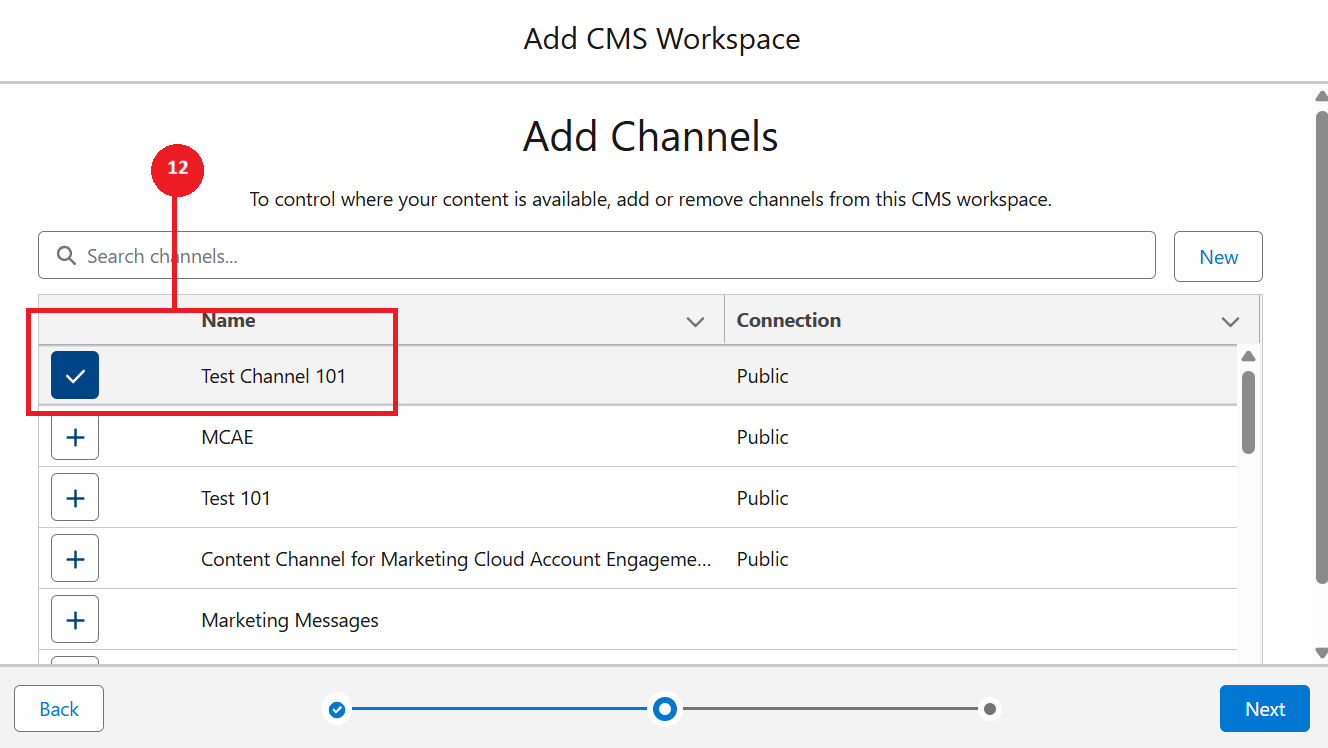
Select the Language (13) and click on finish to create an workspace. Now all set, we have completed the part of creating the CMS workspace.

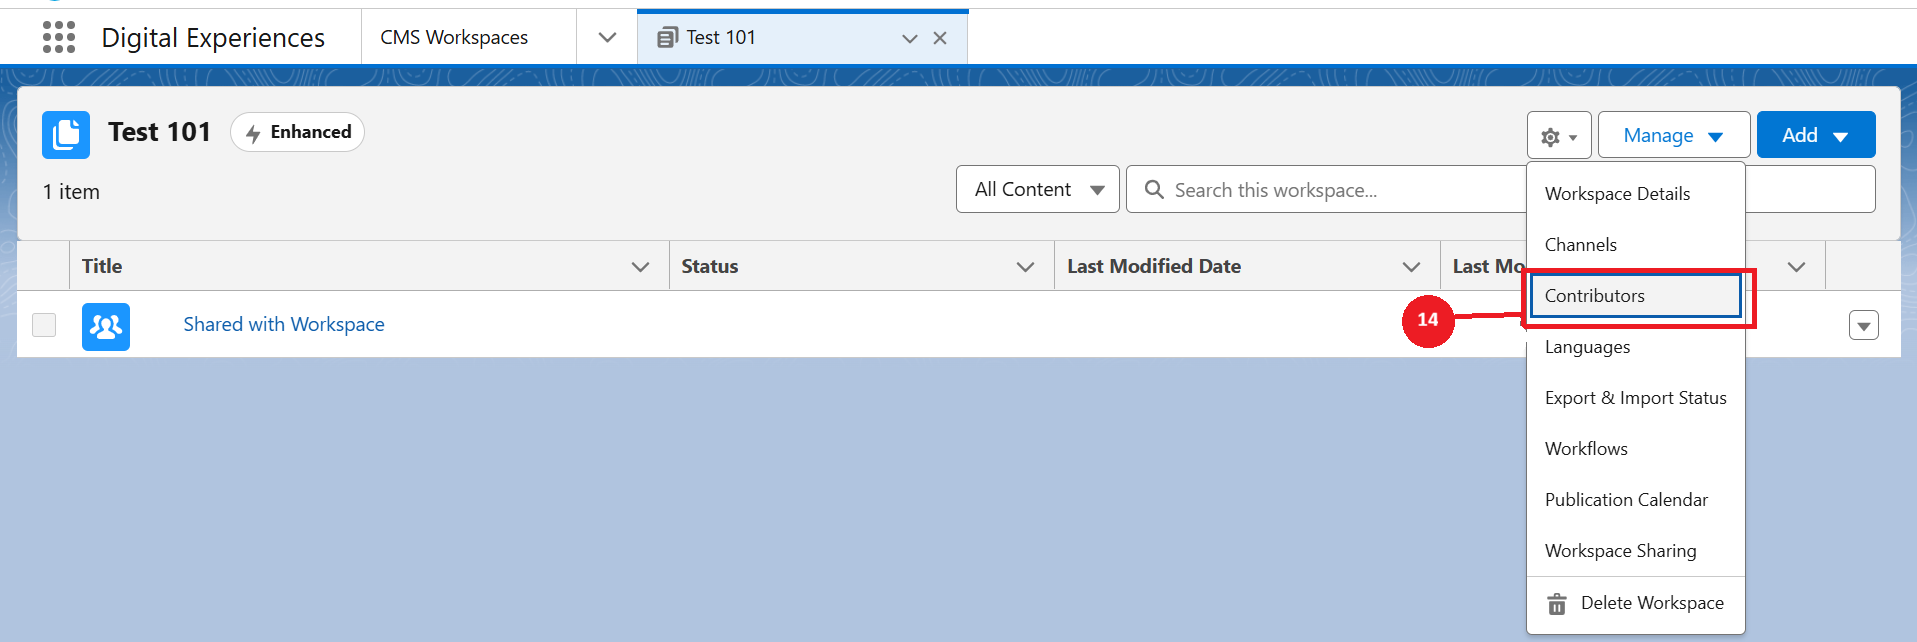
(Optional) If you want other users to Contribute the files to be added into the CMS Workspace, Navigate to the Contributors (14) in the setting and click on add contributors. Select the users you want and that's it. Hit the finish button.
Step 3: Adding the content to the CMS workspace
In this step, let's understand how the content should be added into the CMS workspace. First, open the created folder and click on Add (15) at the top right corner as shown below.

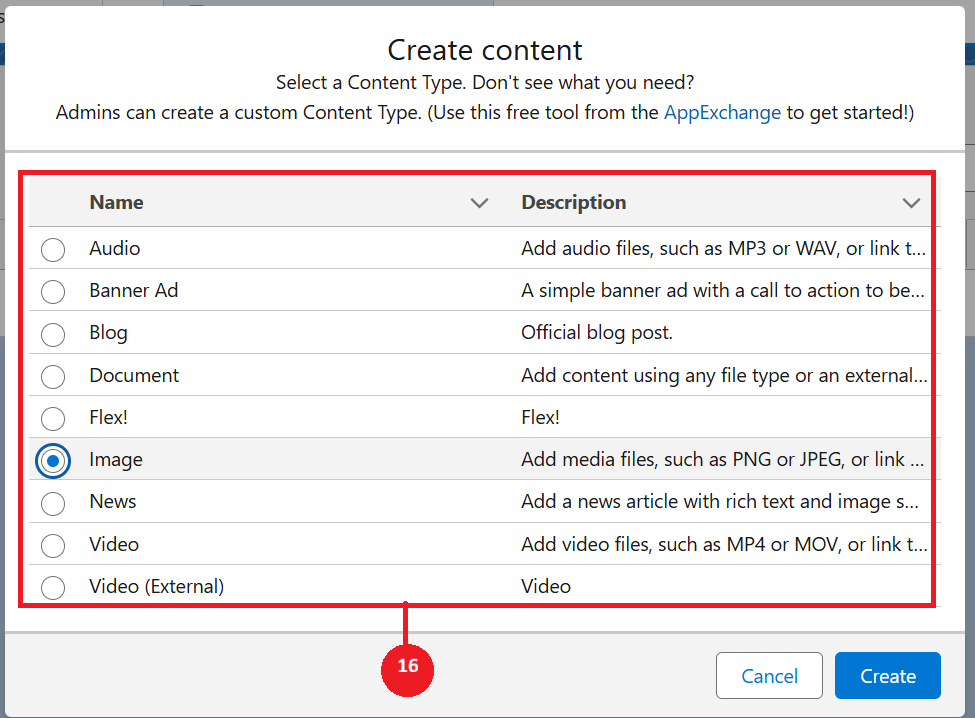
Click the content and select any sample images from your local system. You can add a link, title and alternative images to the logo (16). First save it as a draft and then Publish.
Now, we have the test image to be uploaded, that we can use it in the builder now and click Upload (17).
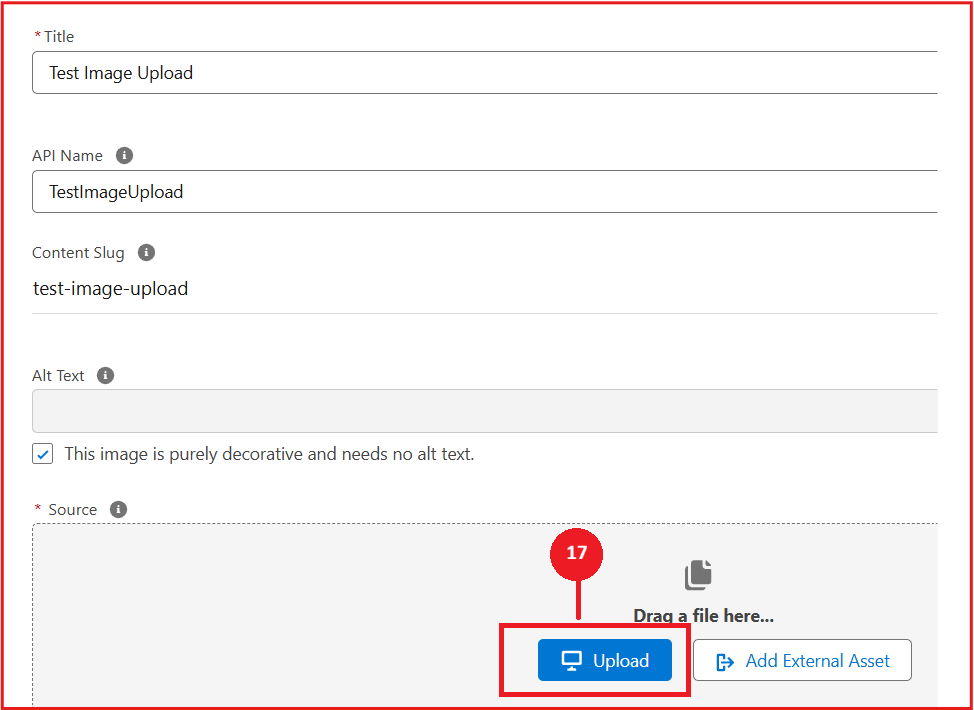
After uploading the image-file from your local computer, we need to Publish(18) the content to use them in the email builder. Not only in the email builder, we only use the contents in the other actions, only if the contents were published.

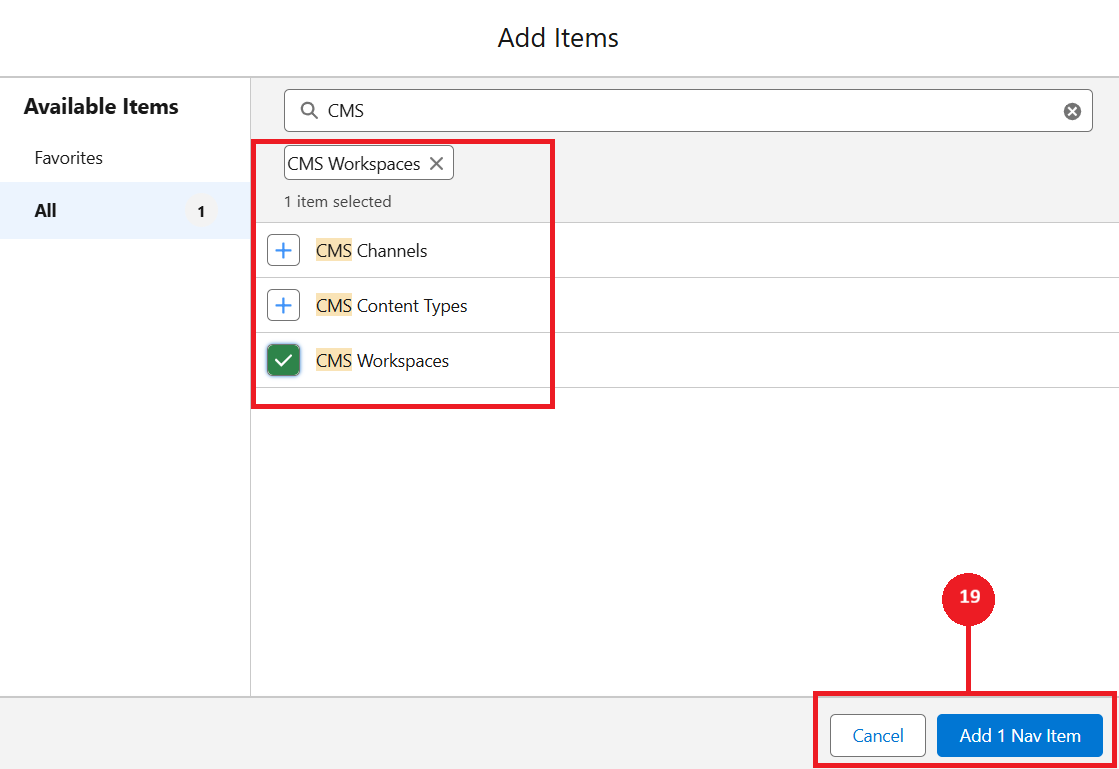
We are going to configure the tabs in the Pardot that is corresponds to managing the emails. Lets go to app launcher and just navigate to the Pardot. Click on edit, (pencil icon) which is located at the top right corner in the UI. For more accessibility, we can add the CMS workspace into the Navigation Items (19) in the Account Engagement App page. It enables to upload the files directly from the app page.
Once we have done this, we will click on Save, to finalize this configuration and that’s it we have accomplished configuring the CMS workspace. Now, we can use the files in email builder templates and other content personalization email templates. In this scenario we have chosen Email builder as a tool to showcase the usage of CMS files.
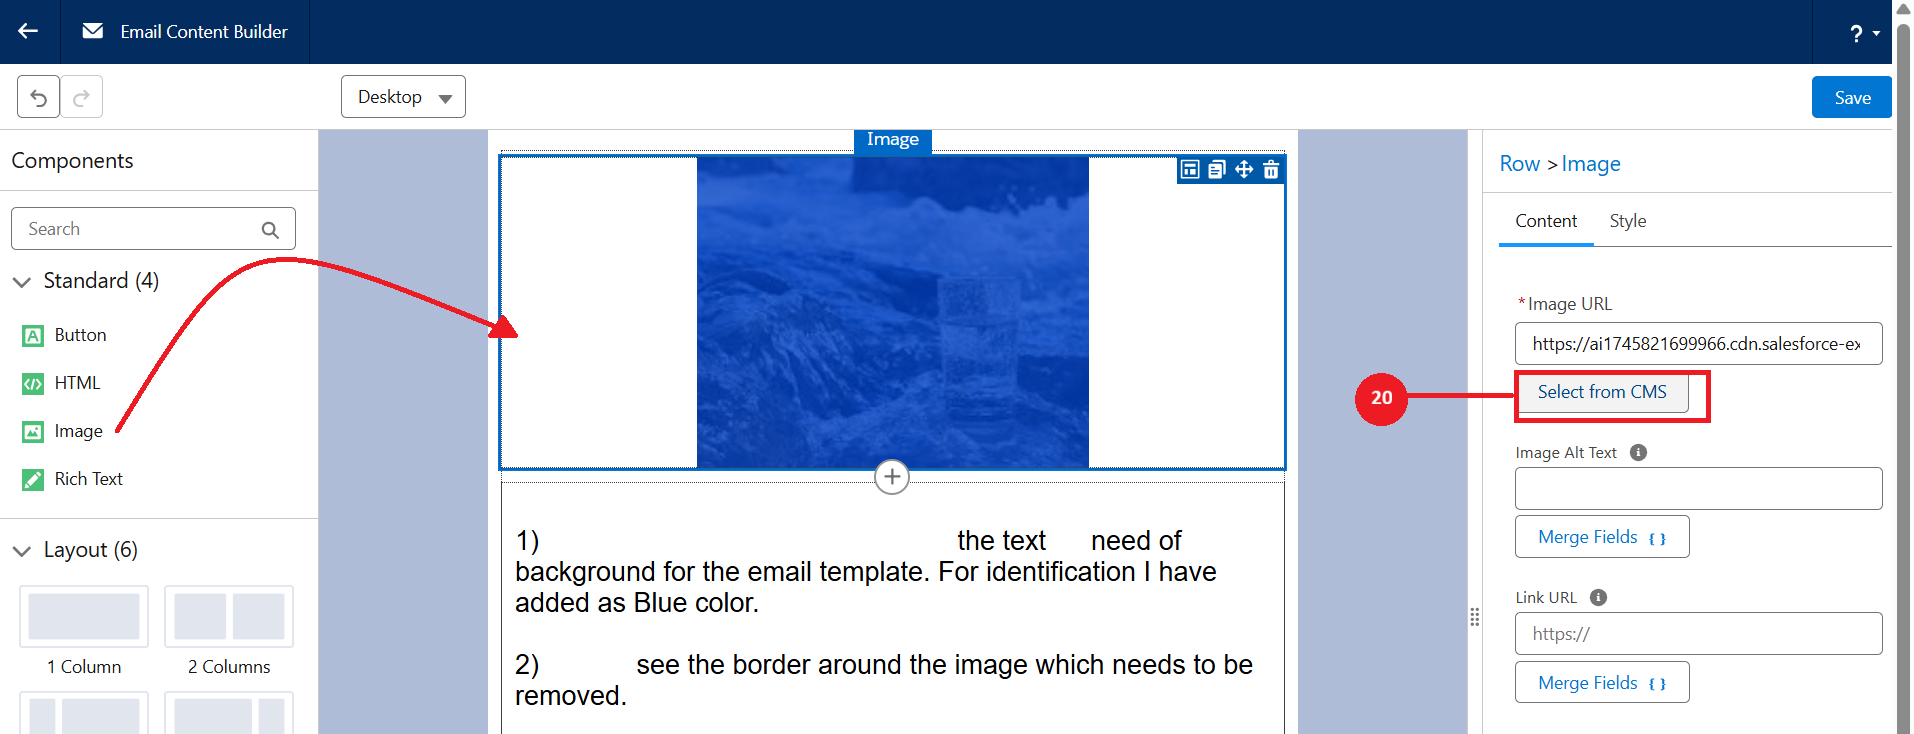
Step 4: How to add the image in email builder
Go to email content and click on edit in builder to edit. See it in the new builder. Drag and drop the image standard component and select the image to choose from the CMS (20). Select the image and click save and now the image will be displayed in the template.
Usage of CMS in Pardot
To create and reuse the email contents for campaigns and automations.
To build a landing pages to capture leads through form submissions.
CMS will enable upload the interactive files and contents. It helps tracking the engagement of the audience using Pardot.
We can store the dynamic content to increase the engagement.
Files from the CMS are also can be used in Automations and Engagement Studio.
Contents can be used in custom redirects to capturing the valuable prospects.
Conclusion
I hope this blog helps you to understand the steps to configure the CMS and how the files from it, will be used for email builder. In our upcoming blogs, let's go further on the Content Management, Email Builder, Content builder and related topics for deep knowledge in the Marketing cloud.