

Multi-Language Translation STF Files
Learn how to export, translate, and manage Salesforce STF files for bulk translation of custom field labels using the Translation Workbench.
By Ashley Jacinth
Asst. Software Developer
Multi-Language Translation STF Files
For the bulk translation of Salesforce custom field labels, the recommended approach involves exporting the labels into .stf files, performing the translation, and subsequently importing the translated files back into the Salesforce platform. The discussion omits XLIF files due to a recognized issue that has persisted since October. Instead, the recommendation is to export metadata using STF files.
Working with Salesforce STF Files: Export, Translate & Import Them Back to Salesforce.
Known Issue for your reference:
https://issues.salesforce.com/issue/a028c00000qQ2E3AAK/translation-workbench--export-as-xliff-fails
EXPORT
We can export three types of .stf files
- 1. Source: Used for initial label translation.
- 2. Untranslated: Used for translating labels after the first pass.
- 3. Bilingual: Used for reviewing and editing translations.
Translation files have the .stf extension and include the export option name, language code, and date stamp in their filenames. Untranslated and Bilingual files are compressed into zip files, each up to 5 MB in size. If needed, multiple zip files are created, each with a date stamp and increment number in their filenames. For example, "Untranslated 2010–09–20 05:13 1of2.zip."
To export and import translation files through the Salesforce Translation Workbench, adhere to these steps:
- Step 1: Log in to your Salesforce Account.
- Step 2: Navigate to Setup.
- Step 3: In the Quick Find search bar, enter "Translation Workbench" and choose the relevant option.
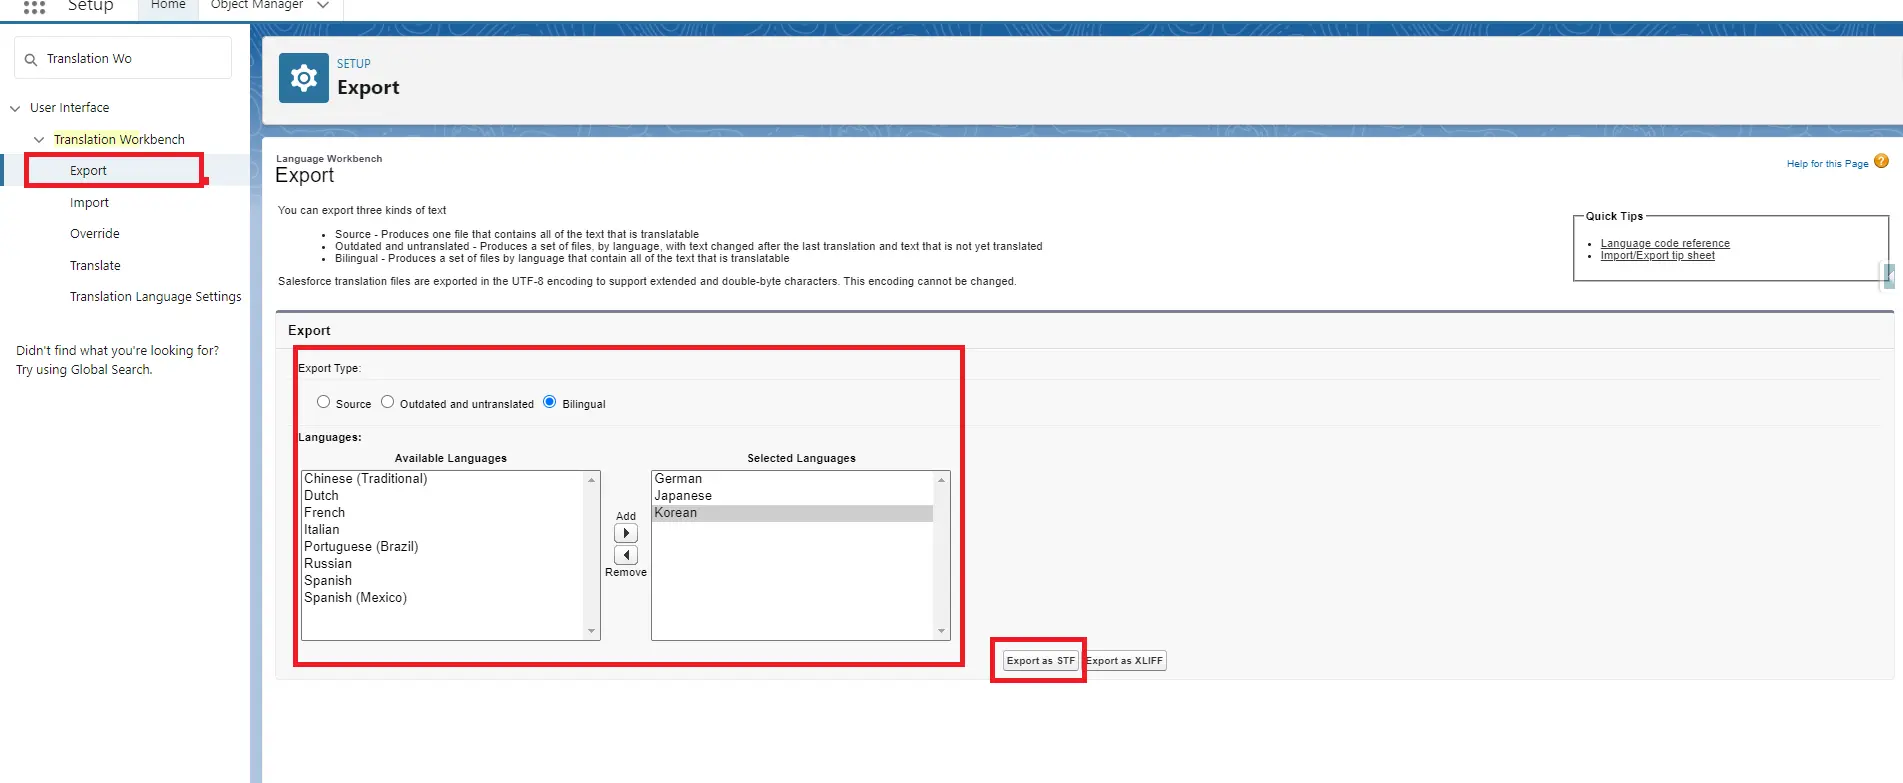
- Step 4: Click "Export."
- Step 5: Choose the language you wish to export.
- Step 6: Select Bilingual or Source or Outdated and Untranslated upon what kind of file you need to translate.
- Step 7: Initiate the export process by clicking "Export."
- Step 8: When the export is complete, you'll receive an email that provides you export completion status.
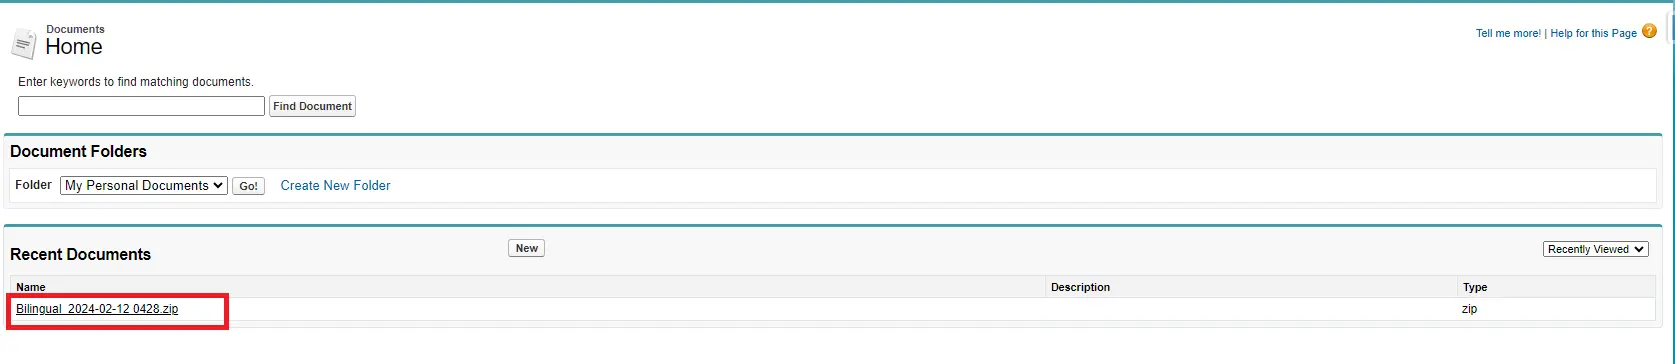
- Step 9: Click the link it will direct you to the Salesforce Classic documents section, where you can download a compressed zip folder. Within this folder, you'll find separate files for each of the selected languages. Download the folder and extract the contents.
- Step 10: Save the folder on your local.


Translate the .stf file
- Step 1: Open the exported STF file in Excel.
- Step 2: Look for the language you want to translate (e.g., "fr" for French, "de" for German).
- Step 3: Use Excel's "Open" feature and select "All Files" to ensure the STF file is recognized or you can open it with Notepad.
- Step 4: Open the file in tab-delimited format.
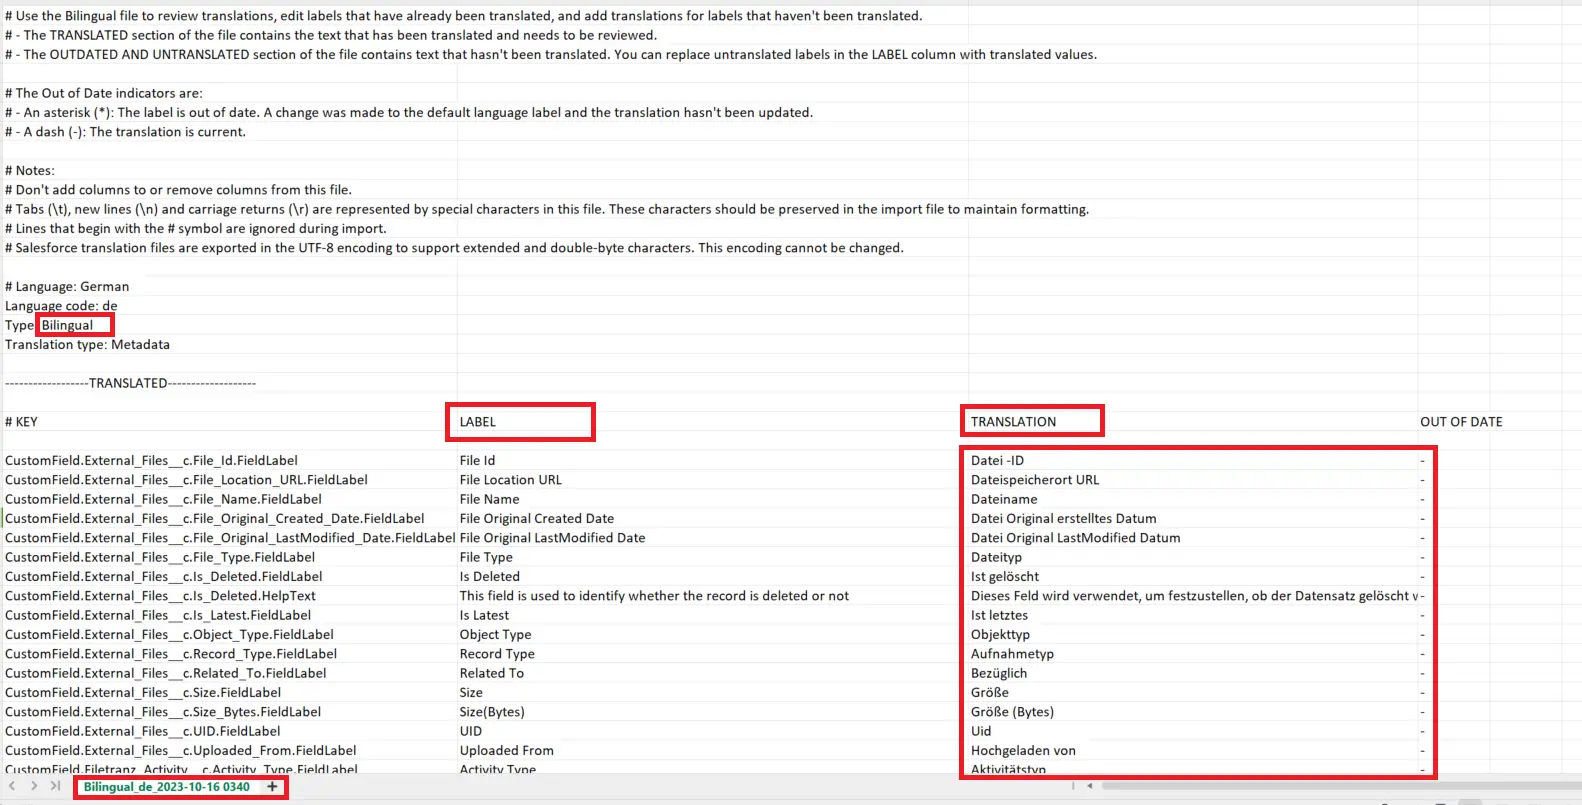
- Step 5: Copy the "Key #" and "LABEL" columns from the untranslated section.
- Step 6: Paste this information into a new Excel sheet or Notepad Sheet.
- Step 7: Save the file.
- Step 8: Do not alter the "KEY" column; it's for reference only.
- Step 9: Translate only the "LABEL" column that you want to translate.
- Step 10: Do not make changes to the original STF file
- Step 11: Ensure to save the translated file using the same format and naming convention
Note: You have the option to utilize Notepad instead of Excel for this task. Notepad inherently supports UTF-8 encoding, which can facilitate better translation.
We exported and translated the file. In the next blog, we’ll focus on importing the file. Link for IMPORT